📝 Key Takeaways: Master Wang explains the NX Fixed Contour Milling “Boundary” operation in detail, comparing it with “Curve/Point” to reveal its unique characteristics. He emphasizes the practical application and common pitfalls of the “Material Side” and “Plane” parameters, teaching how to correctly select boundaries, optimize toolpaths, prevent machining errors, and improve efficiency and precision. These are hardcore, real-world experiences you won’t find in textbooks!
Listen up, newcomers and old timers! I’m Master Wang. Today, let’s talk about a rather interesting operation in NX (Siemens NX): the “Boundary” operation within Fixed Contour Milling. This feature might seem similar to “Curve/Point,” but it has many intricacies. Those critical parameters, if misunderstood, can easily lead to excessive Depth of Cut (DOC), wasted time, and scrapped parts. Don’t be fooled by fancy software simulations; when the actual cutting sparks and noise start on the machine, they don’t lie!
Alright, let’s get straight to the point. I’m going to break down the “Boundary” operation, its rationale, and practical tips for you.
The Boundary Operation: A Powerful Tool for Surface Milling

The “Boundary” operation, as the name implies, primarily involves milling along your specified boundary lines. It shares similarities with the “Planar Milling” we discussed previously, but the key difference is that the “Boundary” operation can directly perform Surface Milling. This offers much greater flexibility than Planar Milling when dealing with complex part edges, grooves, or Rest Milling/Corner Cleanup scenarios.
When you open this command, you’ll notice it indeed resembles “Curve/Point” in some aspects, such as both having “Specify Part” and “Cutting Area.” However, remember that often, especially when your objective is clearly to machine along a specific boundary, you don’t necessarily need to select both “Specify Part” and “Cutting Area.” You must adapt to the actual situation; don’t overcomplicate it.

Core Parameter Breakdown and Pitfall Avoidance
Upon entering the “Boundary” operation’s edit interface, several areas are critical. Pay special attention, as these are where pitfalls often hide!
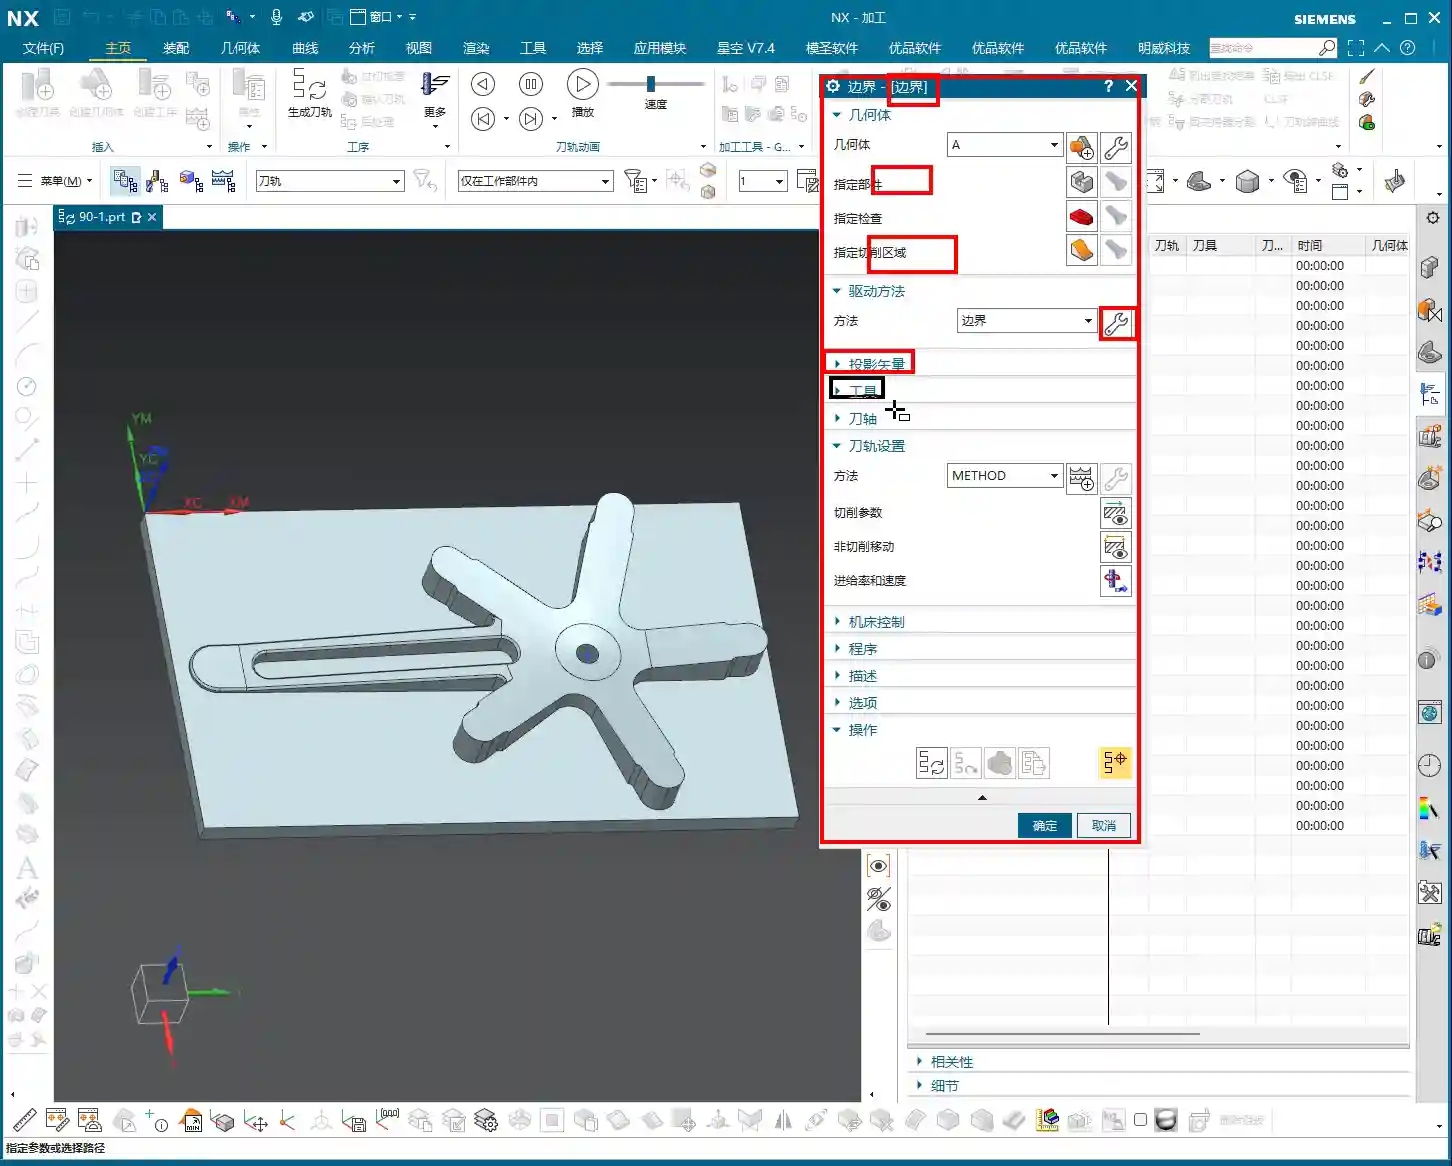

1. Drive Geometry: The Art of Boundary Selection
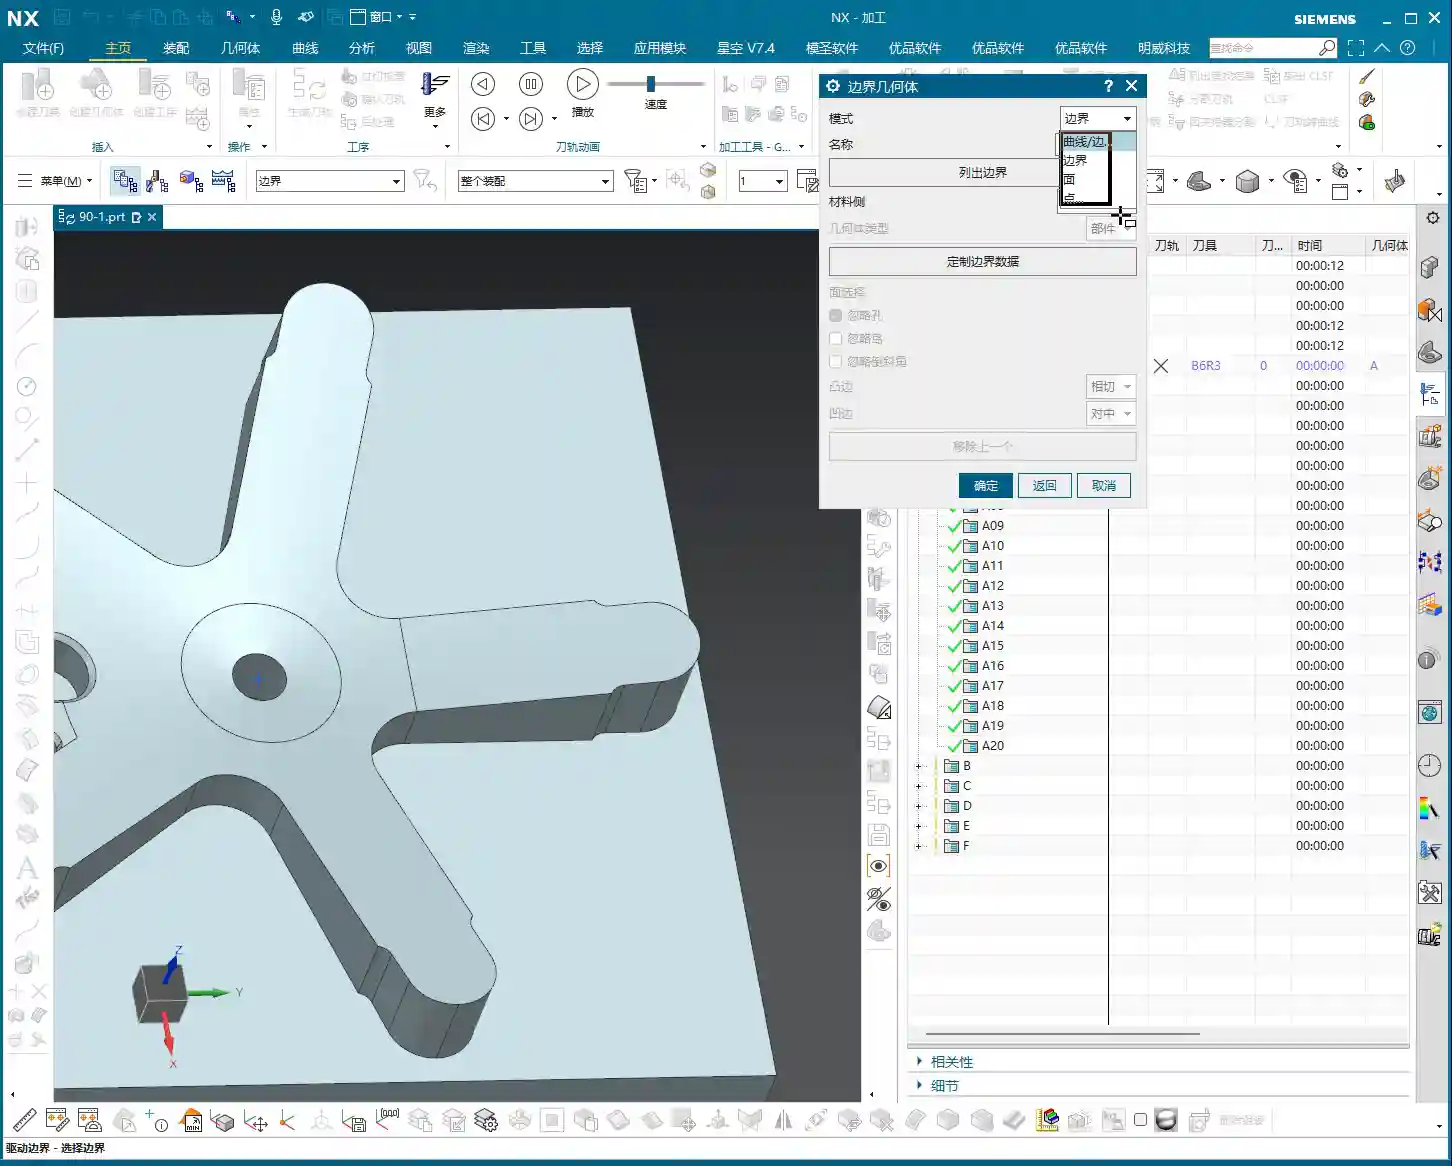
This is the core of the “Boundary” operation. Click the “Specify Drive Geometry” option, and you’ll see a familiar interface, similar to some pre-NX 12.0 versions. Here, you have four selection methods: Curves, Edges, Faces, Points. While all are available, Master Wang advises that in practical applications, “Curves” are used most frequently and offer the greatest flexibility.
-
Step 1: Select the Mode. Remember to choose the mode first. For instance, if you want to define the boundary using curves, click the “Curves” option first. This sequence is crucial; otherwise, your subsequent operations won’t align.
-
Step 2: Select the Curves. Next, the software will prompt you to select the curves for the drive boundary. Here’s a critical point: the “Boundary” operation in NX will only follow the selected curve with a single pass, or generate a single row of toolpaths. Therefore, do not select too many! Only choose the precise boundary line you actually need to machine. If the boundary lines are discontinuous, you’ll need to select them one by one, ensuring each line is chosen and that they form a continuous path.
-
The Projection Secret: When you select these curves, they will be projected onto the “Plane” you define later. This is crucial, as the toolpath is generated along this projected relationship. So, regardless of where your original curves are located, the final toolpath will be based on their projection onto the plane.
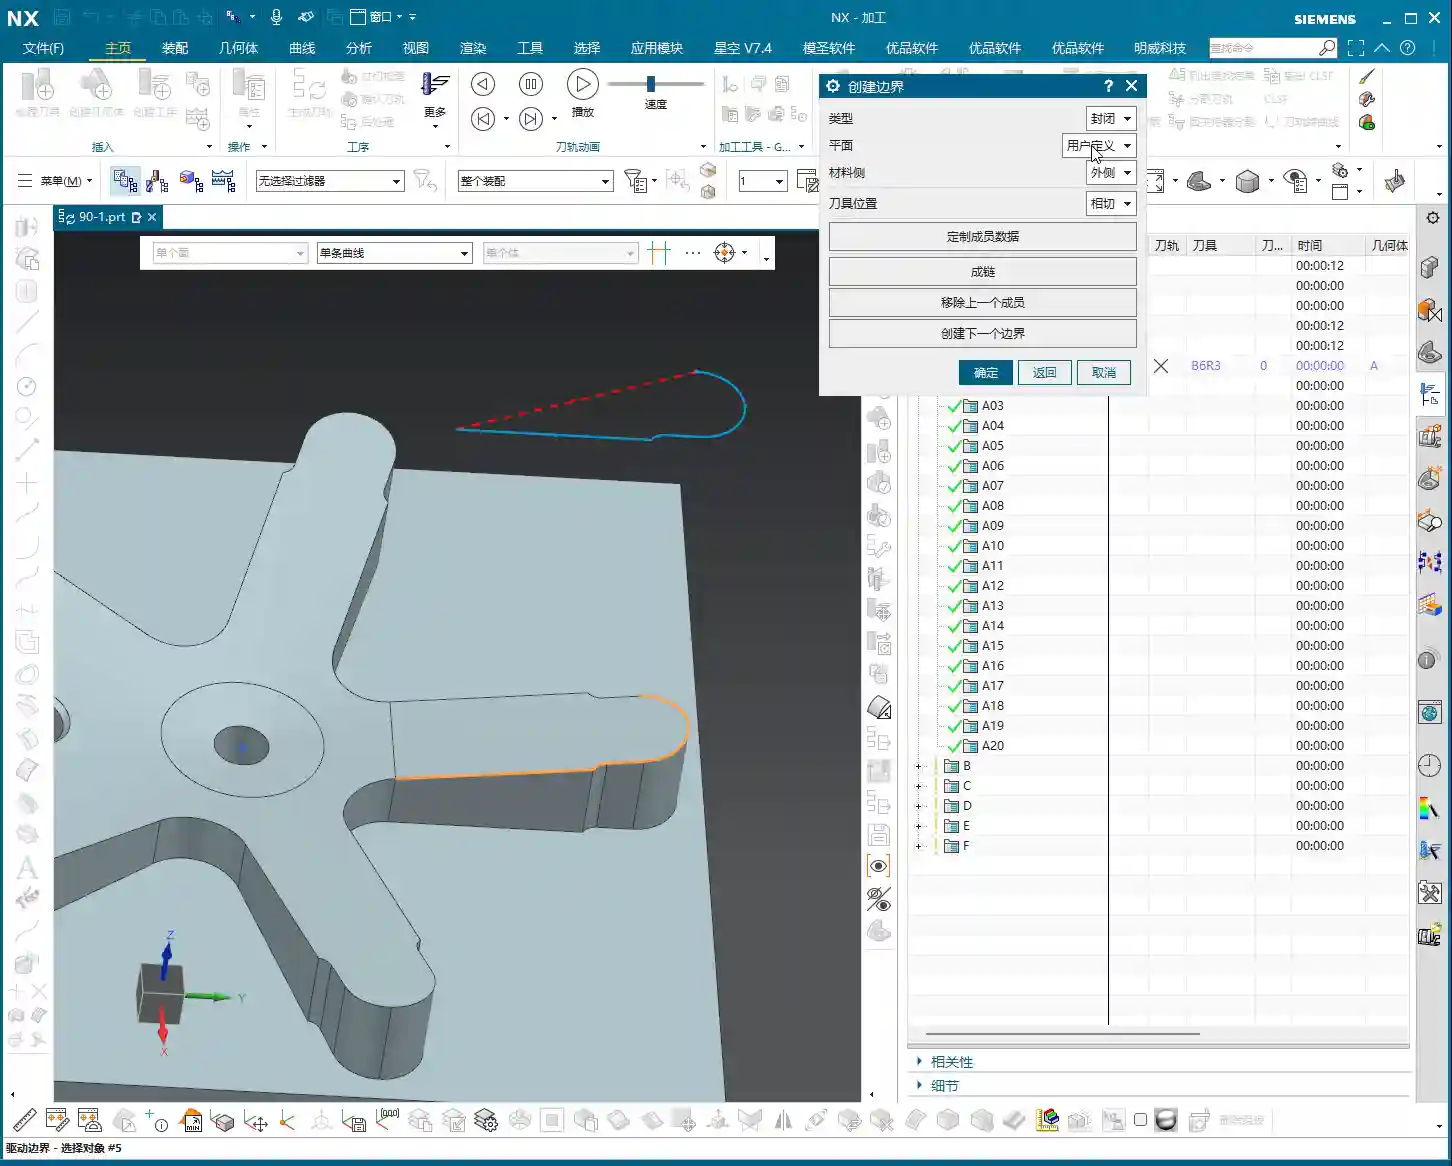
2. Plane: Choose Anything, But Understand Why
This is where many novices get confused. In the “Boundary” parameters, you need to specify a “Plane.” However, due to the nature of the “Boundary” operation, it only executes a single pass (or a single row of toolpaths), unlike Planar Milling which can machine across multiple levels. Therefore, the function of this “Plane” is simply to provide a projection reference for your boundary lines.
Master Wang’s Secret: Listen up, this is important! You can simply select any plane—for example, the top face of the part, the bottom face, or even a randomly created reference plane. Whether it’s above or below your boundary line is actually irrelevant. This is because the toolpath is ultimately projected onto your selected drive boundary, and this plane merely defines the direction of the projection. Select a plane, click OK, and you’re done!

3. Material Side: The Biggest Trap for Novices!
This is paramount; you MUST understand it! The logic of the “Material Side” parameter is completely opposite to the “Inside/Outside” selection we use in Planar Milling! Many novices assume it’s the same here, and as a result, when the toolpath is generated, the tool either cuts into the part or runs off outside of it.
-
Planar Milling Logic: “Inside/Outside” typically refers to the tool’s position relative to the boundary line. If you select “Inside,” the tool path stays within the boundary; if you select “Outside,” the tool path stays outside.
-
Boundary Operation Logic: “Material Side” refers to which side of the boundary line the material is on.
- If you want to machine the inside of the boundary line (e.g., clearing a groove), is the material on the outside of the boundary line? Yes, so you must select “Outside.”
- Conversely, if you want to machine the outside of the boundary line, then the material is on the inside, and you must select “Inside.”
Got it? It’s the reverse of Planar Milling! If you can’t remember this, your Fixed Contour Milling “Boundary” operation toolpaths will never be calculated correctly. Don’t wait until the machine alarms and the part is scrapped to remember what Master Wang told you today!
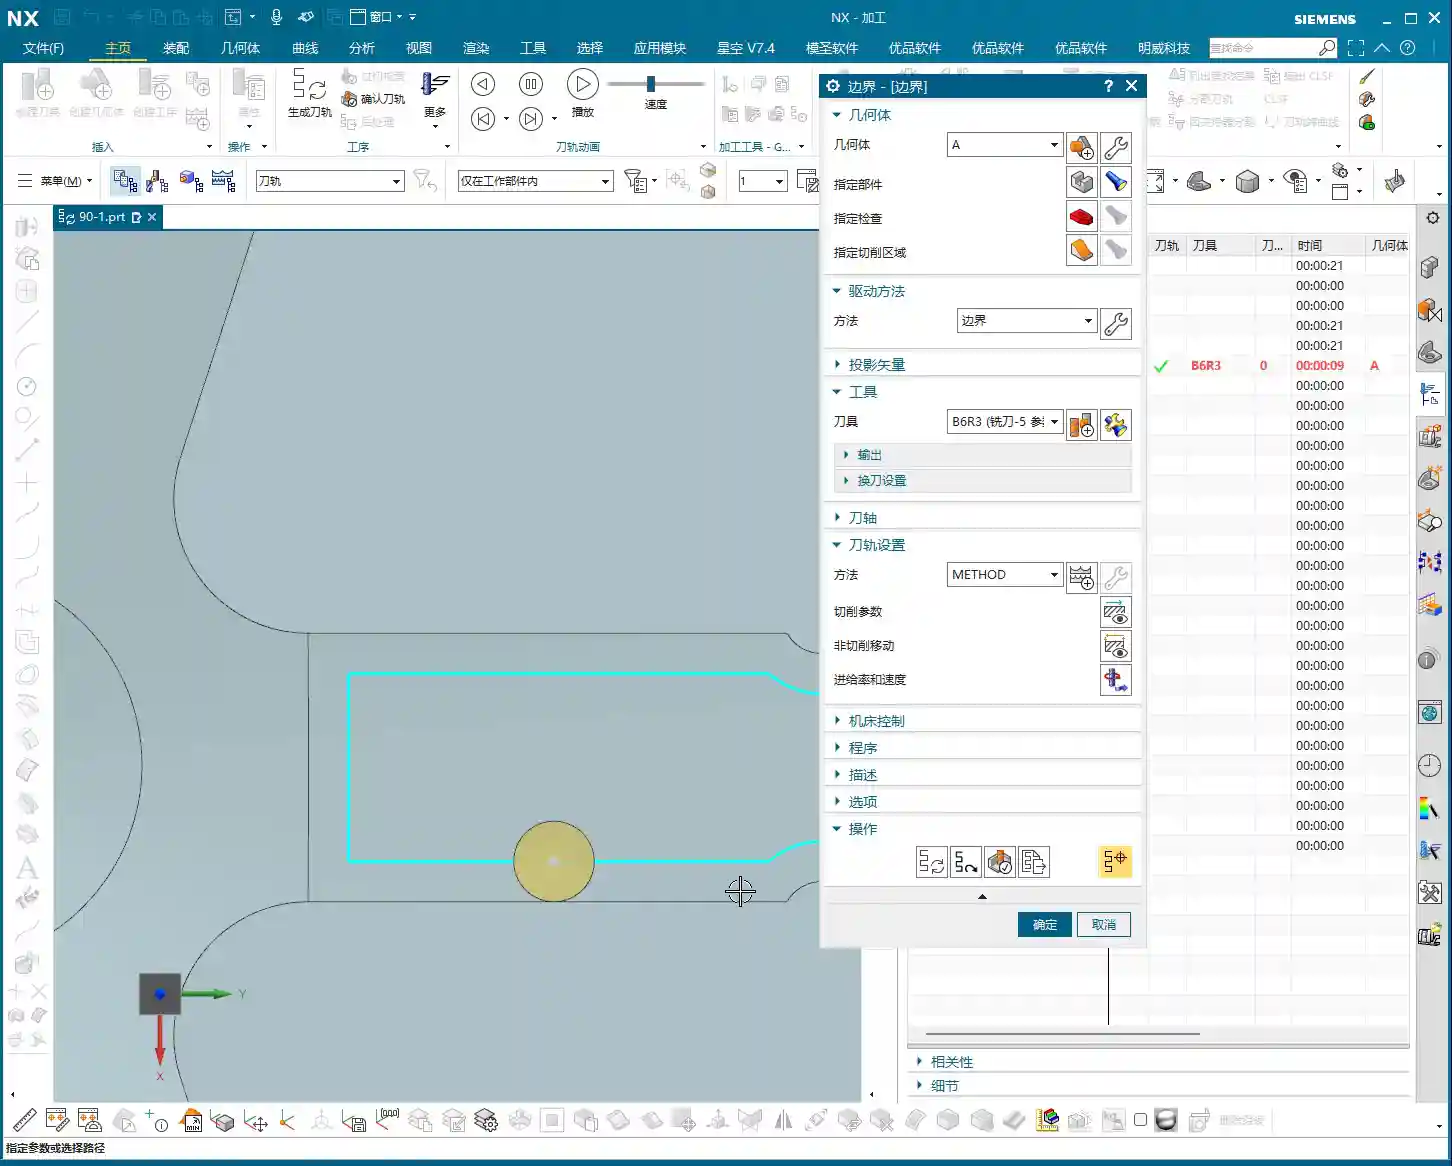
4. Tool Position: Standard Operation
This is where you select the tool’s contact point position, such as the tool tip, cutter center, etc. Just like with standard milling operations, choose a point suitable for your current tool and machining requirements.
5. Tolerance and Offset: Ensuring Precision and Stock Allowance
-
Tolerance: The “Inner Tolerance” and “Outer Tolerance” here mean the same as the tolerance in “Curve/Point.” They determine how closely the generated toolpath approximates the original geometry. For high-precision parts, such as those in aerospace or medical devices, set the tolerance to a smaller value, for example, 0.005mm or even less. A smaller tolerance results in a denser toolpath, longer machining time, and places higher demands on machine performance and tool life. You must weigh these factors against the actual part precision requirements and machining efficiency.
-
Offset: This parameter can be understood as giving the tool an additional machining stock allowance along the boundary line. You can imagine it as an offset of the tool relative to the cutting surface during turning. For example, if you’ve selected “Outside” for the material side and then apply a positive offset, the tool will extend further outward along the boundary line. This is very useful for operations that require leaving stock for subsequent finishing passes or polishing. Remember, the offset can be positive or negative; adjust it flexibly according to your machining requirements.
Summary: Pitfall Avoidance Guide
Core Issues and Solutions
-
“Plane” Selection: Don’t overthink it; just pick any plane, as it only serves as a projection reference. The toolpath follows the projection of your selected boundary lines.
-
“Material Side” Trap: This is the biggest pitfall! Its logic is opposite to the “Inside/Outside” selection in Planar Milling. To machine the inside of the boundary line, select “Outside” (because the material is outside); to machine the outside of the boundary line, select “Inside” (because the material is inside). If you can’t remember, try it a few times, or simply sketch it out to understand.
-
Boundary Line Selection: Ensure that the curves you select represent the exact boundary for your toolpath; don’t over-select or miss any. One boundary line typically corresponds to one toolpass (or a single row). Less is less, more is more – NX can be quite “rigid” in this regard.
-
Toolpath Verification: Once the toolpath is generated, don’t rush to the machine! Always perform a thorough simulation and inspection to verify that the tool’s motion trajectory matches your expectations. The effects of “Material Side” and “Offset” in particular will be clearly visible in the simulation. This is your last line of defense to ensure machining safety and quality.
Programming in NX is all about “learning by doing and adapting.” Theory is foundational, but practical experience is the ultimate truth. Get hands-on, think critically, and internalize these tips. You’ll avoid unnecessary detours and become a true machining expert. That’s all for today; next time, we’ll dive into some other hardcore techniques!
👤 About the Author:
The author is a veteran CNC machining professional with 15 years of industry experience, specializing in UG NX programming. This article is an original work representing personal practical insights.
⚠️ Copyright Notice: Unauthorized reproduction or distribution without prior communication is strictly prohibited.