📝 Key Takeaways: Master Wang provides a hands-on explanation of first-operation programming for graphite complex geometry parts (front face) in UG. He shares invaluable, real-world UG (NX) tips and tricks not found in textbooks, covering tool selection, parameter tuning, collision prevention, cutting direction determination, and blank definition with WCS setup. He emphasizes small Depth of Cut (DOC) and multiple passes, as well as the optimization strategy of using previous operation results as the blank for subsequent operations, all to enhance efficiency and avoid pitfalls in precision machining.
Opening Remarks: UG Programming, Practical Experience is Paramount
Hello everyone, I’m Master Wang! I’ve been in the machining industry for fifteen years, having worked with everything from turning, milling, planing, grinding, to EDM. Now I mainly focus on UG (NX) programming. Don’t let the fancy software fool you; ultimately, it all comes down to the machine. Today, let’s talk about front face first operation programming for graphite complex geometry parts. Listen up, this job might look simple, but there are many intricate details. I’m going to share some practical tips you won’t find in textbooks.
Step One: Tool Selection and Parameter Tuning – Don’t Use Blindly!
The Tool’s “ID Card”: Rebuilding and Naming
Since it’s a graphite part, the material is brittle, generating a lot of dust during machining, and causing rapid tool wear. We need to select tools based on the actual situation. As mentioned in the audio, an 8mm ball end mill is to be used, but its parameters might be incorrect, so it must be rebuilt first. Why? Because the previous parameters might not have been set for graphite. After rebuilding, give it a clear name, such as “8mm_R5_Graphite_Specific_Ball_End_Mill“. Consistent naming helps the next shift’s machinist understand the tool’s purpose, preventing misuse.

Tool Dimensions: A Millimeter’s Difference, A Collision’s Consequence
Listen up, here’s a critical detail. Initially, it might have been set to 10mm, but in practice, to prevent interference with the part, we temporarily changed it to 6mm. Master Wang’s exact words were: “Look, if it’s 6 [mm], and you start machining upwards from this face, if you were to start machining upwards from the back side at this position, wouldn’t we already collide at this point? Right? So we absolutely must start machining inwards from this face.”
This is a classic collision warning! Don’t just rely on software simulations; they can sometimes be misleading. For real jobs, you need to mentally walk through the toolpath. Especially with complex geometry parts, the structure is intricate, and even a slight miscalculation in tool dimensions can lead to minor issues like tool chipping, or major issues like a machine crash. So, when adjusting parameters in UG (NX), such as tool diameter, tool length, and holder length, always proceed with extreme caution and verify thoroughly.
Step Two: Process Path and Cutting Strategy – Balancing Efficiency and Quality

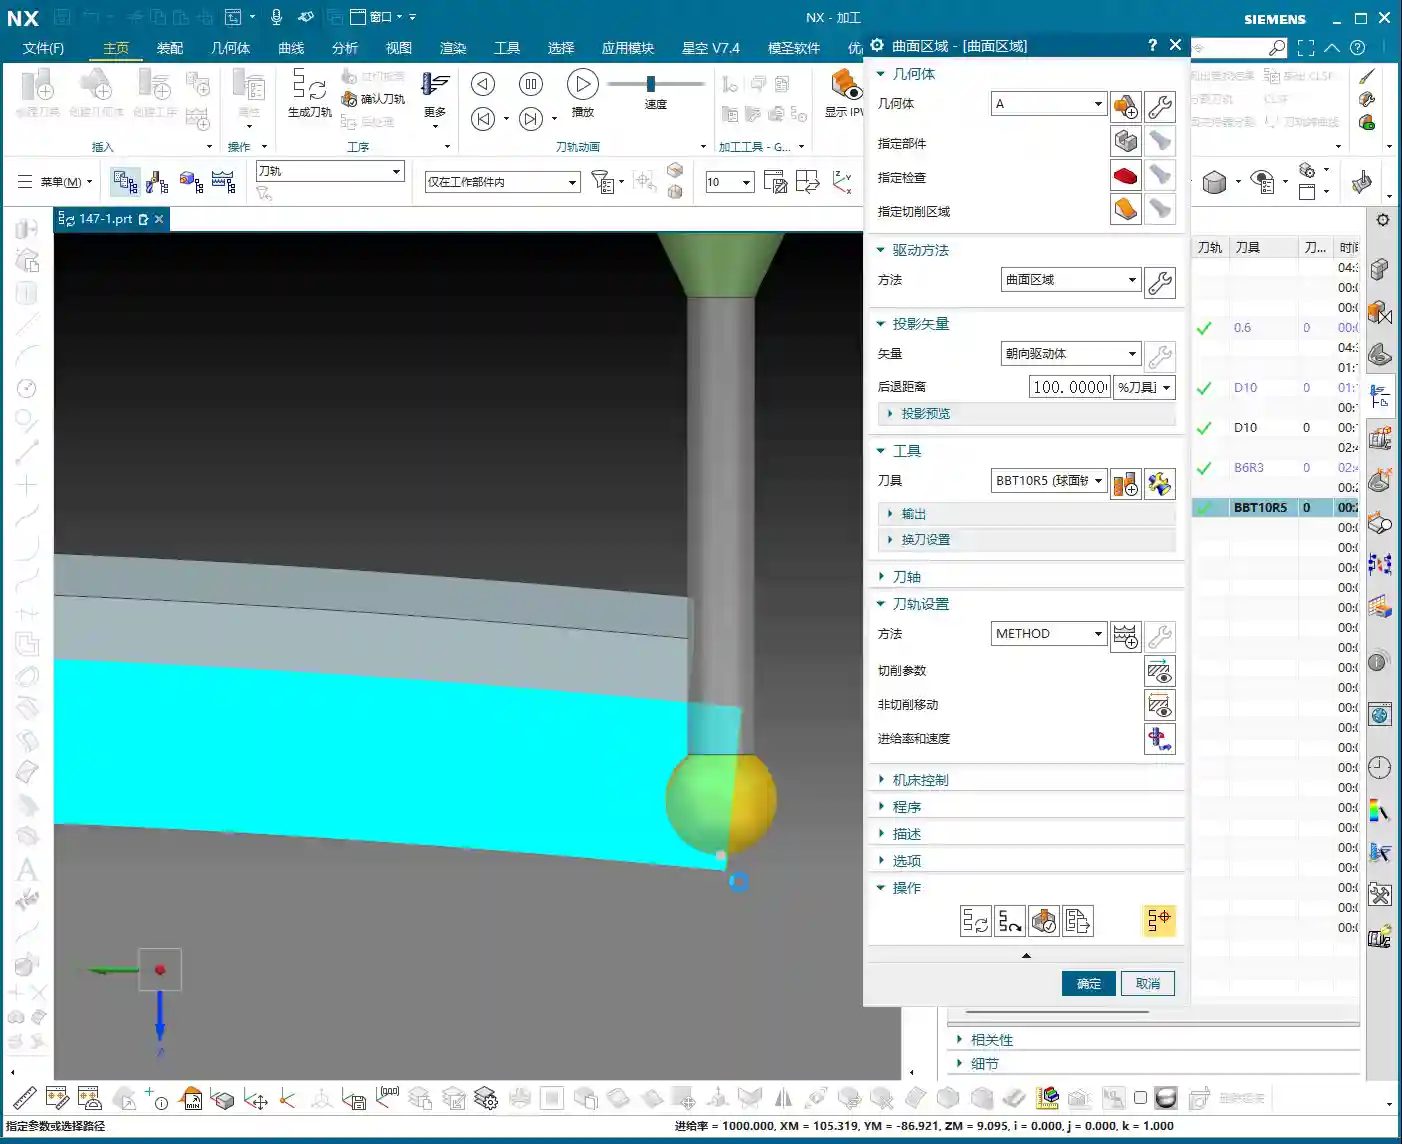
Precise Selection of Drive Geometry
Many of those flashy options in the software are often unnecessary. We’ll go directly into the “wrench” tool and simply select the correct Drive Geometry. This is like assigning a patrol route to the tool; once the route is clearly defined, it can get to work systematically.
Cutting Direction: Climb Milling or Conventional Milling?
This is an age-old question, but for special materials like graphite, it’s particularly crucial. Master Wang emphasizes the need to check if the cutting direction is correct, or if it’s reversed. In UG (NX) programming, the default is usually Climb Milling, which is what we use most frequently. The advantage of climb milling is stable cutting, even tool forces, less tool wear, and good surface finish. If the direction is reversed, resulting in conventional milling, the graphite part will be prone to chipping and burrs, and tool life will be significantly reduced. Therefore, after generating the toolpath, the first thing to do is drag the toolpath with the mouse and carefully check the direction – don’t get lazy!

Entry Depth and Toolpath Extension: Details Determine Success
This program is used to machine a “feature cutout” on the part, which is a recess or specific feature. Master Wang mentioned: “It’s not good for the tool to plunge directly at this edge; it needs to extend a bit.” This is practical experience! A tool plunging perpendicularly directly into the material can cause impact and chipping. We want the tool to smoothly enter the cut from the outside of the part. In UG (NX), this can be achieved by setting the Extend Distance. For example, by extending the toolpath outwards by -2mm and adjusting the depth to 102mm (specific values depend on the actual situation), the tool can have a buffer outside the material before entering the cut. This small extension effectively protects the tool and improves surface quality.
As for the Depth of Cut (DOC) (how much material to remove per pass), Master Wang’s recommendation is 0.2mm Depth of Cut (DOC) per pass. Although graphite material is soft, it has poor toughness, and too large a Depth of Cut (DOC) can easily cause chipping. This 0.2mm empirical value is derived from countless trials and errors, balancing both efficiency and part integrity.
Step Three: Blank and Fixturing: Precise Positioning for Seamless Flip-over Machining

First Operation Blank Definition and Flip-over Machining Strategy
After the front face first operation is complete, it’s typically followed by flip-over machining. At this point, the part machined in the previous operation becomes the “blank” for the new process. Master Wang’s approach is very clear: “Once we’re done with this side, we’ll take out the fixture, place the part on it, then rotate the part 180 degrees, and proceed with the backside machining.”
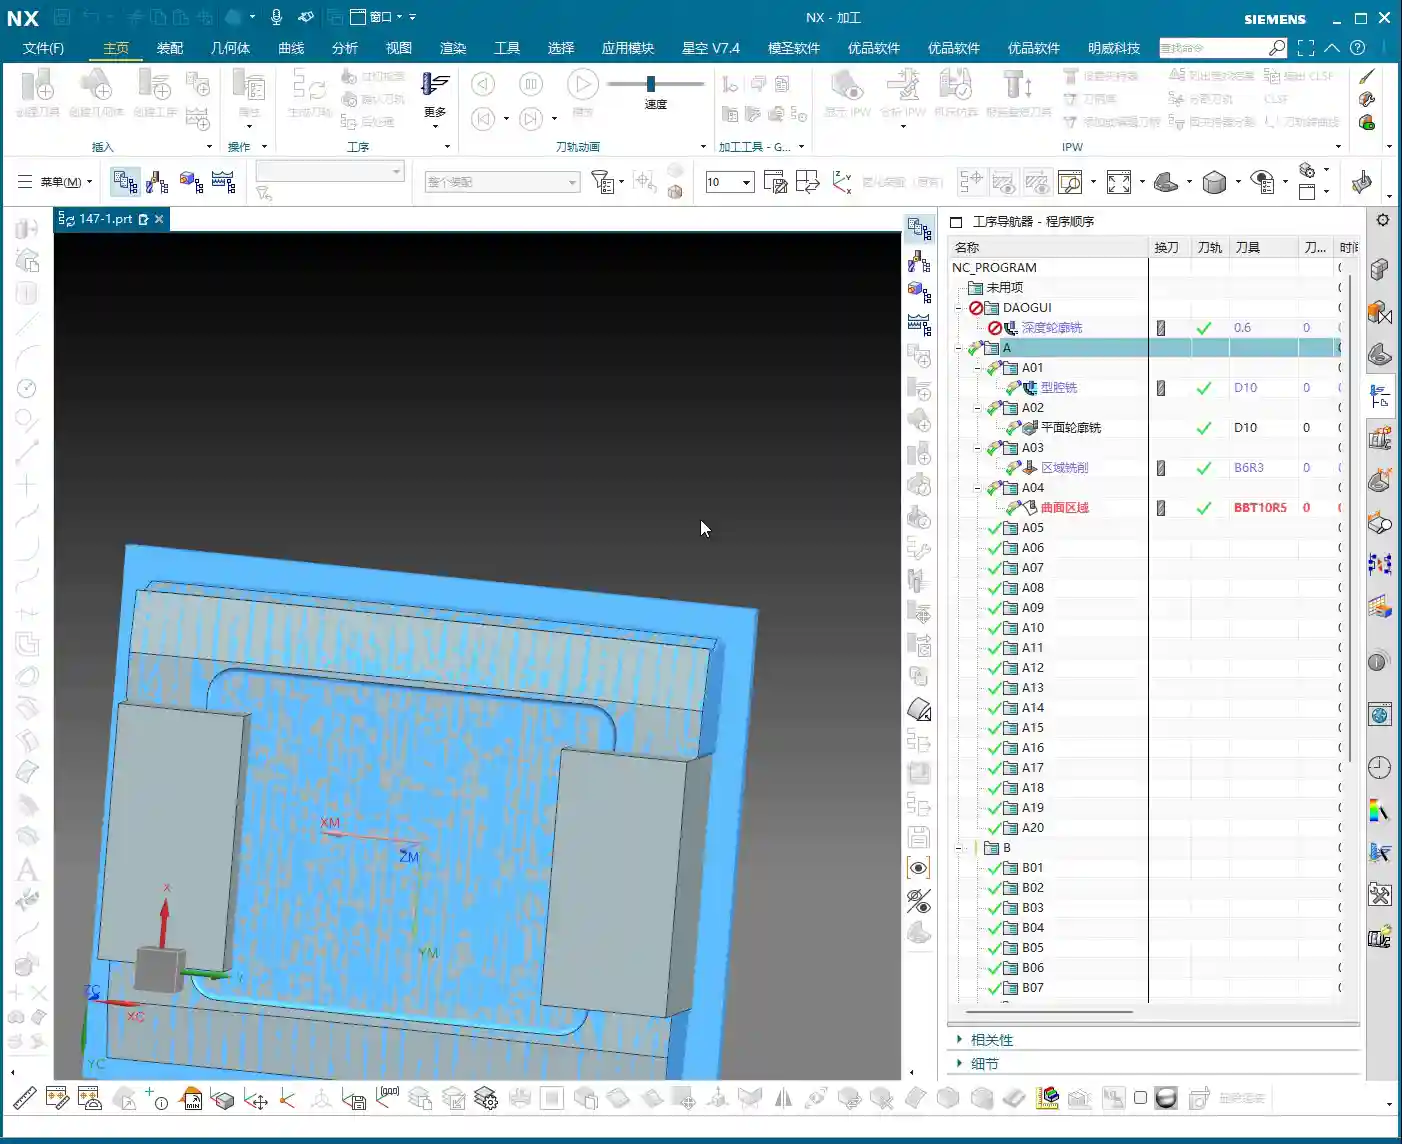
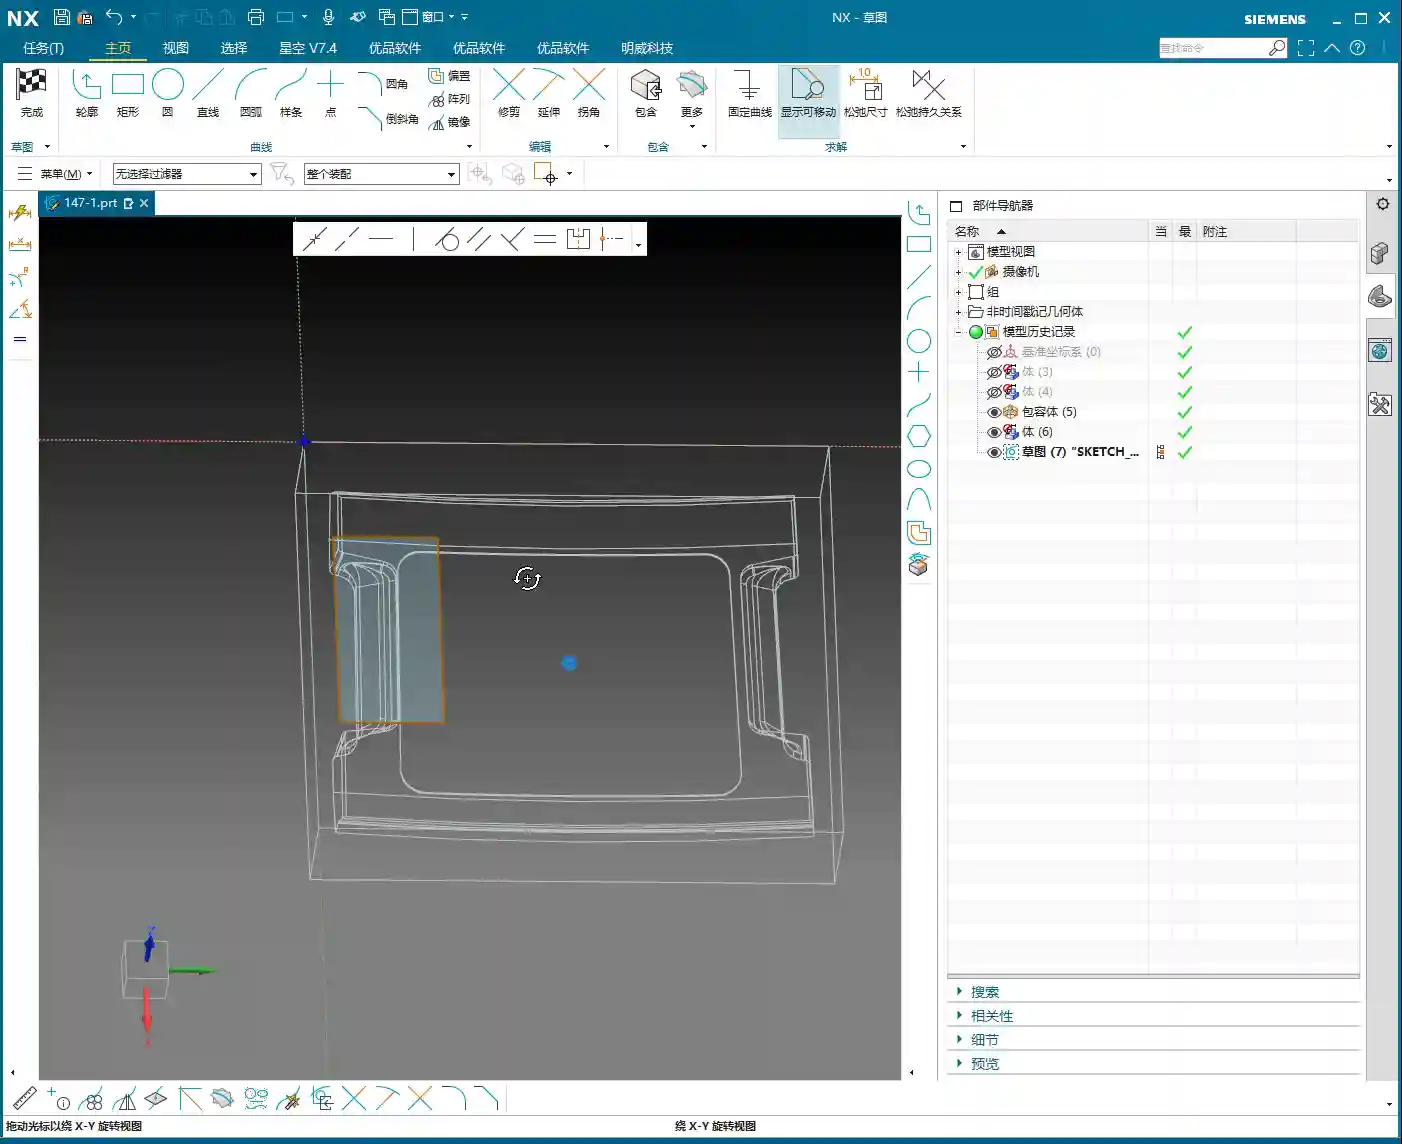
In UG (NX), this means you need to redefine the Work Coordinate System (WCS) and the blank. It’s not just a simple flip of the model; you must use the solid model resulting from the first operation as the blank for the second operation. This ensures accuracy in subsequent toolpath calculations, preventing air cuts or overcutting. Master Wang also mentioned in the audio that it’s important to “create a block geometry” to define the machining boundary, which is a very practical strategy for precisely controlling the toolpath range, especially for complex geometry parts.
WCS Setup: Datum Consistency is Critical
Setting up the WCS, or Work Coordinate System, is fundamental to machining accuracy. When setting it up, Master Wang emphasized selecting the Work Coordinate System, then the plane, and then specifying an offset (e.g., 100). This 100mm offset might be to raise the machining face to an absolute height convenient for operation and measurement, or to accommodate a specific fixture height. Remember, no matter how you set it up, it must maintain high consistency with the actual tool offsetting and fixturing datums on the machine tool; otherwise, all efforts are moot.
Blank Replacement and Mirroring: Handling Complex Structures
During UG (NX) operations, you might encounter minor issues, such as “Why is the model red?” or “Why did mirroring merge?” as mentioned in the audio. Master Wang’s approach is to right-click and replace, or to reprocess via planar mirroring. This teaches us not to be intimidated by superficial software phenomena; most of the time, there are flexible solutions.
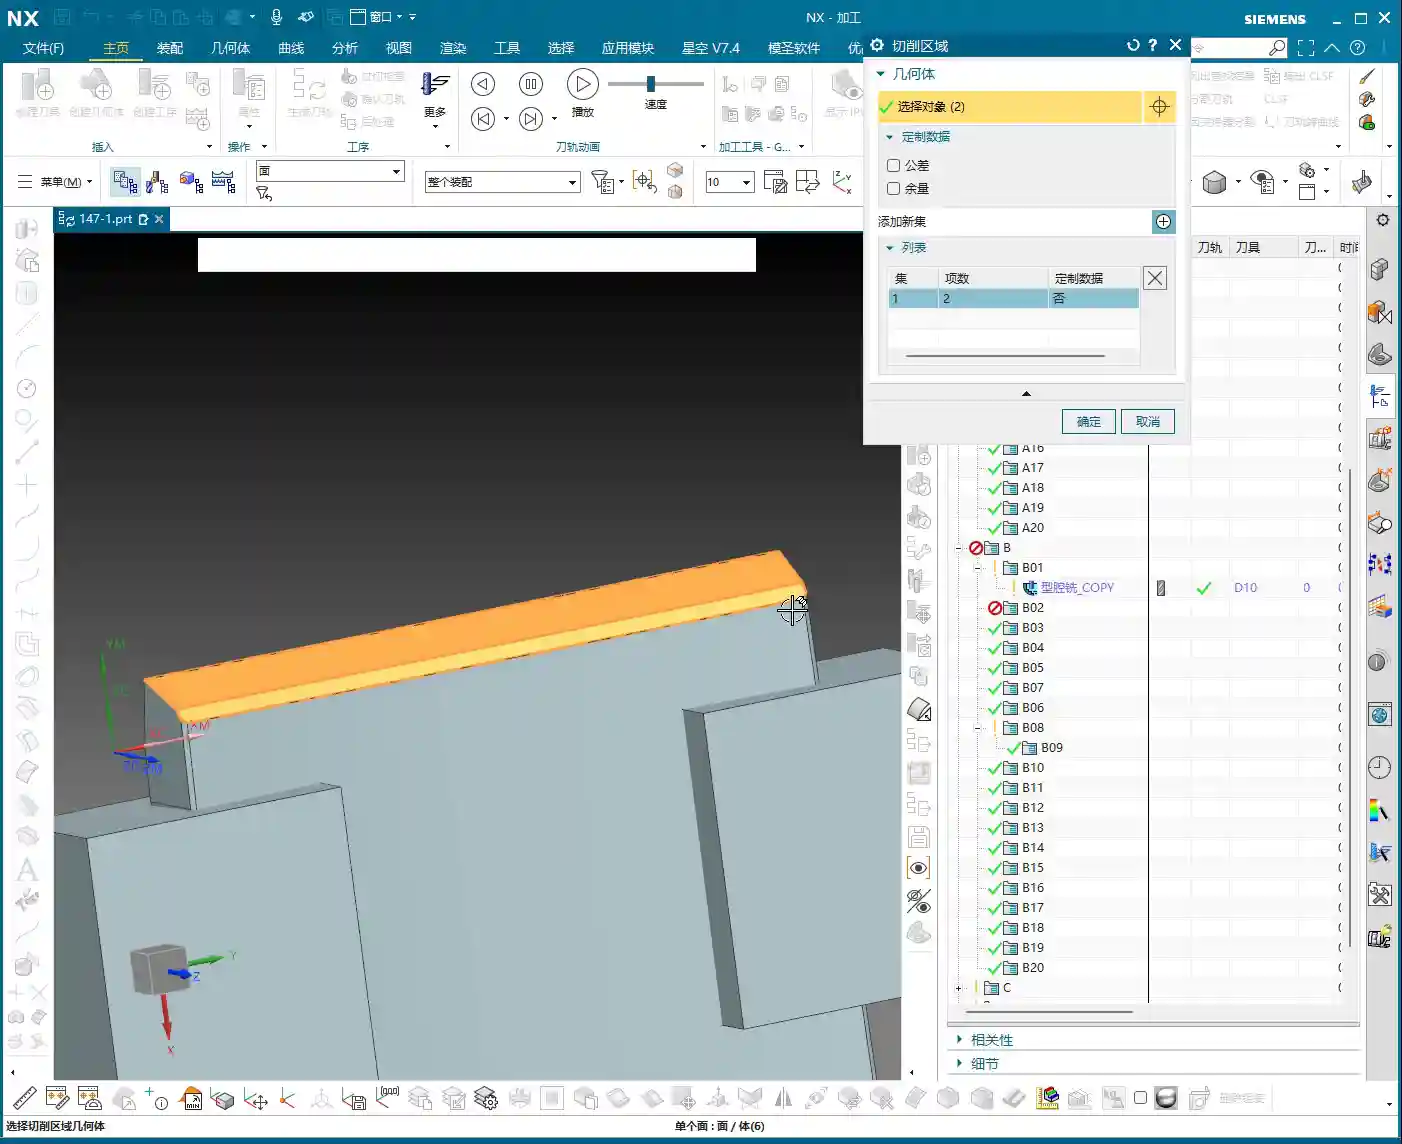
Especially when dealing with complex geometry parts, simulating the first operation to generate the machined blank, and then using this as the blank for the second operation, is a core step to ensure accuracy and efficiency in multi-operation machining. This approach not only provides a visual representation of the first operation’s outcome but also allows for more precise toolpath calculations in the second operation, avoiding already machined areas, reducing air cuts, and improving overall efficiency. This is the principle of “using the blank from the first operation as the input for the second operation.”
Summary: Pitfall Avoidance Guide
- Tool Parameters: Err on the Side of Smaller: Especially for diameter and length, when setting them in UG (NX), it’s better to be conservative and fine-tune during actual machining. Blindly pursuing larger or longer tools is simply setting a trap for a collision.
- Always Check Cutting Direction: After generating each toolpath, take a few seconds to check if it’s climb milling or conventional milling. For graphite machining, climb milling is the preferred choice, as it significantly improves surface quality and extends tool life.
- Toolpath Entry Must Be Gradual: When the tool plunges, avoid direct perpendicular entry into the material. Use UG (NX)’s extension function to allow the tool to enter smoothly from outside the part, reducing impact.
- Strictly Control Depth of Cut (DOC) per Pass: For brittle materials like graphite, small Depth of Cut (DOC) and multiple passes are paramount. Master Wang’s recommended 0.2mm Depth of Cut (DOC) per pass is knowledge gained from hard-won experience.
- WCS Must Be Consistent with Machine Datums: The coordinate system settings in UG (NX) must match the tool offsetting and fixturing datums on the machine tool. This is an ironclad rule for ensuring dimensional accuracy.
- Linkage of Blanks Across Multiple Operations: For multi-sided parts, always use the machining results from the previous operation as the blank for the subsequent one. This maximizes the avoidance of air cuts and overcutting, and is key to optimizing toolpaths and enhancing efficiency.
- Don’t Blindly Trust Software; Observe Cutting Conditions: Software simulation is just a reference. During actual machining, observe the cutting conditions, the sound of the tool, and any vibrations. This on-site feedback provides the most authentic signals!
In our line of work, theory is important, but practical experience is even more so. UG (NX), no matter how powerful, is just a tool. How much power that tool can unleash in your hands depends on your mind and skill! That’s all for today; feel free to ask any questions, Master Wang here will tell you everything I know!
As a senior industrial product marketing expert, I also want to add: To all my colleagues, if you have high-precision graphite complex geometry part machining needs, or if you want to improve UG (NX) programming efficiency and optimize machining processes, our team has extensive practical experience and solutions. Feel free to contact me anytime, and let’s work together to bring excellent products to the global market!
👤 About the Author:
The author is a veteran CNC machining professional with 15 years of industry experience, specializing in UG NX programming. This article is an original work representing personal practical insights.
⚠️ Copyright Notice: Unauthorized reproduction or distribution without prior communication is strictly prohibited.