📝 Key Takeaways: Master Wang explains practical Siemens NX multi-operation part programming, covering the full process from raw stock positioning and process planning to Face Milling, chamfering, pocketing, drilling, and post-processing. The discussion emphasizes Work Coordinate System (WCS) transformation, program optimization, tool selection, and Clamping strategies. He also shares real-world experience on avoiding common pitfalls, helping you boost efficiency, reduce costs, and master practical know-how “you won’t find in textbooks.”
Listen up, young engineers! Today, Master Wang is taking you through multi-operation part programming. Don’t let this example part fool you with its simplicity; it’s a small bird with all its vital organs. We’re not just going to learn how to click around in NX; more importantly, we’ll understand the underlying process logic and machine tool behavior. This is the real expertise gained from hands-on experience in the field – you won’t learn this from any textbook.
Our approach here is to go from raw stock to finished product, with every step carefully calculated. Today’s part is a typical example of multi-sided machining. Programming strategy, Work Coordinate System (WCS) transformations, and smooth operation transitions are all critical in real-world scenarios. Especially for those aiming for complex Surface Milling or 5-axis machining, if your fundamentals aren’t solid, everything else will be built on shaky ground! Siemens NX has a vast number of commands, so we can’t cover everything. We’ll focus on practical techniques that are useful, highly efficient, and cost-effective.
Step One: Overall Planning and Process Decomposition
When you get a new part, don’t rush into drawing or programming. First, you need to visualize its “past and future”: What material is it? What are the precision requirements? How will it be Clamped? What tools will be used? You need to think through all of these. For this part, we plan to complete it in multiple operations with multiple Fixturing setups.
Clarifying the Machining Strategy: Never Fight Unprepared
Listen up, planning comes first. For this part, we’ll use three Work Coordinate Systems (WCS) – A, B, and C – to distinguish different machining faces. The specific steps are roughly as follows:
- Operation A (First Face): Machine the front face first, establishing datums for the subsequent flip.
- Operation B (Second Face): Flip the part over and machine the back face, again establishing datums.
- Operation C (Third Face): Flip it again to machine the holes and pockets on the top or side.
You need to think clearly about each step, otherwise, you’ll be scrambling, leading to scrapped parts or out-of-tolerance dimensions, which will cost you dearly.
Raw Stock Positioning and Clamping Strategy
The Clamping of the raw stock directly impacts machining accuracy and efficiency. For this part, we’ll first fixture one side for Roughing. Once the first side is machined, we then flip the part and re-clamp it. At this point, the new Clamping datum must be selected on the already machined surface from the first side, ensuring accurate datum transfer. While it might seem like just clicking in Siemens NX, on the machine, every detail – fixtures, parallels, clamps – must be meticulously considered.

Step Two: Front Face Machining (Operation A)
This is our first machining face, primarily involving Face Milling, chamfering, and pocket Roughing. Don’t underestimate Face Milling; the flatness and surface finish directly influence the datums for subsequent operations.
Face Milling and Chamfering
First, we’ll use a face mill to flatten the entire surface. The Depth of Cut (DOC) can be a bit larger, for example, 2mm, to get it done in one go. Remember, when programming, your entry and exit paths must be smooth; avoid sharp, right-angle turns, as that can lead to heavy tool engagement, which is bad for both the tool and the machine.
Next is chamfering. This may seem like a minor detail, but its function is significant: it eliminates sharp edges, protects operators, and prevents part damage during handling. We’ll use depth milling, select these four corners, and set the Depth of Cut (DOC) to 50% of the tool diameter. That’s a solid approach.
Pocket (Cavity) Roughing
Next is the Roughing of the internal pocket. For this, we’ll use a pocket milling operation. As for tooling, start with a larger tool to clear most of the material. The Depth of Cut (DOC) and feed rates must be determined by the material properties. For example, common aluminum can be machined faster, but titanium alloys and high-temperature nickel-based alloys require a more cautious approach to ensure chip evacuation and tool life.
Master Wang’s Pro Tip: Don’t always aim for a single-pass solution; separating Roughing from Finishing is the golden rule. Roughing prioritizes efficiency, leaving sufficient material allowance; Finishing pass prioritizes accuracy and surface finish, so the cuts must be stable and slow.

Step Three: Back Face Machining (Operation B)
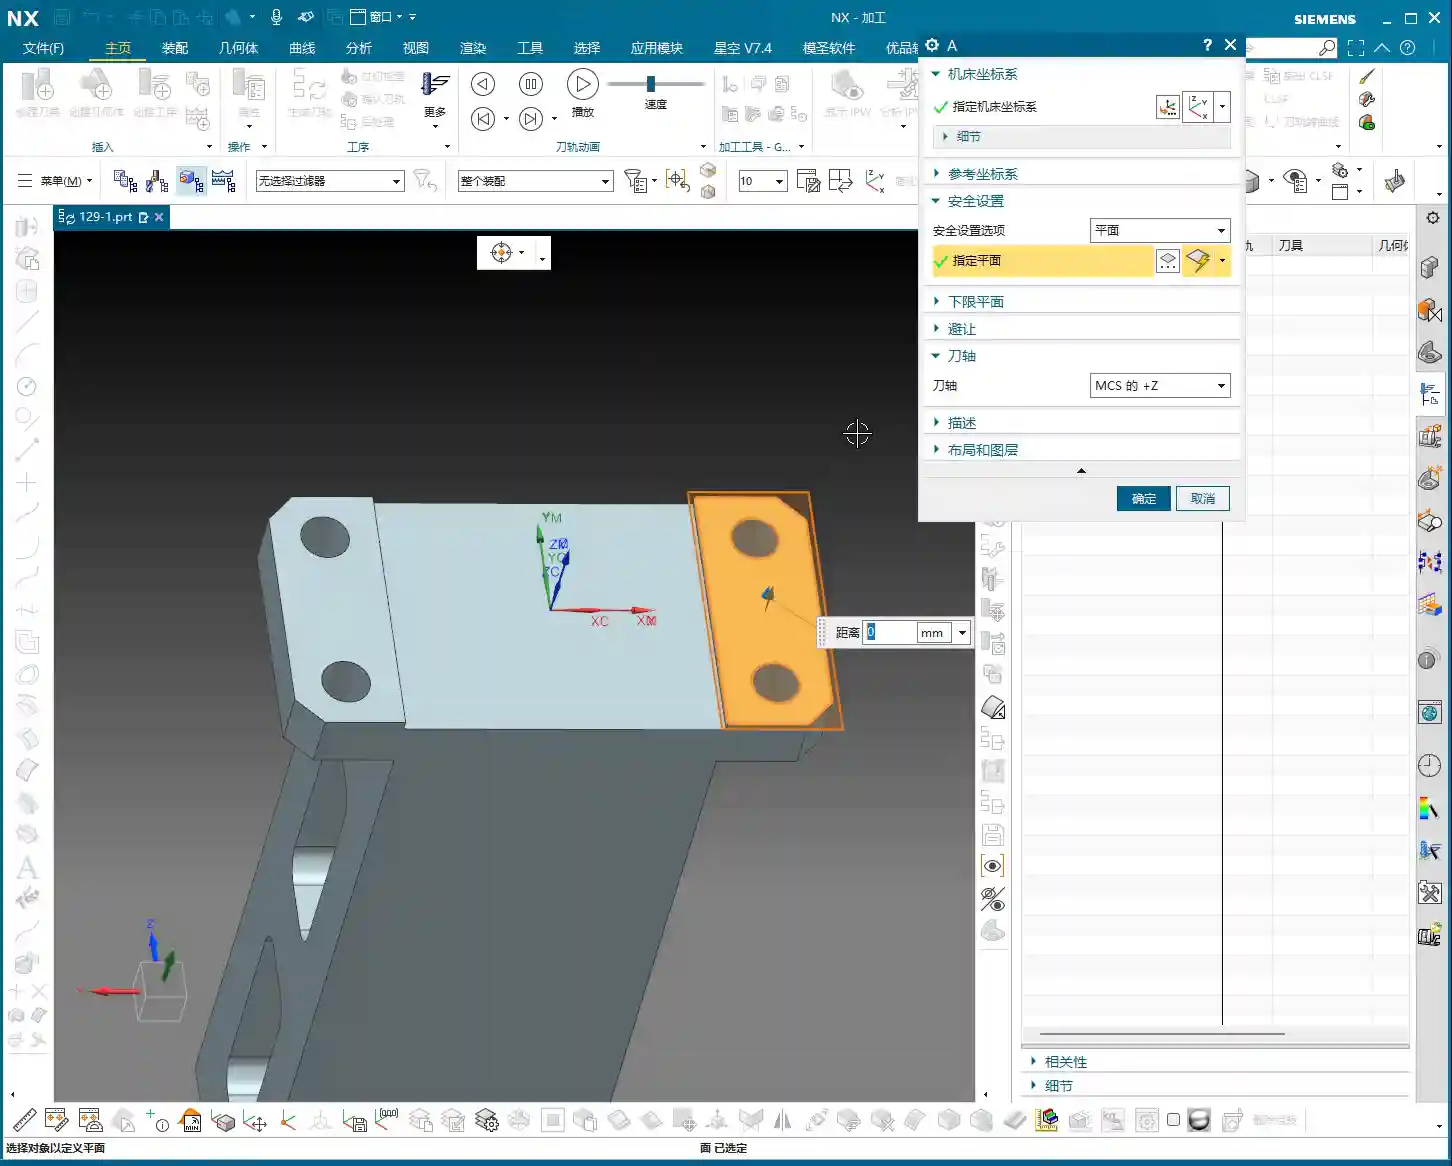
Once the first face is done, we’re ready for flip-over machining. At this stage, Work Coordinate System (WCS) transformation is paramount; get it wrong, and all your previous efforts will be wasted.
Coordinate System Transformation: Flipping is Key
Listen up, creating a new WCS (Coordinate System B) typically involves reversing the Z-axis direction and redefining the XY plane. The easiest method is to use an already machined feature as a reference for your new Work Coordinate System (WCS). For example, the face you just Face Milled on the first side becomes your Clamping datum for the second side. In Siemens NX, as long as you select the correct datum, the system will automatically help you with positioning, saving you time and effort.
Leveraging Copy-Paste: Efficiency is King
In Siemens NX programming, especially for symmetrical or similar machining operations, copy-paste operations are a powerful tool for boosting efficiency. You can directly copy the Face Milling and chamfering operations from Operation A, then simply modify the Work Coordinate System (WCS) and machining region. This significantly reduces repetitive work and ensures operational consistency.
Programming Tip: After copying an operation, don’t forget to check all parameters, especially clearance planes, lead-in/lead-out strategies, and most importantly, material allowance settings – these are common areas for errors.

Step Four: Remaining Feature Machining (Operation C)
After the first two sides are Roughed, we need to address the part’s holes and Finishing passes. This involves another new Fixturing setup and Work Coordinate System (WCS), typically for machining features on the top or side.
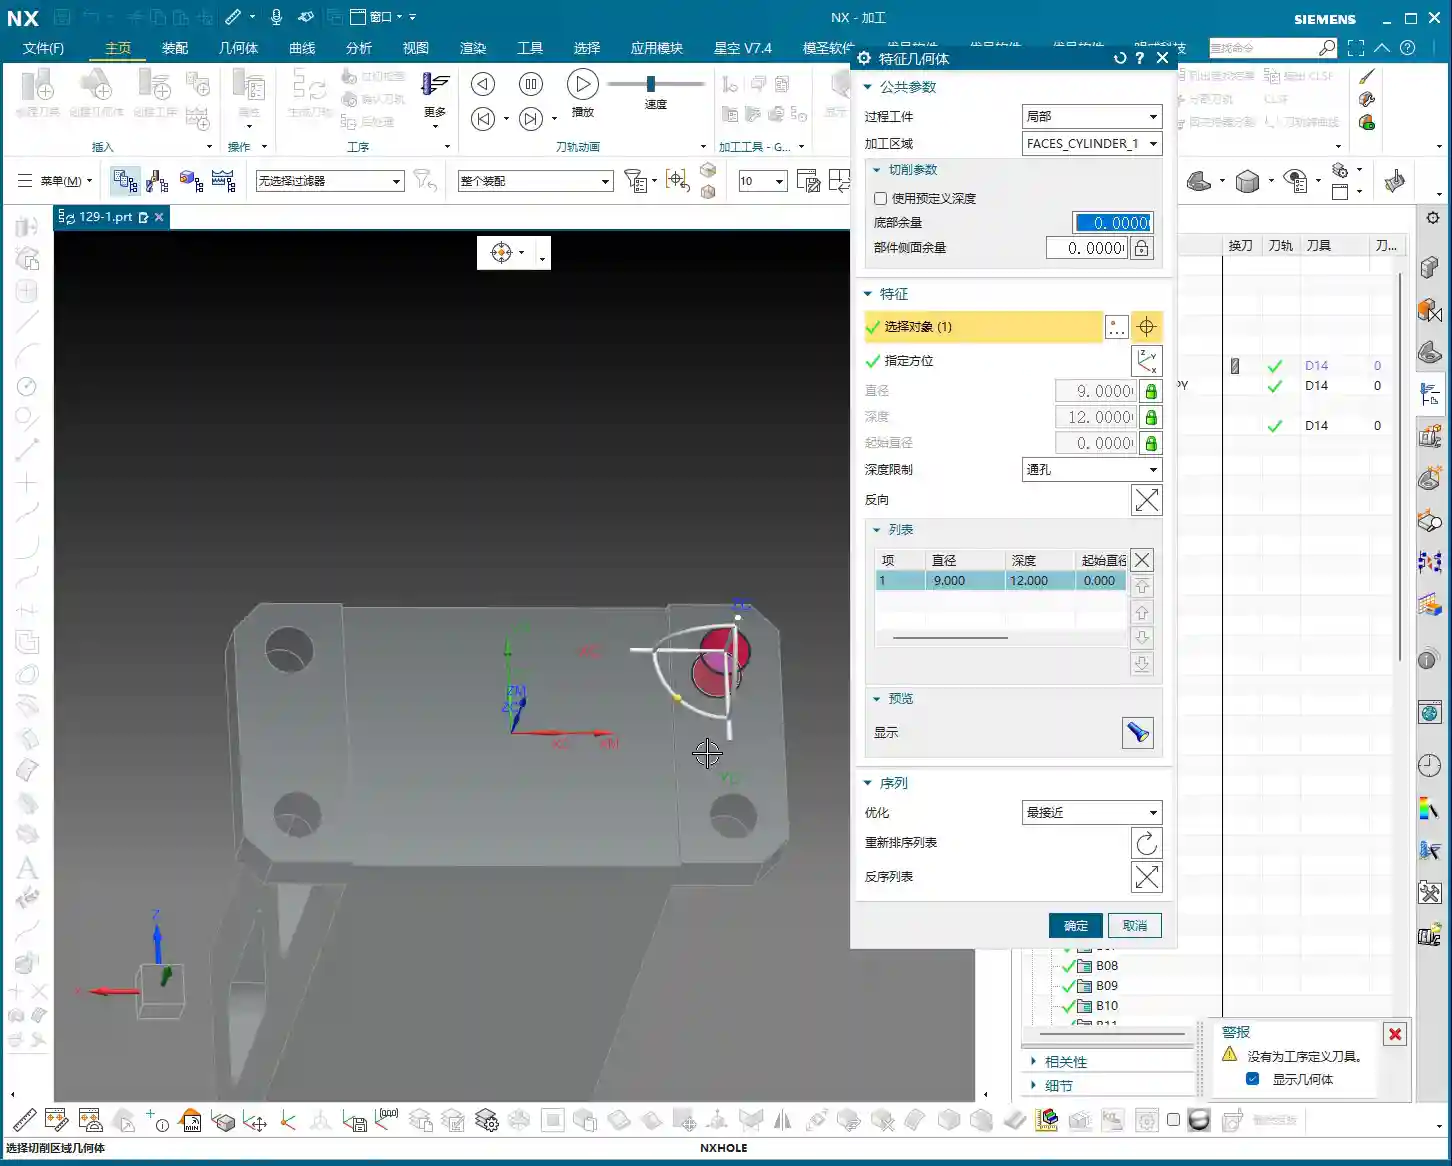
Hole Machining: Spot Drilling and Deep Hole Drilling
For hole machining, especially for high-precision holes, it’s not as simple as just plunging a drill bit.
- Spot Drilling (Center Drilling): First, use a spot drill to establish the center point, preventing the drill from walking. This is fundamental.
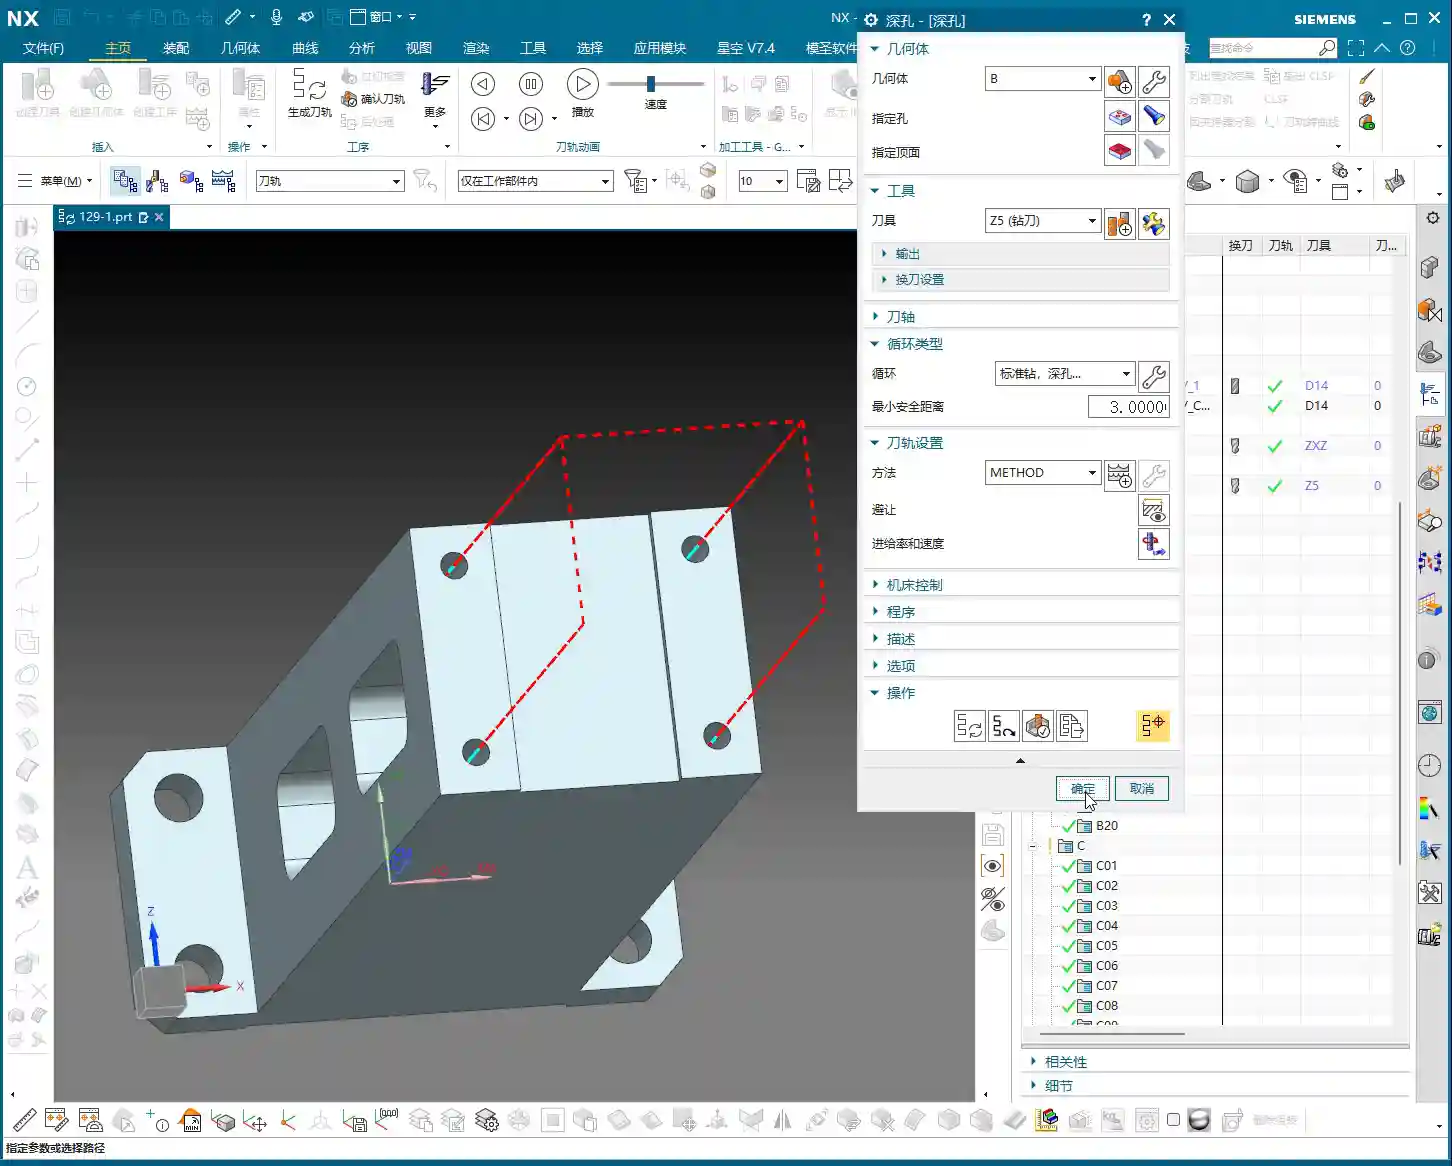
- Deep Hole Drilling: For deep holes, you must use a deep hole drill and set up peck drilling or chip breaking cycles to prevent chip packing and tool burning. Don’t just rely on software simulation; observe the cutting sparks and chip condition – that’s the real feedback.
For our 5mm diameter hole, we’ll first spot drill for positioning, then use an appropriate drill bit to drill to full depth.
Pocket Finishing and Helical Milling
For pocket Finishing passes, helical milling is an excellent choice. It allows the tool to engage smoothly, avoiding impact, and is particularly well-suited for difficult-to-machine materials like titanium alloys and high-temperature nickel-based alloys. Helical entry allows for precise finishing of the side walls and bottom, step by step.
Master Wang’s Pro Tip: For Finishing passes, the tool overhang must be short, and rigidity must be excellent. Feed rates and spindle speeds need to be matched, and coolant flow must be ample; otherwise, you’ll easily generate chatter marks, compromising surface quality. For this pocket, we’ll set the bottom stock allowance to 0, leave a 0.05mm allowance on the side walls for the Finishing pass, then use a finishing end mill for a single finish cut to depth.

Step Five: Program Output and Post-Processing
Don’t assume everything is done once all the operations are programmed. The most critical step is converting the virtual toolpaths in Siemens NX into the language the machine tool understands – G-code. This requires a setup sheet and post-processing.
The Value of Setup Sheets and Post-Processing
A setup sheet is your operational manual, clearly detailing the tooling, parameters, Fixturing, and precautions for each step. It’s the machine operator’s “bible.”

Post-processing, now that’s a specialized skill. It translates Siemens NX’s internal data into G-code and M-code that specific machine tools (such as FANUC, SIEMENS, etc.) can recognize. For me, Master Wang, modifying post-processors is routine. The goal is to optimize code structure, reduce air cuts, enhance machining efficiency, and even correct some inherent machine tool errors through post-processing (at the ±0.005mm level).
Marketing Perspective: A clear, accurate, and efficient setup sheet and G-code not only guarantee product quality but also represent the strength of our manufacturing facility. In industrial SEO, this is the best calling card to showcase our “professional, precision, and high efficiency” to clients, helping your product keywords rank high on search engine home pages!
Toolpath Optimization: More Than Just Software
Software simulations might show beautiful toolpaths, but real-world machine performance is what truly matters. Too many air cuts? Uneven cutting loads? These issues require careful adjustment within Siemens NX, or optimization at the post-processor level. For instance, using Siemens NX’s “Optimize Toolpath” function can automatically plan the shortest path, reducing non-cutting movements – every second saved is money!
Summary: Pitfall Avoidance Guide
Alright, we’ve walked through this multi-operation part programming example from start to finish today. Finally, Master Wang has a few more reminders for you – these are practical experiences you won’t learn from books, so commit them to memory:
- Fixturing is fundamental, datums are critical: For multi-operation machining, ensure you select the correct datum surface for each flip and Clamping setup; otherwise, dimensional errors are guaranteed.
- WCS management must be rigorous: Clearly define A, B, and C Work Coordinate Systems (WCS) and ensure they correspond precisely in the program to prevent operator confusion.
- Tool selection must be appropriate, and cutting parameters must match: Don’t try to use one tool for everything, and never input random parameters. Material, tool, and machine tool – these three must be properly matched.
- Separate Roughing and Finishing, leave room for error: Leave sufficient stock for Roughing, then perform the Finishing pass. This is the ironclad rule for ensuring accuracy and surface finish.
- Never be careless with post-processing and setup sheets: These are your bridge of communication with the machine tool and the operator. The code must be concise, and instructions detailed; otherwise, they are potential hazards.
- Observe cutting sparks, listen to machine sounds: No matter how good the software simulation is, it cannot replace on-site experience. The color of cutting sparks, the shape of chips, and the sound of the machine’s load are all “signal lights” for judging the machining status.
Remember, programming isn’t “magic”; it’s a combination of science and accumulated experience. Practice more, think more, and summarize more, and you will truly become a master craftsman in machining!
“`
👤 About the Author:
The author is a veteran CNC machining professional with 15 years of industry experience, specializing in UG NX programming. This article is an original work representing personal practical insights.
⚠️ Copyright Notice: Unauthorized reproduction or distribution without prior communication is strictly prohibited.