📝 Key Takeaways: Master Wang reveals practical deburring techniques in Siemens NX for planar and three-axis operations. Planar deburring efficiently handles 2D edges with quick chamfer program generation, but beware of overcutting internal corners. Three-axis deburring is more robust, using a ball end mill to tackle complex Z-axis burrs with flexible edge selection. This guide emphasizes tool selection, parameter settings, and common pitfalls to help you eliminate manual finishing and significantly boost machining efficiency and quality.
Master Wang’s Session: Deburring – Where Details Make All the Difference
Hello everyone, I’m Old Wang, Master Wang. Our Siemens NX practical tutorial is drawing to a close. We’ve covered the basics, from DB-HS and 2D machining to drilling, chamfering, deep cavities, and various fixed-axis operations – essentially all the key commands. For this final lesson, let’s talk about a pervasive and often frustrating issue in machining: “burrs.” Don’t underestimate them; if not handled properly, they can affect assembly or even scrap parts. So, listen up! Today, we’re going to thoroughly break down planar deburring and three-axis deburring in Siemens NX, so you’ll know exactly what to do when you encounter burrs in the future!

Planar Deburring: Fast and Efficient 2D Edge Processing
First, let’s discuss Planar Deburring. Simply put, it’s a quick tool in Siemens NX for handling burrs on 2D planar edges. Although it’s called “deburring,” it essentially automatically creates a small radius or chamfer on these edges, effectively “grinding” away the burr. What makes this command so useful? It saves effort! It’s several times more efficient than manually selecting edges and contour milling chamfers.
Core Operation: Geometry and Tool Selection
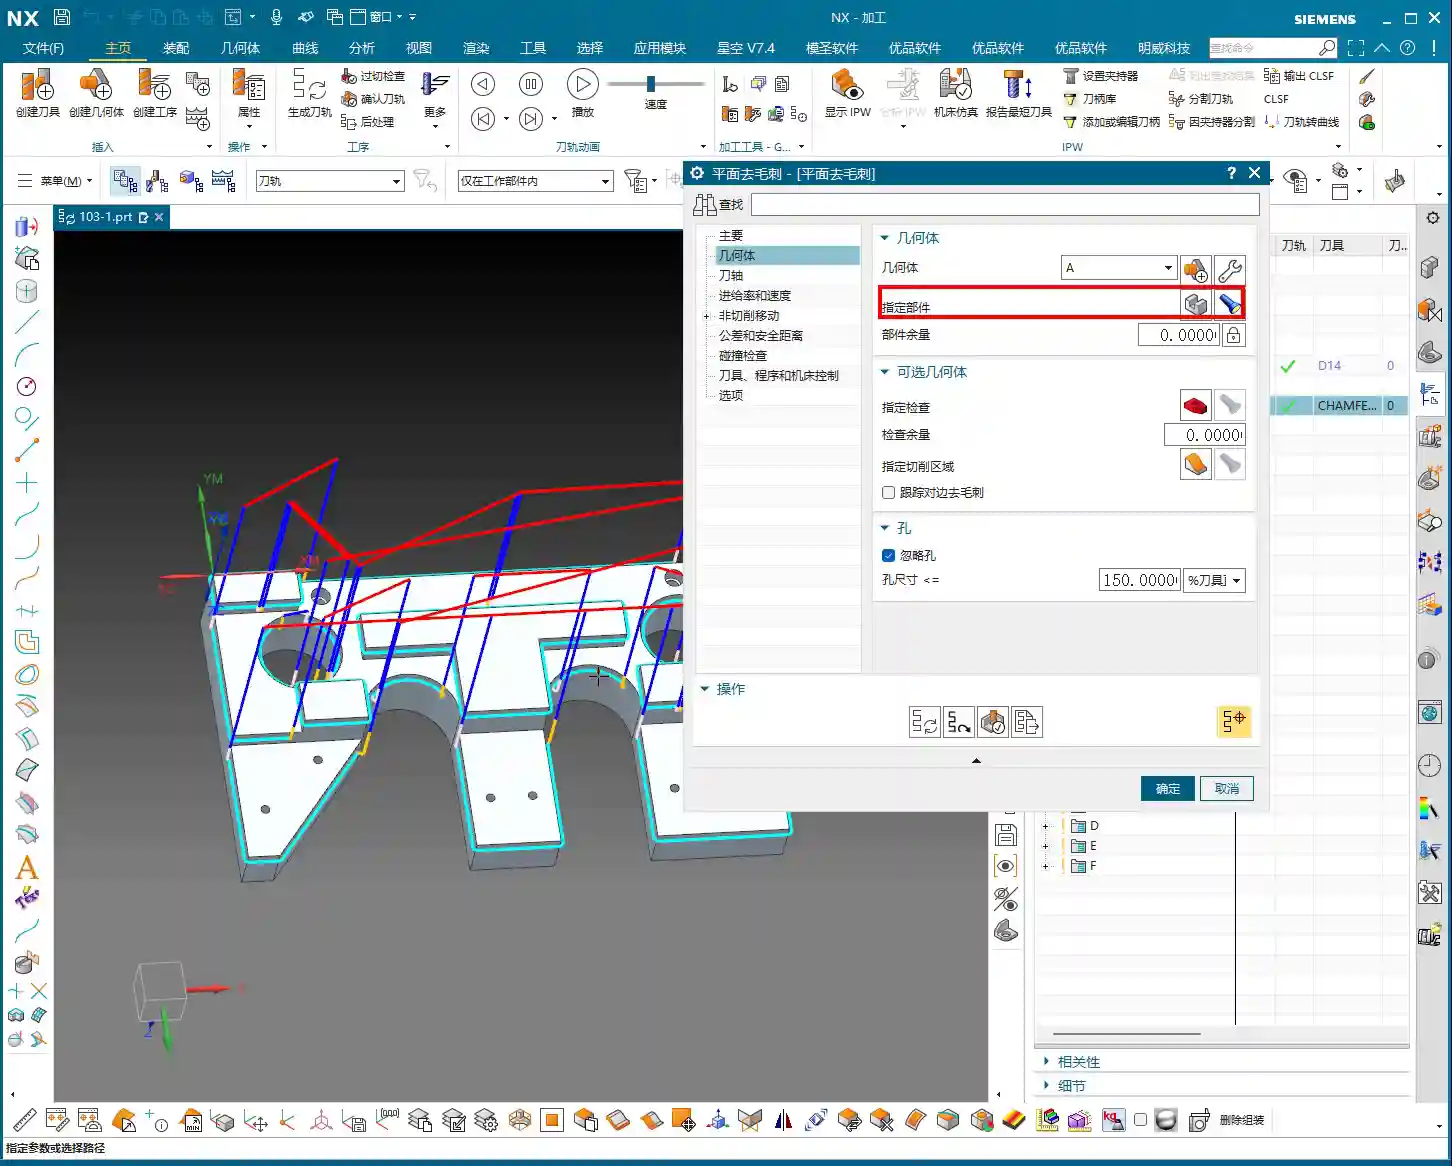
- Define Geometry: Listen up, to use this command, you must specify a “Geometry” (Part). Siemens NX needs to know which part you’re looking for burrs on, right? Just select your workpiece.
- Select Tool: Planar deburring typically uses a chamfer mill. Create a new one yourself, for instance, a φ8 chamfer mill.
Master Wang’s Trick (Avoiding Pitfalls): Many beginners get confused here. If you want to create a C4 chamfer (meaning the chamfering edge length of the tool is 4mm), then the chamfer mill you create cannot have a blunt tip. For example, if you use a φ8 chamfer mill, but the tip is made φ4, the chamfer will be a right angle. If you want to create a C10 chamfer, you’ll need to select a tool with a 5mm tip radius. In short, your tool’s chamfer length must match the actual chamfer amount you need, otherwise, it won’t be sharp enough! Here, we’ll use a φ10 chamfer mill, which is quite versatile.


Program Generation and Parameter Adjustment
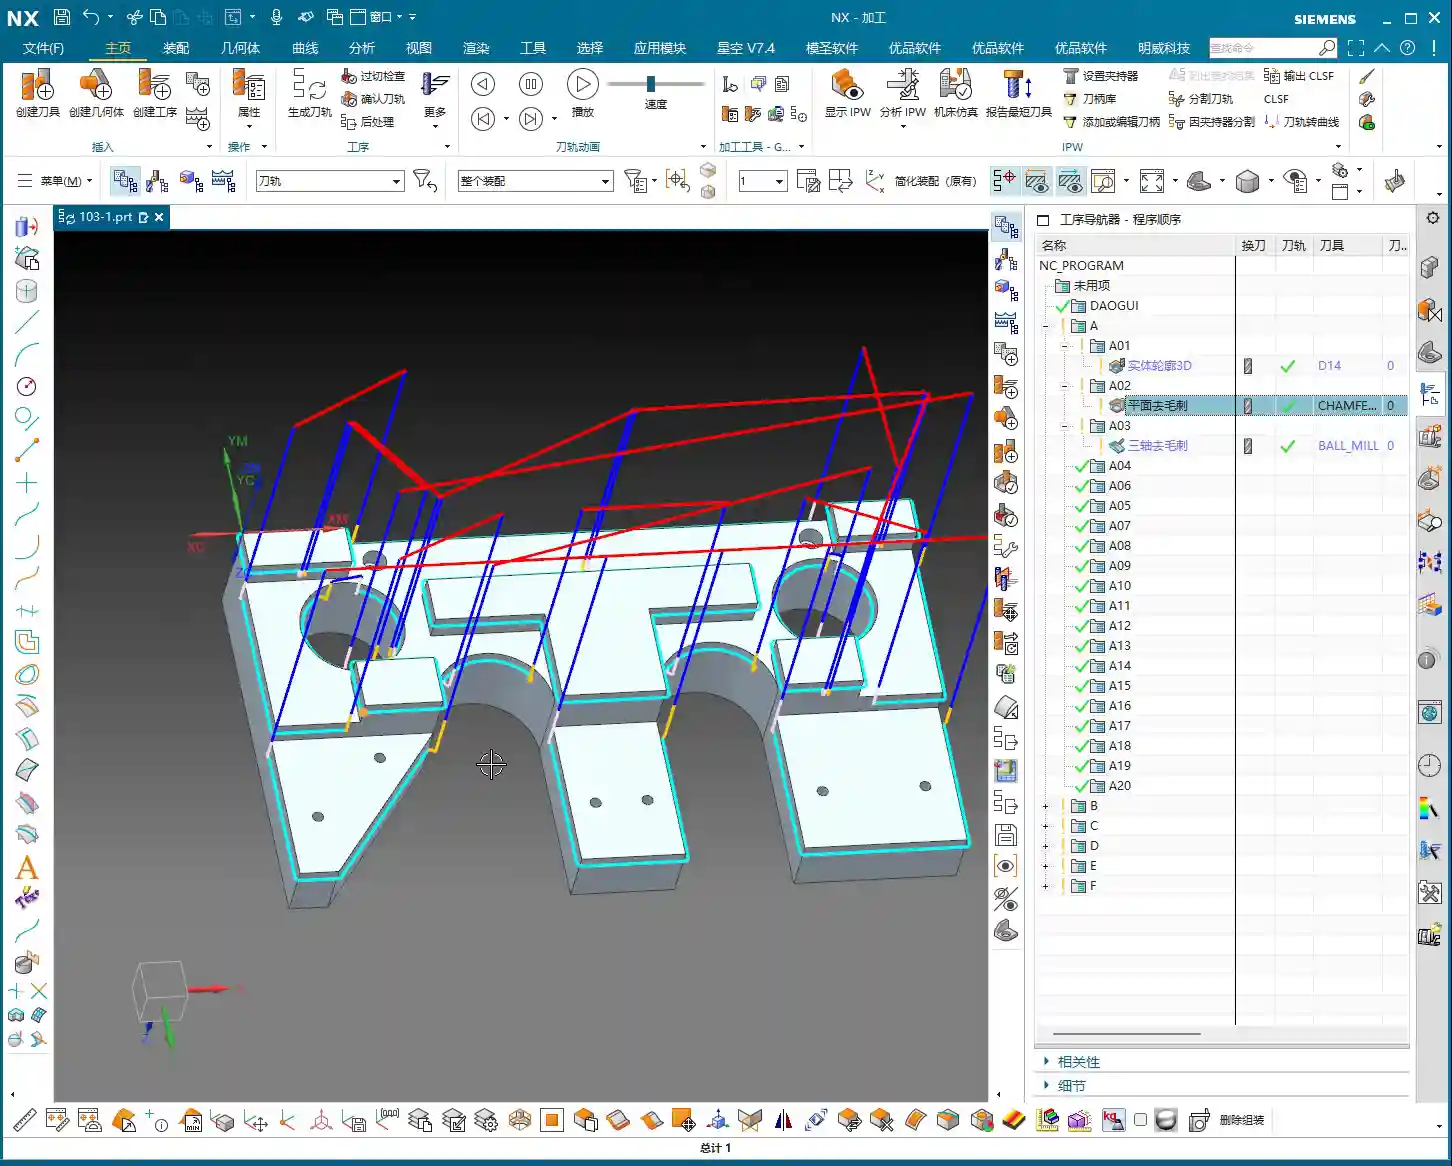
Once the tool and geometry are selected, generate the program directly. You’ll notice the toolpath appears instantly – it’s incredibly fast!
- Program Preview: If you see a dense display of F values (feed rates) on the toolpath, and find it distracting, click “Replay” or “OK” and then re-enter the command, and it will display normally.
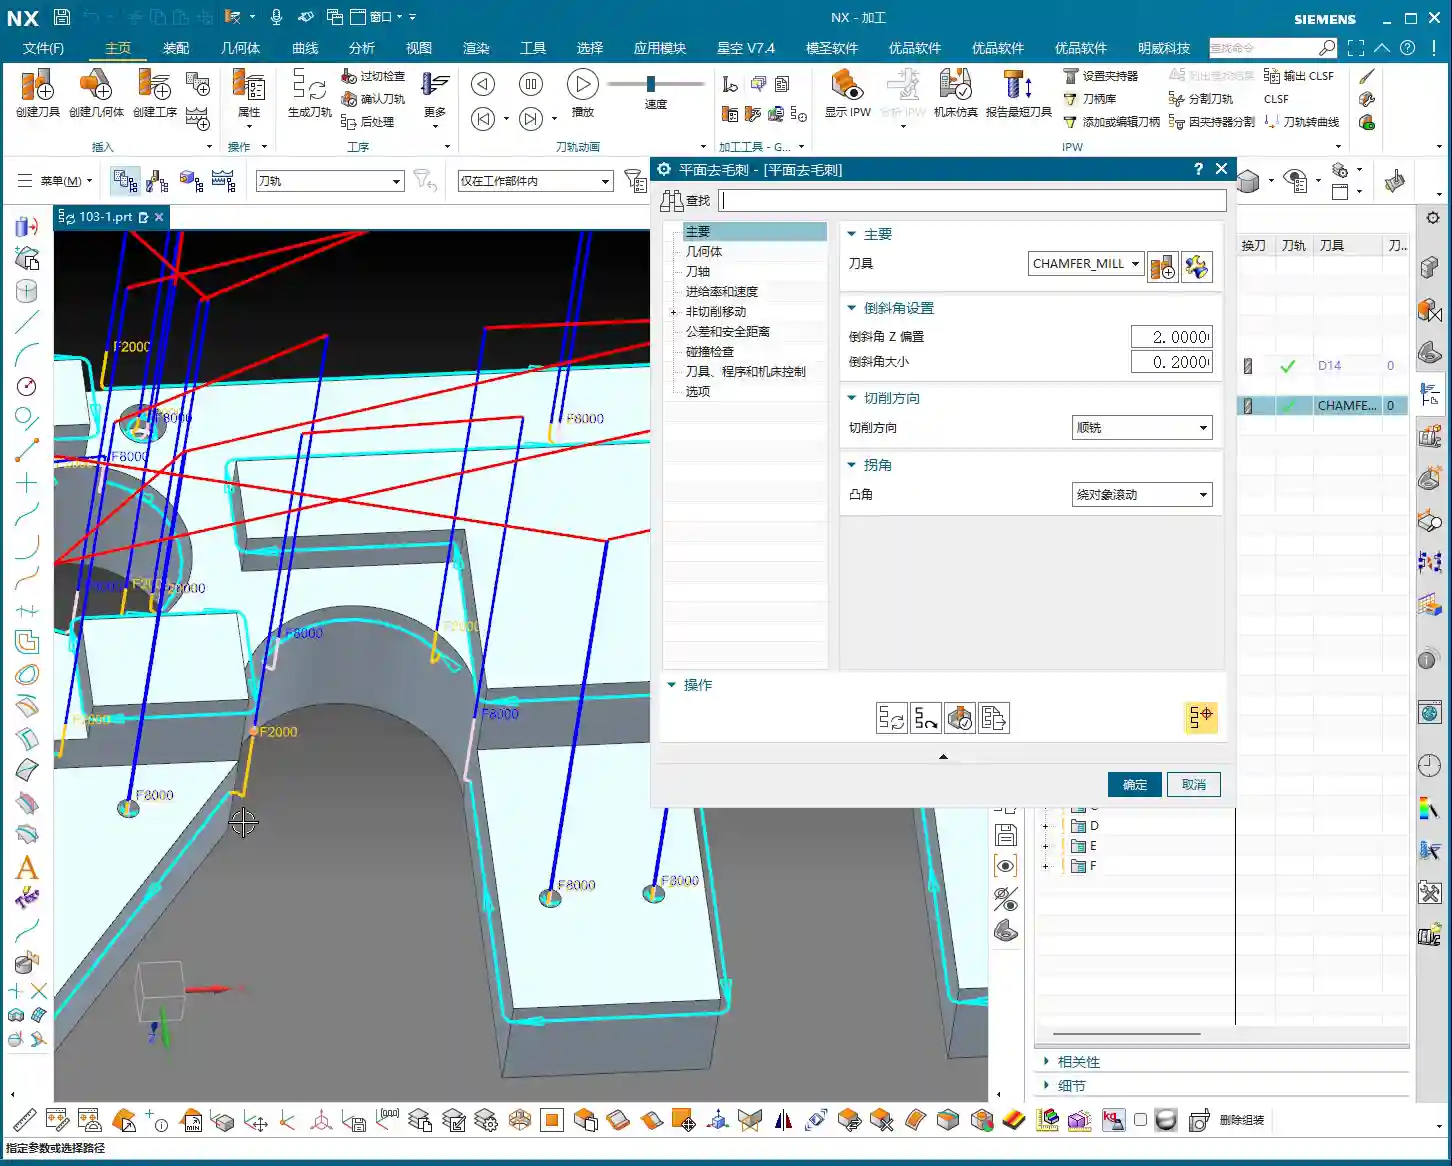
- Deburr Size (03:22): The default deburring amount for this command is 0.2mm, which creates a C0.2 chamfer. You can change this in the parameters, for example, to C0.5 or even C1.0, depending on the part requirements.
- Tool Offset (03:26): Here’s the crucial part! This “offset” refers to how much the tool is offset downwards relative to the edge. The default is 2mm. This value determines the Depth of Cut (DOC) at the tool tip. You can adjust it based on the tool’s effective cutting length and your specific needs. For example, changing it to 2.5mm will make it offset further downwards.
- Ignore Holes (05:08): If your part has holes and you don’t want to deburr them, Siemens NX also provides an “Ignore Holes” option. Check this box, and the program will skip all hole edges. This feature is very practical, saving you the trouble of manually excluding them.
Master Wang’s Insights: Advantages and Limitations of Planar Deburring
The greatest advantage of the planar deburring command is its high efficiency and simple operation. It automatically identifies all edges that require deburring, and in just a few clicks, the program is ready. Imagine if you had to manually select dozens or hundreds of edges – that would take forever!
However, it also has limitations. Have you noticed that it cannot deburr certain internal corners or sharp angles? For example, if your part has right-angle internal cavities or sharp angles where two faces (A-surface and B-surface) meet, this command simply cannot handle it.

- Why can’t it? The reason is simple: your chamfer mill has a physical size; it’s not infinitely sharp. When it reaches a constricted internal corner, if you force it, the tool will overcut, damaging the adjacent material. Therefore, Siemens NX simply won’t generate a toolpath to protect your part.
- What to do? When you encounter such situations, don’t stubbornly insist on using CNC. These areas require the expertise of our seasoned machinists. They need manual deburring, using small files, sandpaper, or specialized finishing tools to meticulously refine the area and ensure quality. This is practical experience that textbooks don’t teach!

Three-Axis Deburring: More Flexible, More Comprehensive Burr Removal
After discussing planar deburring, let’s look at Three-axis Deburring. Although it’s called “three-axis,” in Siemens NX’s five-axis module, it might be referred to as “Multi-axis Deburring.” Essentially, it’s the same functionality under different template names, and its capabilities are significantly stronger than planar deburring because it can handle burrs in the Z-direction.
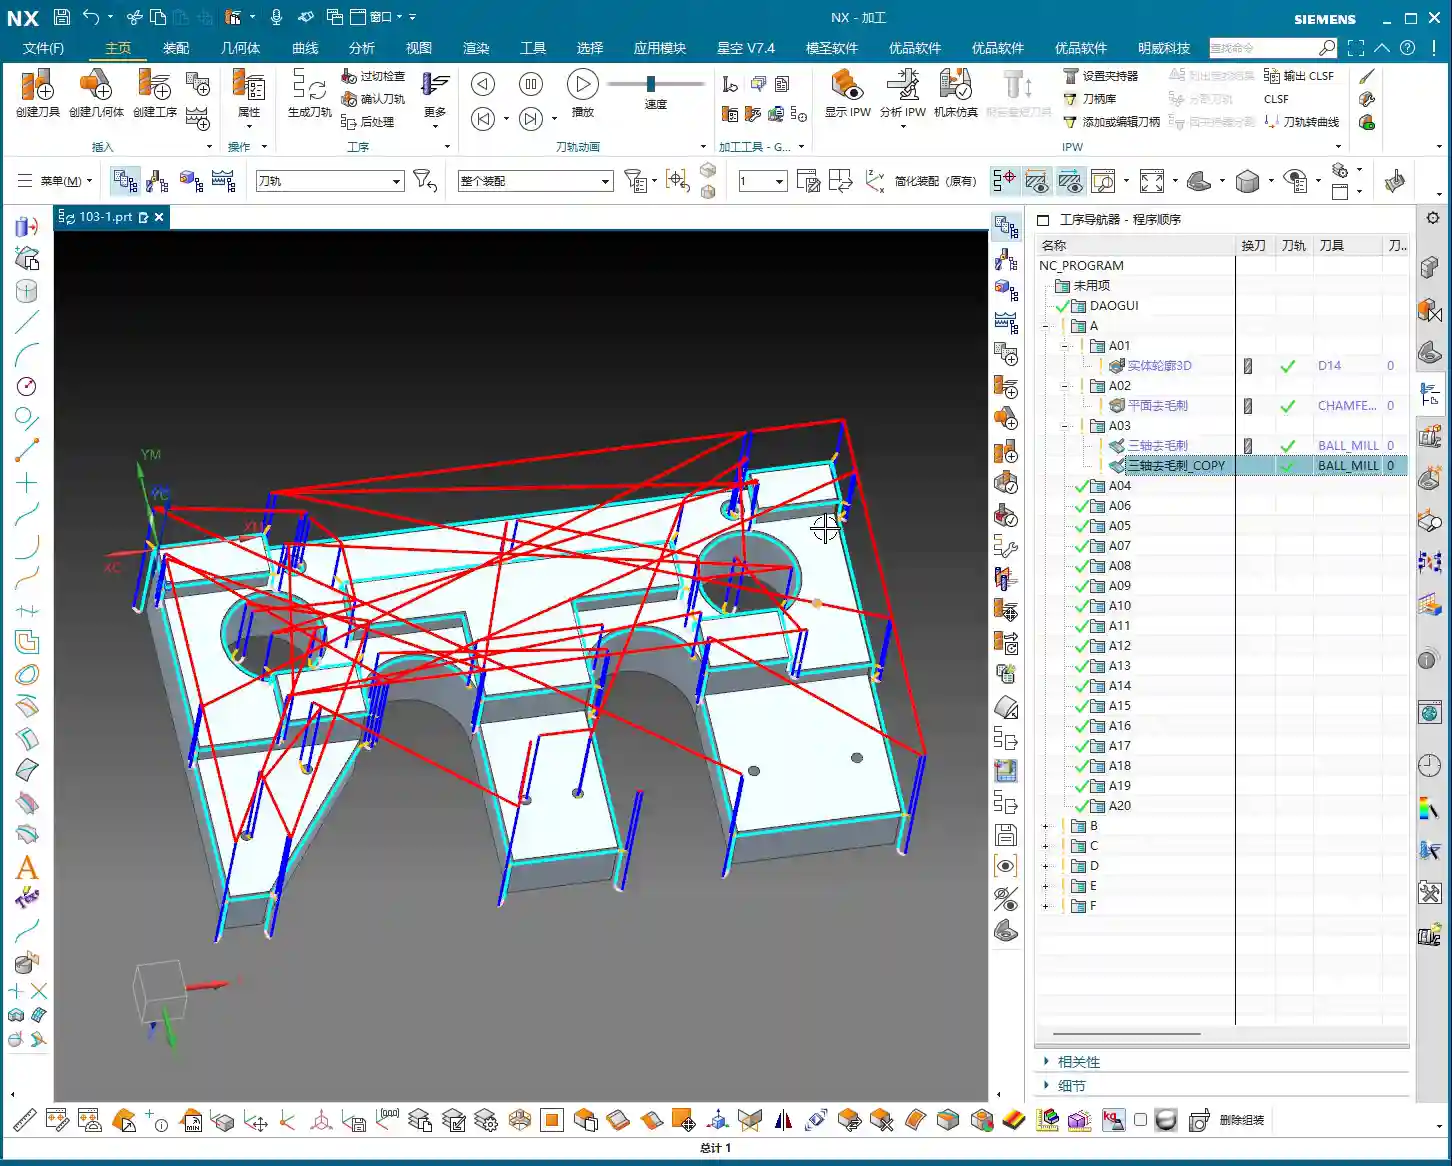
Key Requirement: Ball End Mill is the Only Option
- Tool Restriction: Listen up, this is crucial! For three-axis deburring, you must use a “ball end mill.” Don’t even think about using flat end mills or bull nose mills; it simply won’t recognize them. Siemens NX designed this function to calculate burrs based on the unique characteristics of a ball end mill.
- Geometry and Tool: As usual, first select the geometry, then create a ball end mill, for example, a φ4 one.

Edge Selection and Flexible Control
The biggest highlight of three-axis deburring is its flexibility in edge selection.

- Automatic Edges (07:24): By default, it will automatically identify all edges on the workpiece that it deems require deburring, just like planar deburring. After generating the program, you’ll find that it even processes the inner edges of holes and some Z-axis edges – something planar deburring cannot do!
- Specified Edges (09:50): If you only want to process certain specific edges, select “Specified Edges.” This feature is particularly useful; for example, if you only need to deburr a specific hole or a few particular edges, you can simply select them directly. Unlike planar profile milling, you don’t need to consider direction or order; just select them, and Siemens NX will handle the rest.
- Exclude Edges (08:24): Even more interesting is the “Exclude Edges” function. For instance, if many edges are automatically identified, but there are a few holes or specific edges you don’t want to deburr, you can select them under “Exclude Edges,” and the program will automatically avoid those areas. In actual production, this can significantly reduce rework and manual adjustment time.
Deburring Parameters and Multi-axis Extension
- Deburr Width (09:20): This parameter is similar to planar deburring, controlling the size of the deburr.
- Internal Chamfer / External Chamfer (09:26): These control the type of deburring for hole and boss edges.
- Multi-axis Integration (09:51): Although we are currently in a three-axis template, the underlying logic of this command is “multi-axis.” In the “Axis and Boundary” options, you can change the “View” to “Four-axis” or “Five-axis,” and it will perform the corresponding four-axis or five-axis deburring. This is why I often use it in the Siemens NX five-axis module; it adapts to deburring more complex curved surfaces.

Summary: Pitfall Avoidance Guide
- Planar Deburring:
- Advantages: Simple to operate, fast program generation, suitable for deburring 2D planar edges. A powerful tool for boosting efficiency.
- Pitfalls to Avoid:
- Tool Selection: Always ensure that the chamfer mill’s tip radius matches your desired chamfer amount. For example, if you want a C0.5 chamfer, the tip radius cannot be greater than 0.5, otherwise, the resulting chamfer will be blunt, or it won’t chamfer at all.
- Limitations: Cannot handle all internal corners or sharp angles, especially burrs in deep cavities or on complex curved surfaces. When encountering such situations, don’t force the CNC; hand it over to experienced machinists for manual deburring to ensure part quality.
- Three-Axis Deburring (or Multi-Axis Deburring):
- Advantages: More powerful functionality, capable of handling Z-axis burrs and complex geometries. Flexible edge selection, allowing for automatic, specified, or excluded edges, making it highly adaptable.
- Pitfalls to Avoid:
- Tool Restriction: Memorize this: you must use a “ball end mill.” Using the wrong tool will either prevent the program from generating or produce incorrect results.
- Parameter Understanding: Understand the meaning of “deburr width” and “offset” and set them according to the actual workpiece and tool conditions to avoid overcutting or undercutting.
- Multi-axis Extension: Although it’s called “three-axis” in a three-axis template, at its core, it’s a multi-axis command. If you need to perform four-axis or five-axis deburring in the future, remember this command; it’s still applicable, just switch the “View” in “Axis and Boundary.”
- Cost Efficiency: Whether planar or three-axis deburring, the core objective is to improve efficiency and reduce labor costs. What can be automated by a program should never be done manually. However, where the program has limitations, don’t hesitate; do it by hand. Quality is always the top priority.
Alright, that concludes today’s lesson. Deburring might seem like a small task, but there’s a lot of expertise involved. Remember these practical experiences, and you’ll never be stumped by small burrs when machining parts again!
👤 About the Author:
The author is a veteran CNC machining professional with 15 years of industry experience, specializing in UG NX programming. This article is an original work representing personal practical insights.
⚠️ Copyright Notice: Unauthorized reproduction or distribution without prior communication is strictly prohibited.