📝 Key Takeaways:
Siemens NX Area Milling: Practical Deep Dive into Non-Steep and Steep Machining
Hello everyone, I’m Master Wang. Today, we’ll pick up whe…
Hello everyone, I’m Master Wang. Today, we’ll pick up where we left off with area milling, focusing on machining strategies for “non-steep” and “steep” areas. The textbooks make this sound complicated, but in actual practice, there are plenty of pitfalls!
I. Review of Machining Modes: One-Way and Zig-zag
Last time, we touched on one-way machining. Let’s quickly review it again today. One-way machining, as the name suggests, means the tool only cuts in one direction. After each pass, the tool lifts, rapids back, and then re-engages to cut again. If you think about it, how efficient can that really be?
One-Way Machining: Low Efficiency, Best Used Sparingly
“Listen up. This kind of one-way machining might occasionally be used in our shop for certain linear, narrow areas with specific surface finish requirements. But for general sidewall milling, I’m telling you, the time it spends lifting and retracting is longer than its actual cutting time. You’re wasting machine time, and that’s real money! So, unless it’s a special case, use it sparingly, or even avoid it entirely.”
Zig-zag Machining: The Foundation of Area Milling
In contrast, “Zig-zag” machining is the workhorse of area milling. The tool sweeps back and forth like a broom, progressively stepping down in the Z-axis while cutting back and forth in the X or Y direction. It’s highly efficient and versatile. It’s the default in Siemens NX. As we’ve covered before, the parameter settings here are the same, so I won’t elaborate further.


II. Zig-zag with Ascent: A Small Trick to Improve Surface Quality
“Within ‘Zig-zag machining,’ there’s a less commonly used option called ‘Zig-zag with Ascent.’ At first glance, you might think this feature is redundant—just a simple tool lift, right? But when used correctly, it’s a ‘hidden helper’ for improving surface quality!”
What is Zig-zag with Ascent?
In zig-zag machining, when the tool reaches the end of a path and needs to turn to machine the next line, it doesn’t just move horizontally. Instead, it will first perform a slight upward Rapid move, then move horizontally, and finally Linear interpolation to cut. It’s like a person lifting their leg to change direction instead of dragging their feet.
Master Wang’s Practical Tip: Combine with ‘Smoothing’ for Enhanced Finishing Pass Quality
“This ‘Zig-zag with Ascent’ feature, especially during a finishing pass, delivers exceptional results when combined with the ‘Smoothing’ parameter. I used to have some junior guys constantly complain about ‘drag marks’ or ‘rubbing’ on finished surfaces, and premature tool wear. One look at their toolpaths, and it was just standard zig-zag, with messy, dragging movements in the corners.
At that point, you’d enable the ‘Smoothing’ function within ‘Non-cutting Moves,’ and adjust parameters like ‘Maximum Stepover’ for smoothing (e.g., I’m setting it to 5000 here – this is just a demo value; adjust based on actual conditions). You’ll notice the tool performs a subtle lift when transitioning between toolpaths. This lift isn’t about how high the tool jumps; it’s about momentarily disengaging the cutting edge from the material before retracting, preventing secondary friction and drag marks during the return traverse. For mirror finishes or parts with extremely high surface quality demands, this small adjustment can save you a lot of polishing and buffing work, elevating the product’s quality!”

III. Core Distinction: Machining Logic for Non-Steep vs. Steep Areas
Now, let’s talk about today’s main event – “Steep” and “Non-Steep” areas. These two concepts are the most easily confused and problematic aspects of area milling.
‘Non-Steep’ Areas: The Preferred Choice for Shallow Slopes
“Non-Steep” area machining, as the name implies, is used for machining areas with relatively shallow slopes. Its toolpaths typically run along the part’s contours or parallel to the XY plane, progressively stepping down. This is the first choice for most flat surface milling and shallow pocket milling. The logic here is: the tool’s bottom cutting edge is primarily engaged, with the side cutting edge playing a secondary role.

‘Steep’ Areas: The Go-To for Sidewalls and Deep Cavities
Conversely, “Steep” area machining is specifically designed for tackling very steep slopes, near-vertical sidewalls, or deep cavities. Its toolpaths typically run along the steep surface parallel to the Z-axis, or step down perpendicular to the tool axis. In this scenario, the tool’s side cutting edge is primarily engaged, with the bottom cutting edge playing a secondary role. This method better utilizes the cutting efficiency of the tool’s side edge, ensuring sidewall perpendicularity and surface quality.

Master Wang’s Hard-Learned Lesson: The ‘Angle Limit’ Pitfall!
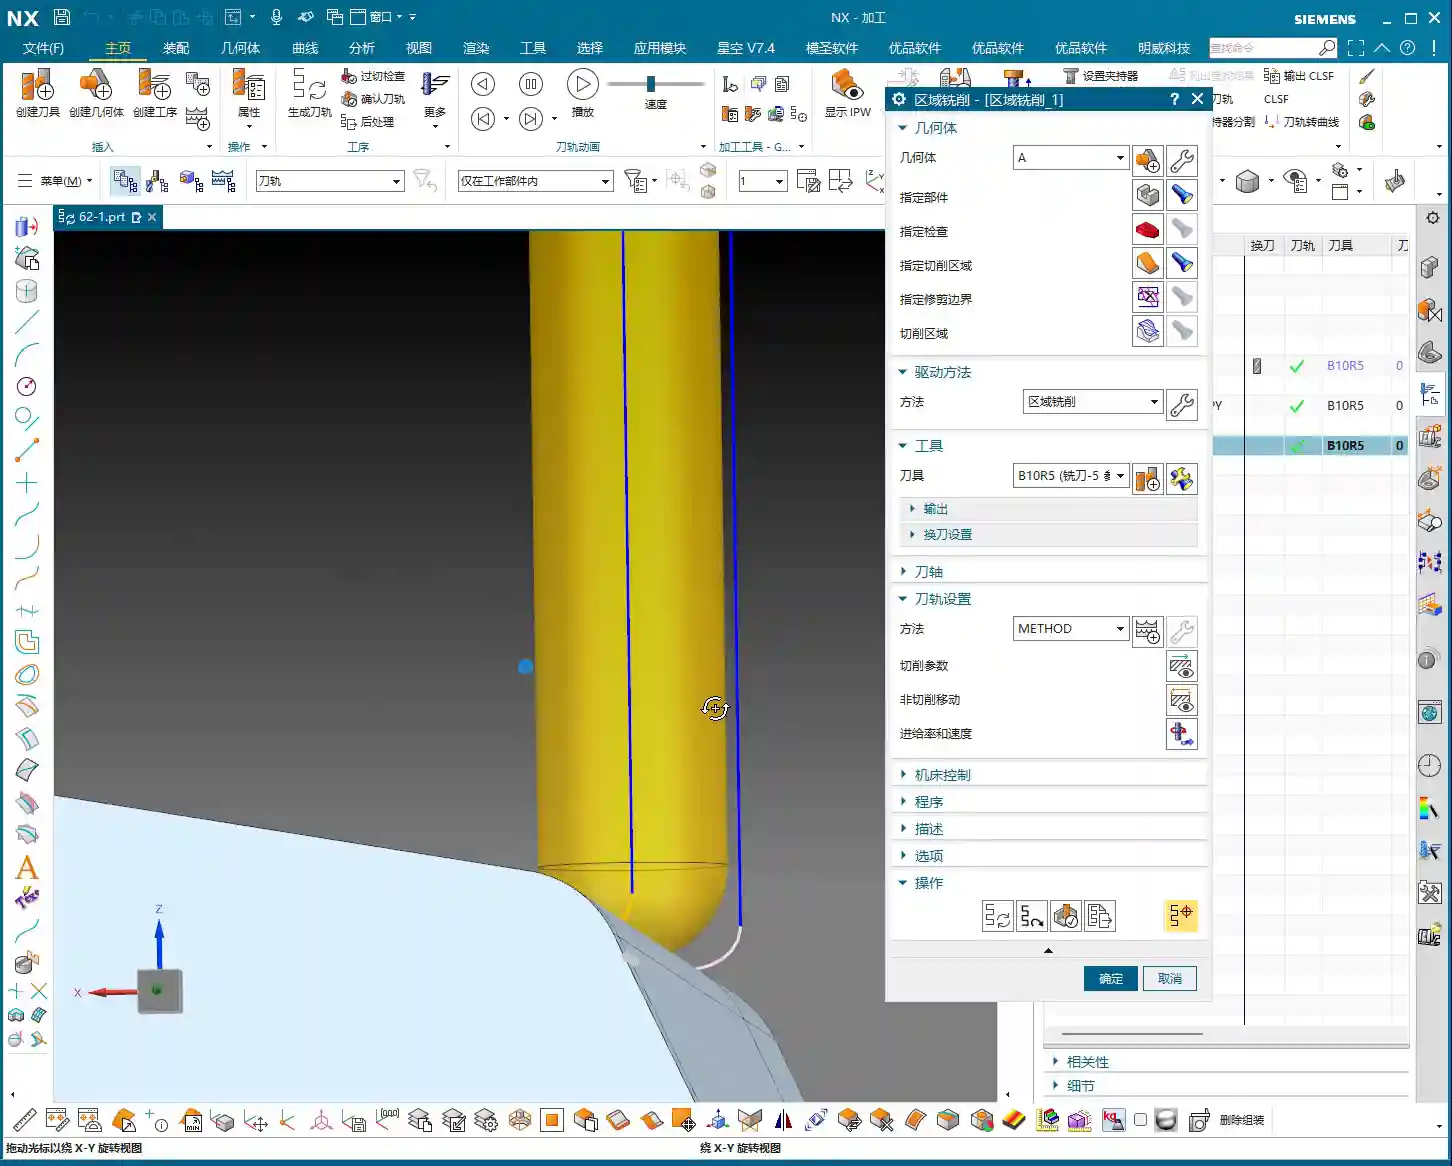
“Listen up, the most common problem area is the ‘Angle Limit’! In Siemens NX, whether for ‘Non-Steep’ or ‘Steep,’ there’s an angle range setting. For example, you set a threshold angle of, say, 65 degrees.
- If you select ‘Non-Steep Area’ machining, it will only machine areas with a slope less than 65 degrees.
- If you select ‘Steep Area’ machining, it will only machine areas with a slope greater than 65 degrees.
The angle value might be the same, but the machining range they represent is completely opposite! I’ve seen countless newcomers try to machine a near-90-degree vertical wall using ‘Non-Steep’ and then set the angle limit to 89 degrees. The software sees, ‘only angles below 89 degrees are considered non-steep,’ so your 90-degree face won’t be machined. What’s worse, even if you loosen the limits and force it to machine, what kind of machining is it to use the bottom of a flat end mill to scrape a vertical wall? That’s destroying tools and ruining parts! High chatter, poor surface quality, short tool life – your costs will skyrocket!“
IV. Practical Drill: How to Select and Set Up Correctly
Let’s dive straight into practical operation.

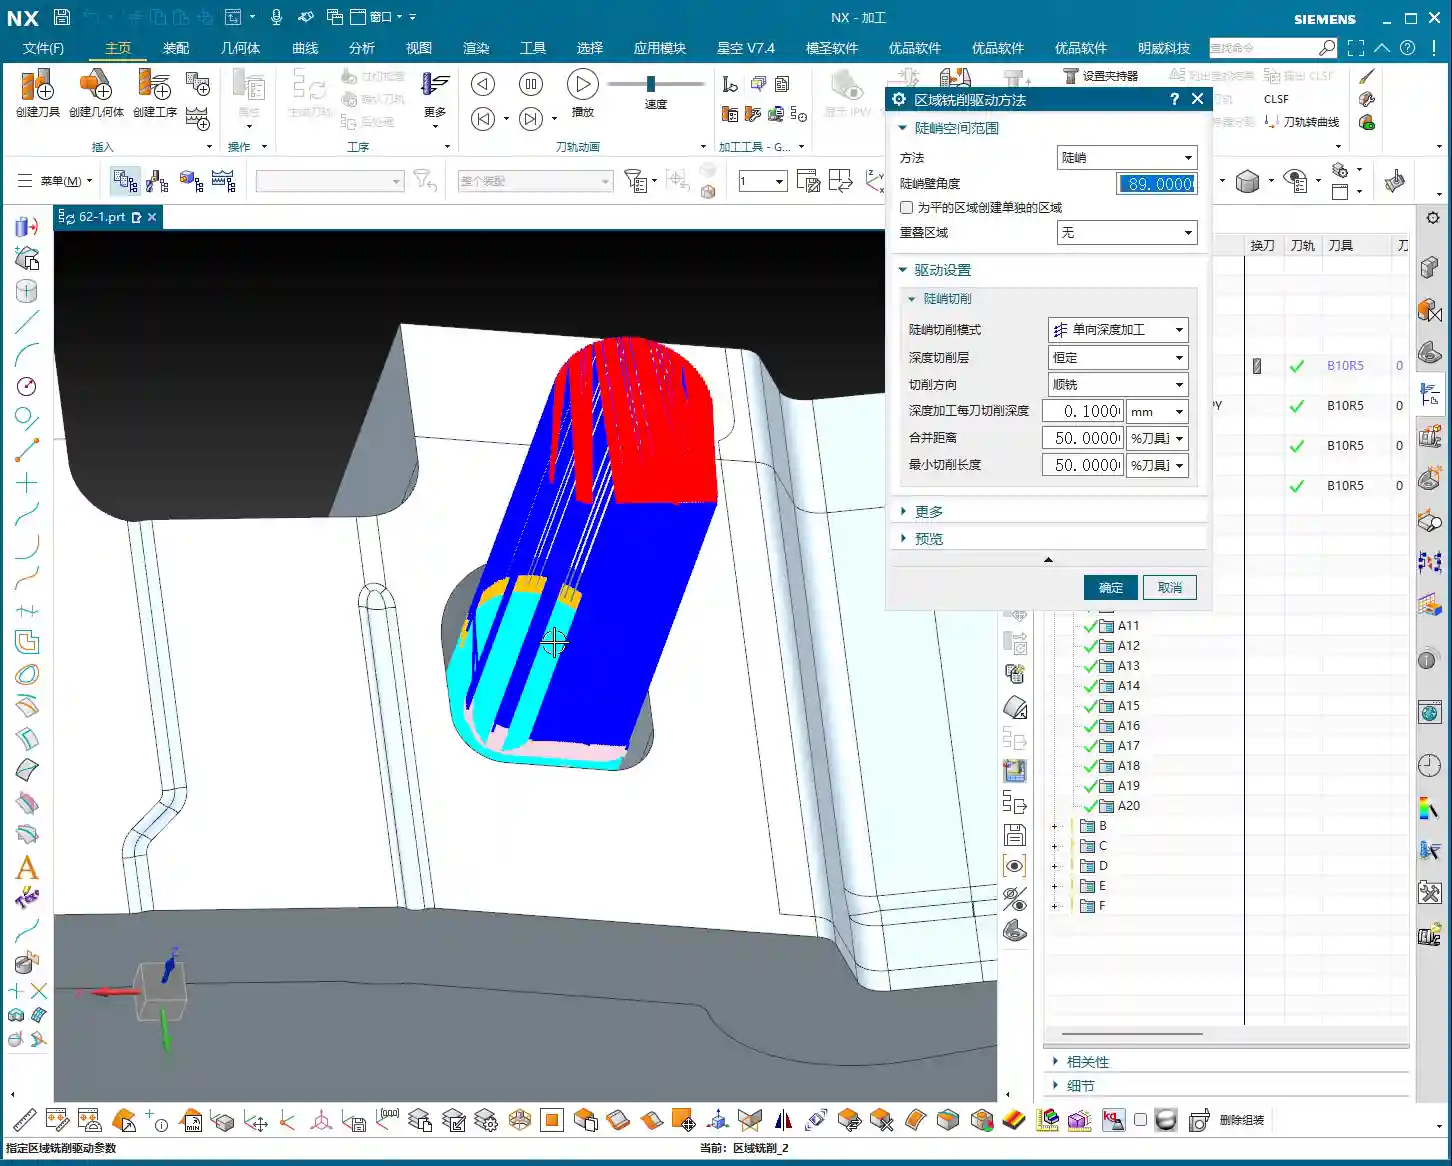
Pitfalls of Non-Steep Area Machining
“As you just saw, I selected a cavity that looked quite steep, but the software defaulted to ‘Non-Steep’ machining. The resulting toolpath looked like ‘climbing a ladder’ on a vertical surface, going down and up, using the tool’s bottom edge to rub against the sidewall. I’m telling you, this kind of toolpath is absolutely unacceptable in production! Especially on complex surfaces, the tool often floats in the air or only uses its tip to cut. Not only is efficiency low, but the surface can also be scarred.
So, when you encounter such steep areas, you can’t just stubbornly force a non-steep approach. In these situations, we typically use helical milling (cutting down gradually with the side edge), or even more advanced smooth contour milling, paired with specialized tooling, to achieve high efficiency and quality.”


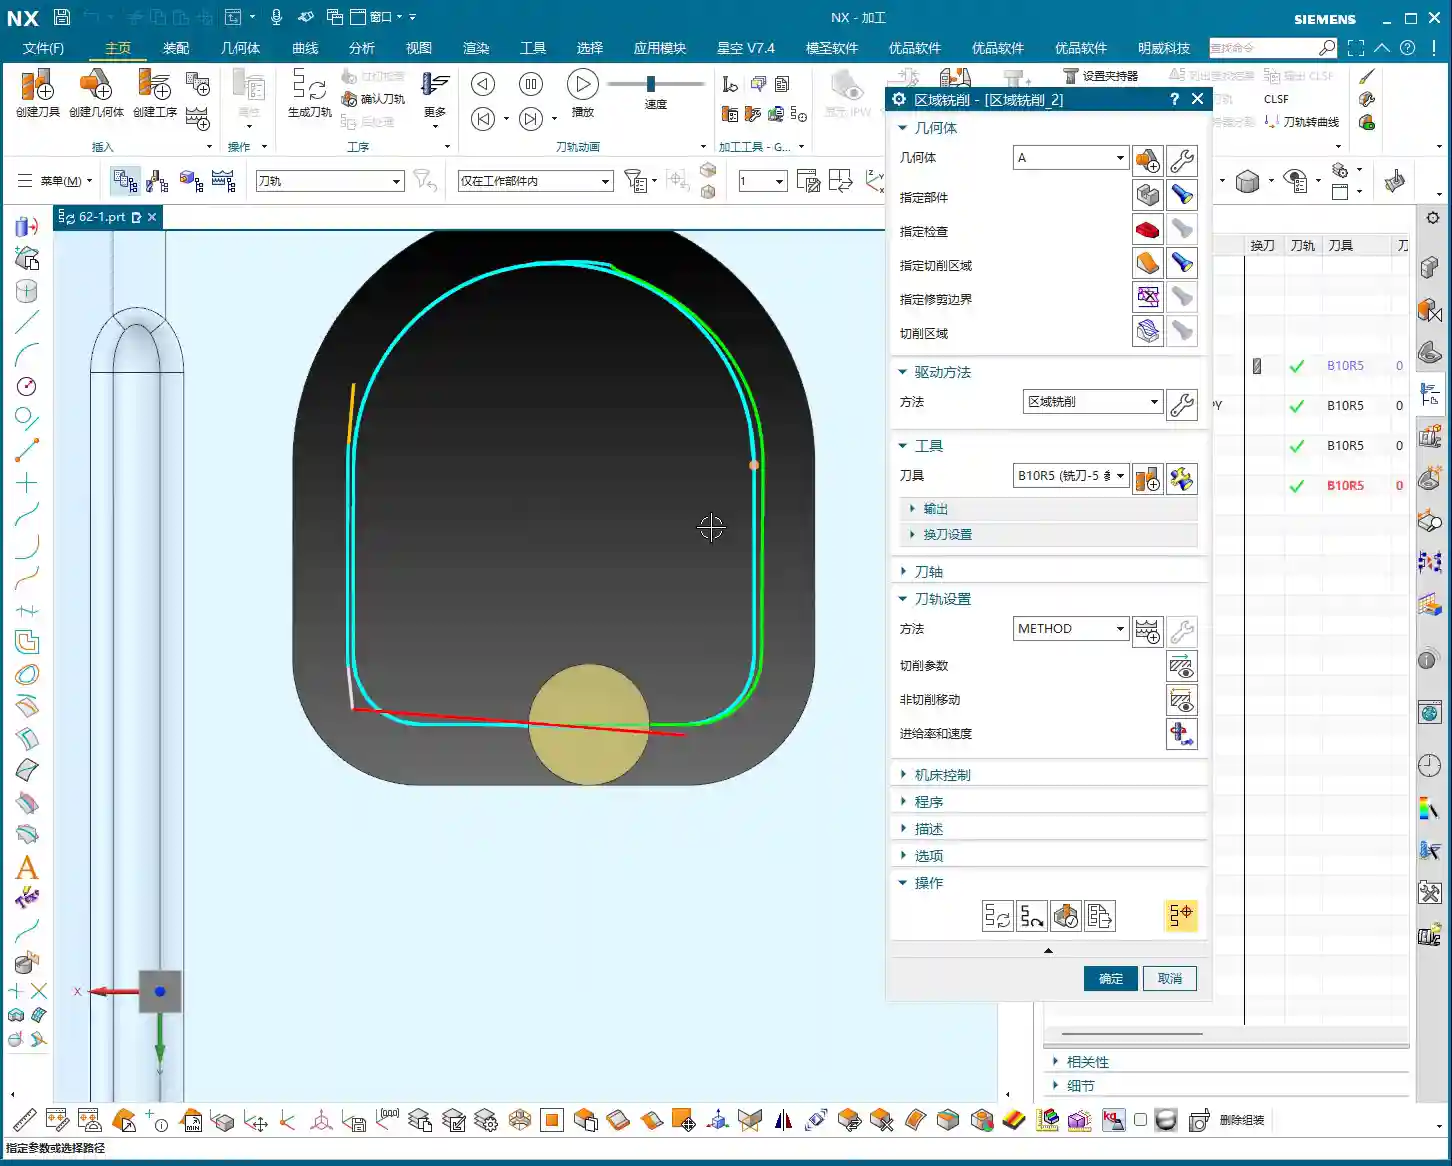
The Correct Approach for Steep Area Machining
“When you switch the machining method to ‘Steep Area,’ you’ll immediately see the toolpath change. It will obediently follow the steep wall, gradually stepping down with a small ‘Depth of Cut (DOC)’ per pass. For instance, we set the ‘Depth of Cut (DOC)’ here to 0.1mm or 1mm (actual value depends on material and accuracy requirements) – this is the golden rule for machining sidewalls.
In this mode, the tool’s side edge is fully utilized, cutting forces are even, machining is stable, and both surface quality and tool life are ensured. Remember, for steep areas, you must use a steep strategy! Don’t try to find a ’roundabout solution’; you’ll only be digging yourself a hole.”
Non-Cutting Moves: Optimizing Entry and Exit for Open Areas
In the “Non-cutting Moves” settings, in addition to the “Smoothing” we discussed earlier, there are also entry methods for “Open Areas.” Here are a couple of options:
- Parallel to Tool Axis: The tool enters or exits the cut with a smooth arc or line, parallel to the tool axis. This method provides stable trajectories, is suitable for finishing passes, and reduces impact.
- Perpendicular to Tool Axis: The tool enters or exits the cut perpendicular to the tool axis, usually appearing as a straight upward and downward lift (i.e., “ascent” behavior). This is particularly effective in situations requiring rapid disengagement from the cutting zone or to avoid sidewall friction.
“These two, ‘Parallel to Tool Axis’ and ‘Perpendicular to Tool Axis,’ are the most commonly used entry methods when dealing with open areas. Switching flexibly based on part geometry, material, and surface requirements can significantly boost machining efficiency and surface quality. Don’t underestimate these details; this is what separates you from those ‘programmers’ who just click buttons!“
Prioritizing Machining Modes
To summarize, there are four most commonly used machining modes in area milling:
- Zig-zag: Most common, highly efficient, suitable for roughing and semi-finishing of most non-steep areas.
- Follow Periphery: Suitable for specific contours, where the toolpath follows the boundary.
- Helical: Often used for deep cavity machining; smooth entry, less chip accumulation.
- Zig-zag with Ascent: Suitable for finishing passes, reduces drag marks, and improves surface quality.
“Among these four, ‘Zig-zag’ is used the most and is practically the default option for area milling. ‘Zig-zag with Ascent,’ as I mentioned, is a great aid for finishing passes. As for other modes like one-way, they can largely be shelved; production efficiency dictates everything!”
Summary: Pitfall Avoidance Guide
- Steep vs. Non-Steep: The core lies in angle range and cutting edge engagement. Non-steep machining uses the tool’s bottom edge for flat surfaces; steep machining uses the tool’s side edge for sidewalls. The logic for their angle limits is opposite, so be sure to distinguish them!
- Don’t try to force a “Non-Steep” strategy on “Steep” areas. Attempting to machine steep regions by loosening non-steep angle limits typically leads to uneven tool loading, poor surface quality, and drastically reduced tool life. When a “Steep Area” strategy is required, use it diligently.
- “Zig-zag with Ascent” is a powerful tool for finishing passes. Combined with the “Smoothing” function, it effectively reduces drag marks and improves the finishing quality of complex surfaces.
- Understand the logic of non-cutting moves. “Parallel to Tool Axis” is primarily for smooth tool entry, while “Perpendicular to Tool Axis” is for rapid lift-off and disengagement in specific scenarios. Flexible selection based on actual conditions optimizes toolpaths and reduces risks.
- Combine theory with practice. No matter how good a software simulation looks, ultimately you need to observe the cutting sparks on the machine, listen to the cutting sound, and examine the actual part’s results. More contemplation and hands-on experience are what truly make you skilled!
👤 About the Author:
The author is a veteran CNC machining professional with 15 years of industry experience, specializing in UG NX programming. This article is an original work representing personal practical insights.
⚠️ Copyright Notice: Unauthorized reproduction or distribution without prior communication is strictly prohibited.