📝 Key Takeaways: Master Wang uses real-world examples to provide a hands-on explanation of the core techniques for cross curves and extension/trimming in NX Streamline Milling. He meticulously compares the differences in tool selection between Streamline and Guide Curve operations and highlights how to leverage Streamline’s unique advantages to efficiently machine complex undercut surfaces. This tutorial emphasizes practicality, efficiency, and cost-effectiveness, offering a series of troubleshooting tips to help you avoid errors and master practical essentials not found in textbooks.
Master Wang’s Talk: Streamline and Cross Curves – All the Ins and Outs Are Here
Hello everyone, I’m Master Wang. Today, let’s talk about “Streamline Milling” in NX, especially its interaction with “Cross Curves.” There’s a lot to know here. While the user interface might seem similar to Guide Curve machining, fundamentally, they’re quite different. Listen up, these are practical tips you won’t find in textbooks. They’ll save you a lot of trial and error on the shop floor and genuinely boost your efficiency!
Step One: Workpiece Coordinate System Setup and Geometry Preparation
To get the job done, you first need to get your setup right. Let’s take the workpiece we have; this area needs to be machined using Streamline. So, the first critical step is to correctly position your Work Coordinate System (WCS).
Remember, the Z-axis must point upwards – that’s a golden rule for milling operations! If your coordinate system is incorrect, your tool paths will be useless.
Next, you need to create the geometry for machining. Some younger engineers prefer to use the built-in NX features, which is fine. But if you have your own templates, calling them directly is much faster and more reliable, saving you from reconfiguring everything each time.
Step Two: Operation Selection and Curve Definition – Distinguishing “Streamline” from “Cross” is Key!
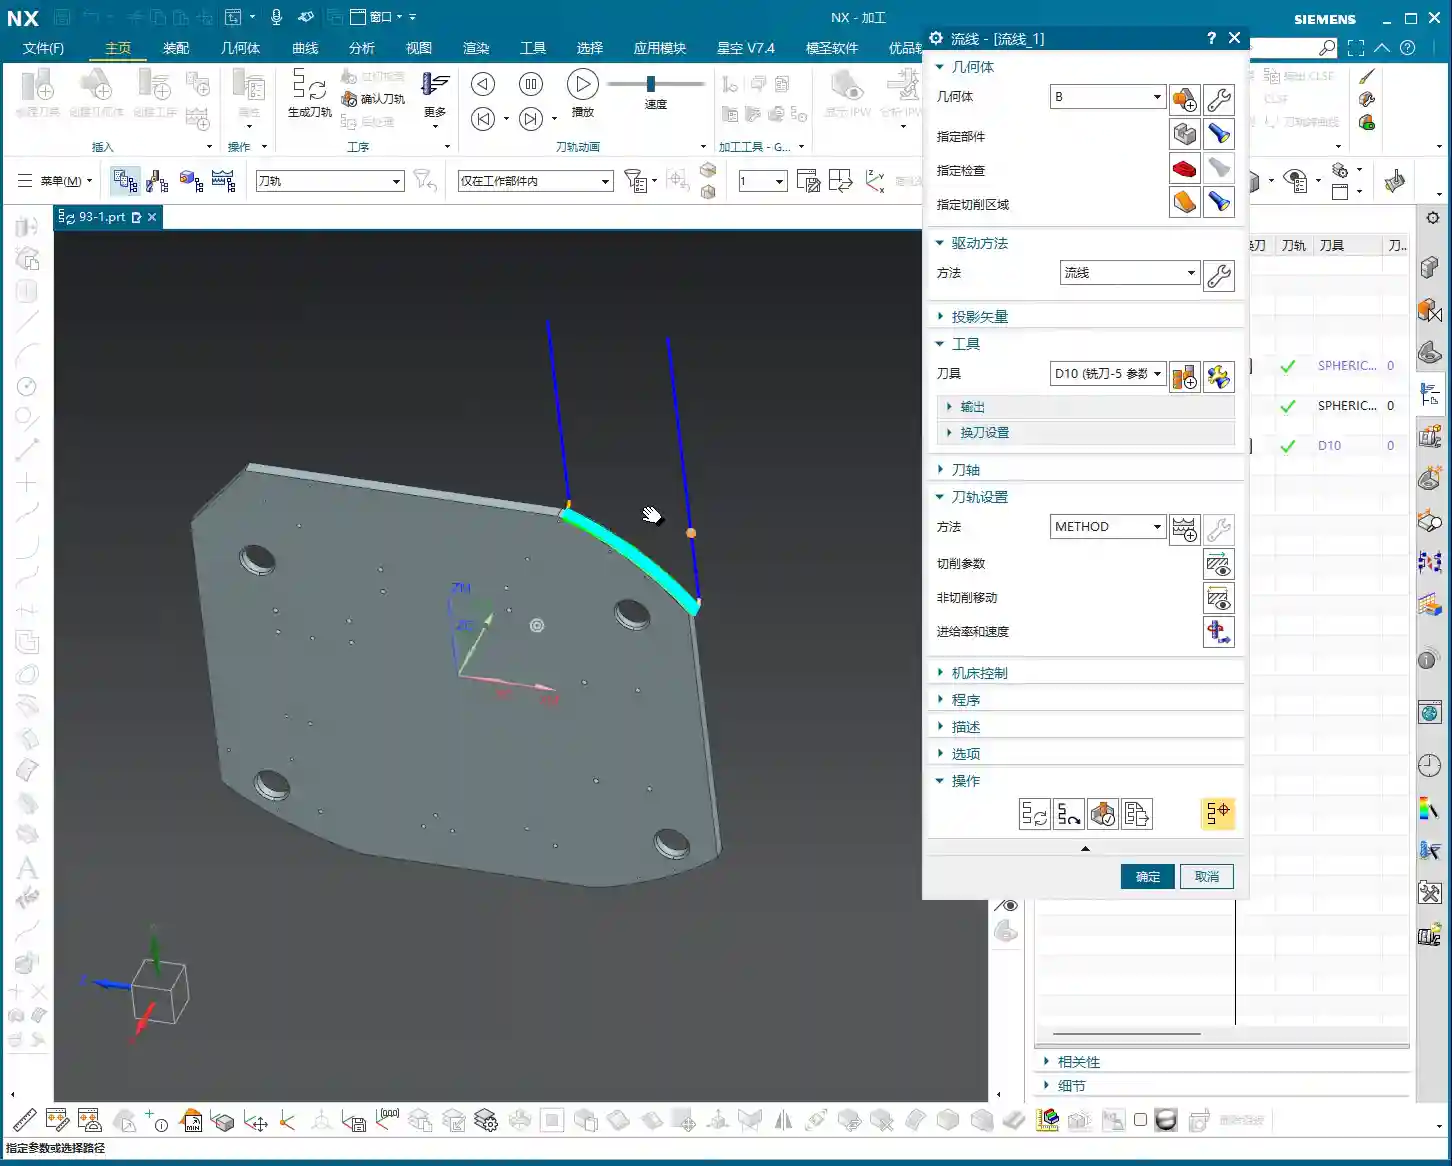
Alright, with the coordinate system and geometry in place, the next step is to select the appropriate operation. We’ll insert a machining operation, select a Type B operation (this usually refers to a specific cutting strategy or tool type), and then choose the “Streamline” machining method.

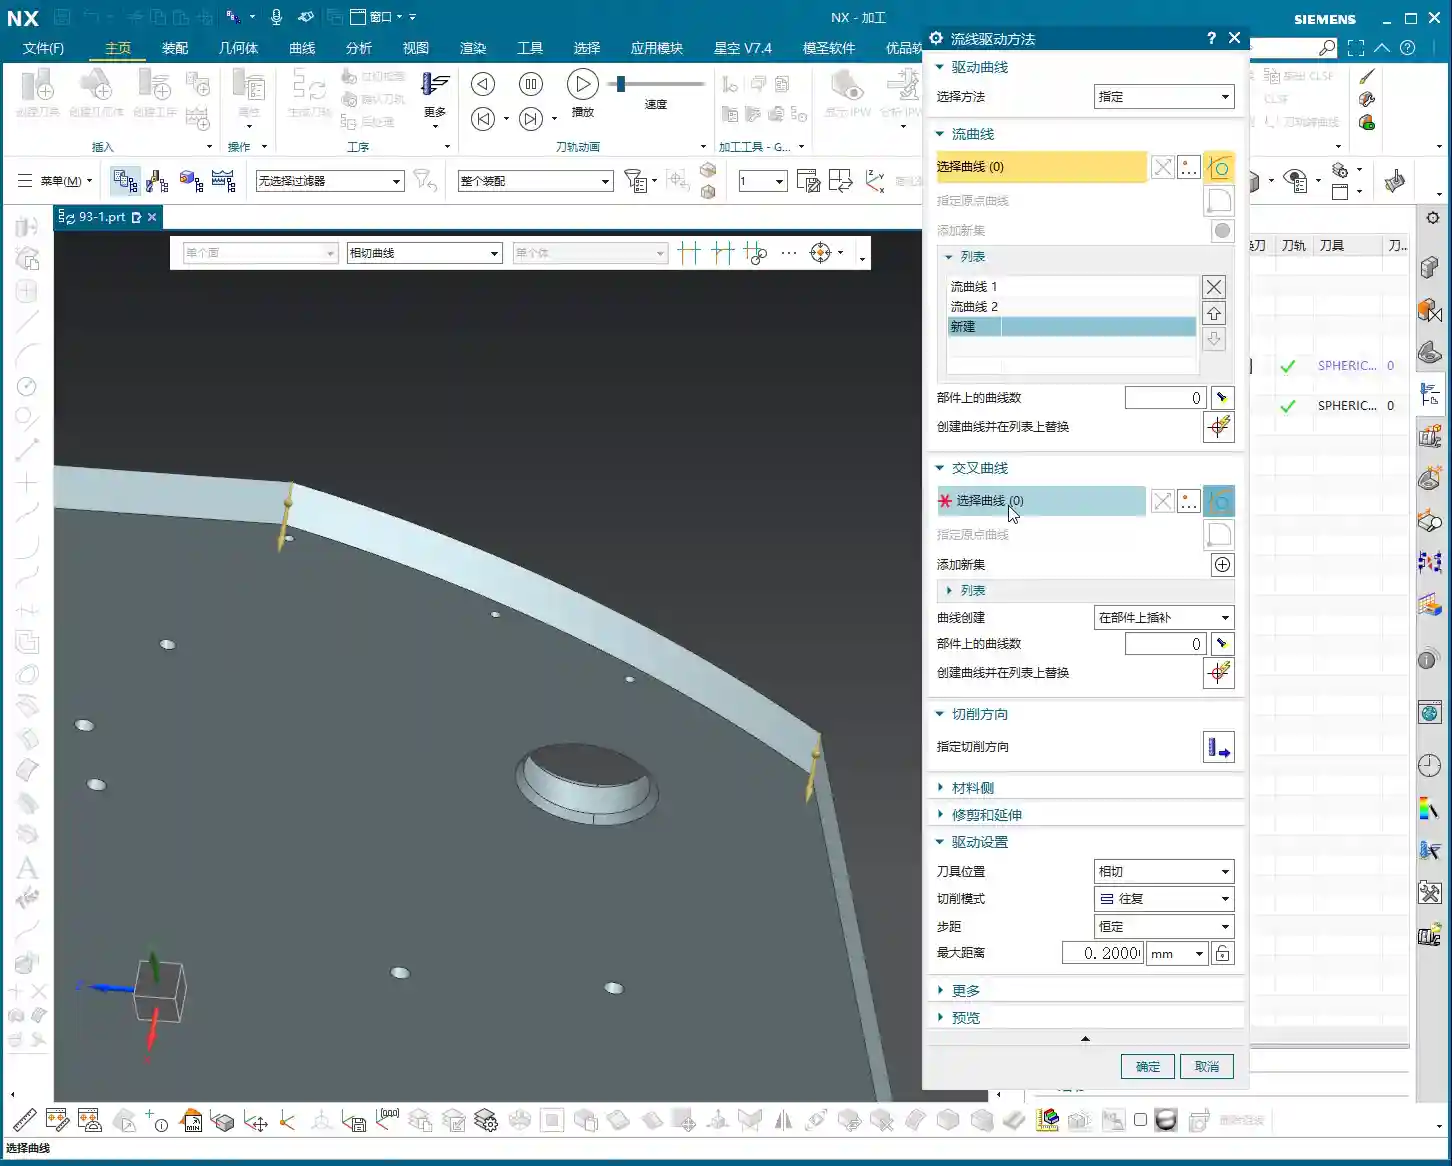
Next, we define the critical curves. Here, I want to emphasize that this is where beginners most often get confused, and it’s also where you’re most likely to encounter unexpected Depth of Cut (DOC)!
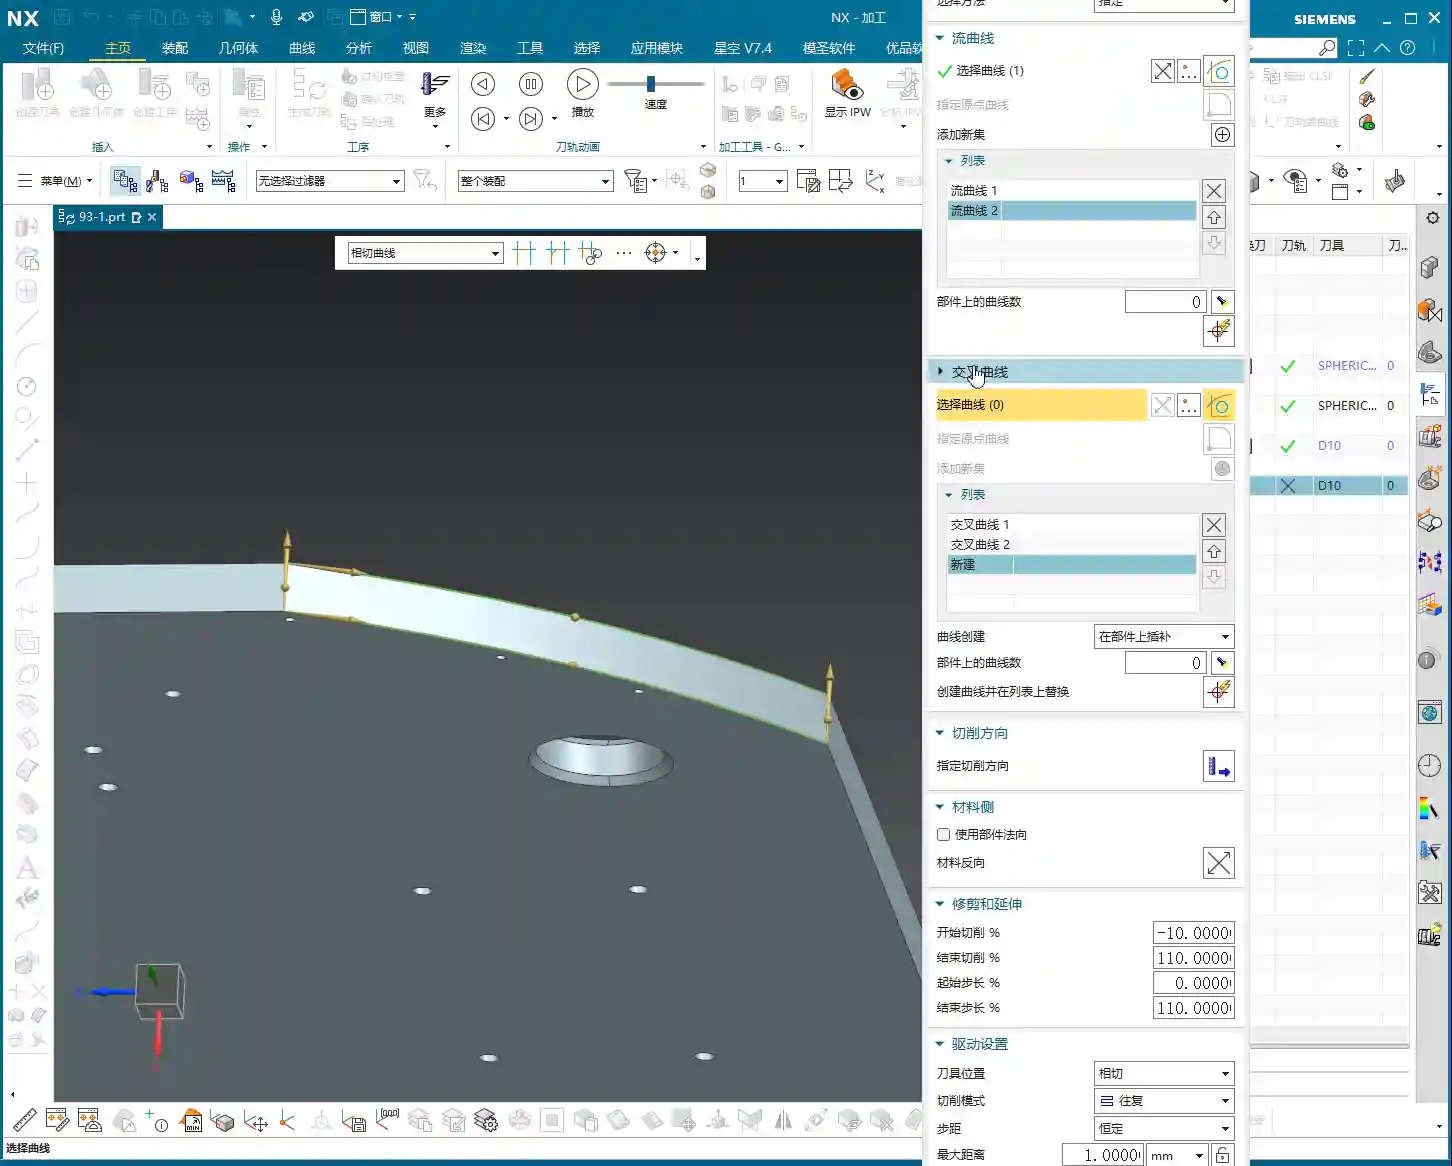
First, you define the “Streamline Curves.” Typically, we select two, such as “Streamline 1” and “Streamline 2.” These define the primary direction and extent of the tool path.
Next comes the main event: the “Cross Curves.” You’ll often find one or more auxiliary curves between the two Streamline Curves. These are the Cross Curves. Master Wang tells you, in Streamline Milling, these Cross Curves must be selected, and selected correctly! They determine the distribution and Stepover of the tool along the Streamline direction.
Listen up, distinguishing between “Streamline Curves” and “Cross Curves” is fundamental! The Streamline Curves are the main framework of your tool path, defining the tool’s direction; the Cross Curves are auxiliary lines, determining the density and distribution of the tool along that framework. Do not select them incorrectly, or your tool path will either error out or be completely unusable! The direction arrows are secondary; up, down, left, or right are all acceptable, the key is to select the correct curves themselves.
Unique Advantages of NX Streamline Milling: Tool Selection and Parameter Fine-Tuning

Breaking Through Guide Curve Tool Limitations, Boosting Machining Efficiency
Many younger engineers new to NX programming might think Streamline Milling is similar to Guide Curve Milling. Indeed, from an operational standpoint, both involve selecting a few curves and generating tool paths. However, Streamline Milling has an advantage that Guide Curve operations can’t match: tool selection flexibility!
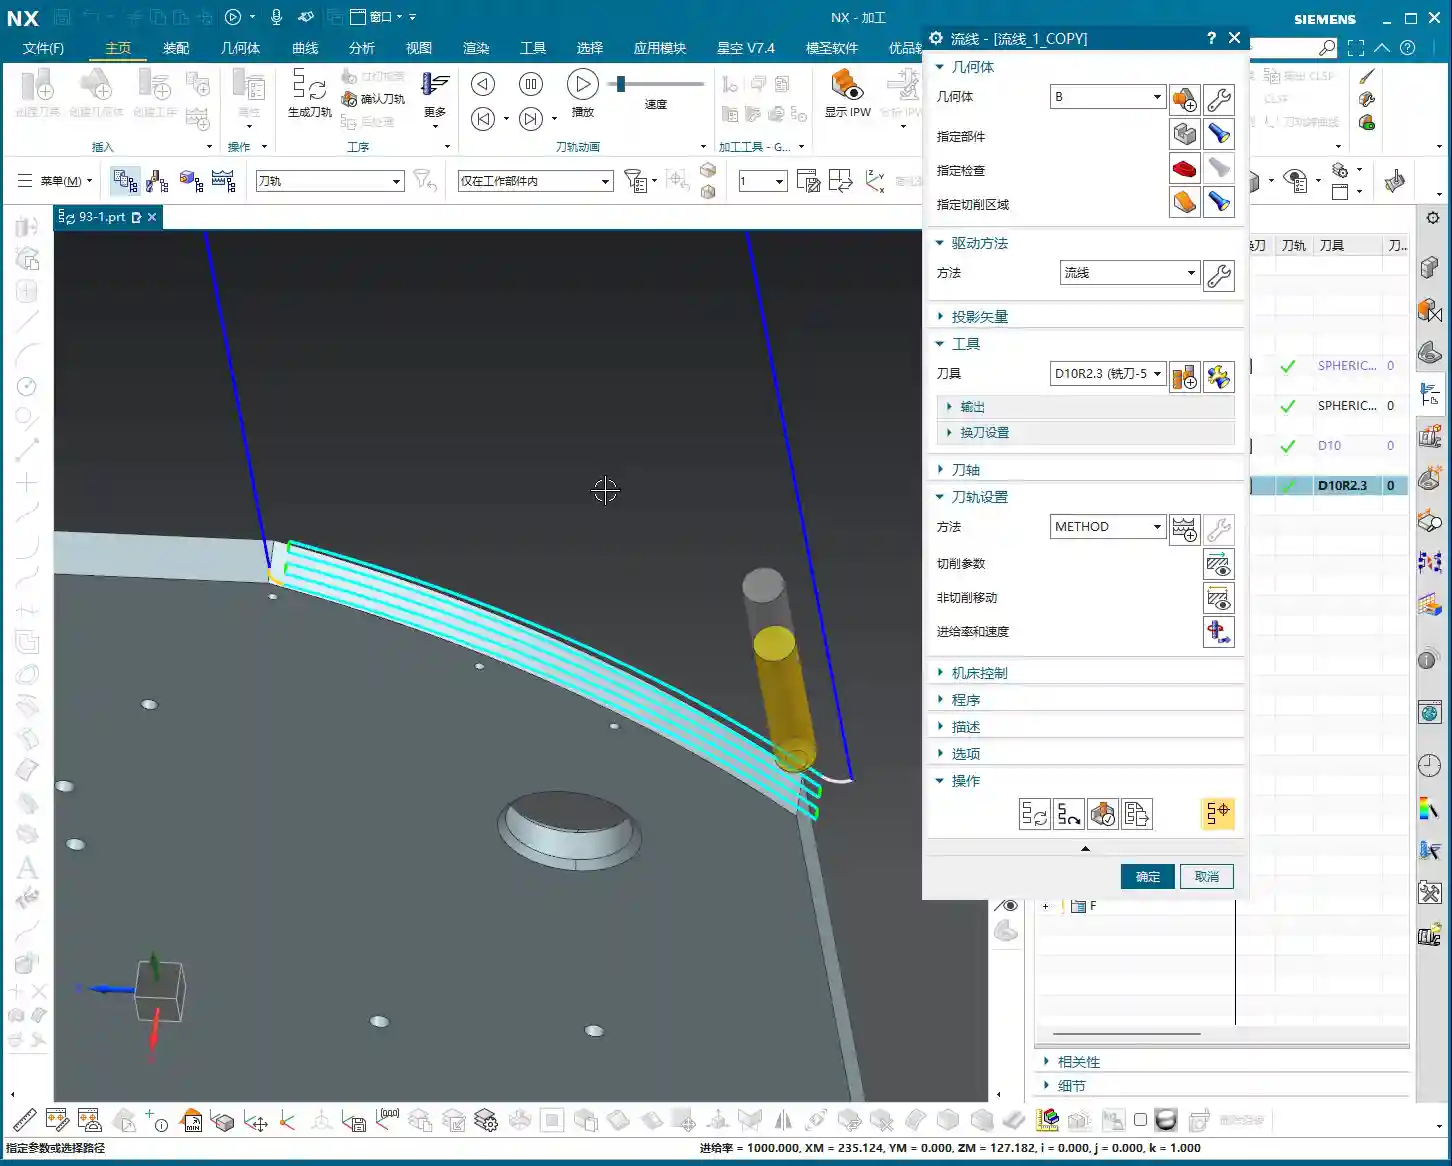
In newer versions of NX, Streamline Milling allows you to freely select various tool types, such as corner radius end mills (R-cutters), flat end mills, and even some custom tools. Guide Curve operations, however, are often limited to ball end mills. What does this mean?
This means when you need to machine parts with small fillets, undercuts, or complex curved surfaces, Streamline Milling enables you to select a more suitable tool, significantly improving both machining efficiency and surface finish. For instance, for the same undercut feature, machining with a corner radius end mill will definitely be faster than with a ball end mill, and the Depth of Cut will be more stable. This is a tangible cost benefit, directly reflected in machining time!
Parameter Deep Dive: The Art of Extension and Trimming
Another powerful aspect of Streamline Milling is its precise control over “extension” and “trimming” parameters. This function helps you prevent incomplete cutting or over-cutting issues when machining complex areas.
In the “Trim/Extend” options, you’ll see “Start Length” and “End Length.” These two parameters aren’t to be filled in randomly; they correspond to the start and end points of your selected Streamline Curves. If you select Streamline 1 first, then Streamline 2, “Start Length” will control the extension or trimming at the Streamline 1 end, while “End Length” will control the Streamline 2 end.
Here’s a tip: Enter a positive value for the extension length, and the tool path will extend outwards; enter a negative value, and it will shorten inwards. This function is particularly useful when dealing with irregular boundaries or when needing to avoid tool collisions. Don’t just rely on software simulation; the actual cutting sparks on the machine are the ultimate test of your parameters!
Furthermore, “Vertical Extension” and “Horizontal Extension” control the tool path’s expansion in different directions. When dealing with features like undercuts, we often need to adjust the “Horizontal Extension” to ensure the tool fully covers the machining area or avoids cutting where it shouldn’t.

Machining Strategy: Avoiding the “Closed Region” Pitfall
Many younger engineers ask why the “Start Length” and “End Length” parameters in Streamline Milling are sometimes grayed out and cannot be adjusted.
This is because your selected streamline forms a closed region, such as a complete circle or a closed annular groove. In such cases, there are no clear “start” and “end” points, so these parameters become inactive. You can only adjust extension or trimming when your selected streamline is an open curve.
Therefore, before performing Streamline Milling, carefully observe your geometric features to determine if they are suitable for using these extension parameters. For closed circular undercuts, even though extension isn’t possible, the streamline operation itself can effectively complete the machining with high efficiency.
Streamline Milling Applications and Efficiency Improvement

Efficiently Conquering “Undercuts” and Complex Surface Milling
In my many years in machining, while Streamline Milling isn’t as common in production as Area Milling, it’s an absolute ‘ace’ when tackling specific complex features!
The most typical application scenarios are machining “undercuts” and complex curved grooves. These features are often difficult to complete in a single operation using conventional Area Milling or Contour Milling, or they require extensive programming time, and the tool path efficiency is low.
However, with Streamline Milling, especially when combined with flexible tool selection like a corner radius end mill (R-cutter), it can be easily achieved. You just need to define the streamline and cross curves, and NX will automatically generate efficient and smooth tool paths. For complex arc undercuts like these, I recommend don’t even consider other commands; just use Streamline, and you’ll achieve twice the result with half the effort!
The Golden Rule of Operation Selection: Best Fit is Best
Those of us in machining need to remember one thing: there is no single best command, only the most suitable one.
Streamline Milling has its unique advantages, especially in tool selection and handling undercuts, which many other commands cannot replace. However, it also has limitations; for instance, for most flat or open area milling, Area Milling will be more efficient. Therefore, when encountering different parts and different machining regions, we must flexibly select the operation.
These two points are critical for improving efficiency and reducing costs: first, understanding the characteristics of each command; and second, selecting the most appropriate machining operation and tool based on part features and machining requirements.
Summary: Pitfall Avoidance Guide
- Distinguish Streamline from Cross Curves: This is the foundation of Streamline Milling. Streamlines define the primary direction, while Cross Curves determine the Stepover. Select them incorrectly, and your tool path is wasted.
- Flexible Tool Selection: A major advantage of Streamline Milling is the ability to use non-ball end mills, such as corner radius end mills (R-cutters). Fully leveraging this can significantly boost efficiency and surface finish. Stop rigidly sticking to ball end mills!
- Understand Extension Parameter Limitations: “Start/End Length” parameters are only effective for open curves. If you encounter a closed region, these parameters will be grayed out; don’t overthink it, proceed with normal calculation.
- Validate Parameters in Practice: After setting extension and trimming parameters, don’t just rely on NX simulation. Adjust them based on actual cutting conditions. Cutting sparks and chip formation are all indicators for judging the rationality of your parameters.
- Practice Diligently and Experiment: NX parameters are highly varied. Only by exploring and practicing extensively on your own can you truly grasp its essence.
- No Universal Operation: While Streamline Milling is powerful, it’s not suitable for all situations. In practical work, you must select the most appropriate operation based on the machining features to achieve optimal results.
Alright, that wraps up our discussion on Streamline Milling for today. I hope these experiences of mine can help you avoid pitfalls and increase your output in actual machining. See you next time!
👤 About the Author:
The author is a veteran CNC machining professional with 15 years of industry experience, specializing in UG NX programming. This article is an original work representing personal practical insights.
⚠️ Copyright Notice: Unauthorized reproduction or distribution without prior communication is strictly prohibited.