📝 Key Takeaways: Master Wang personally teaches Siemens NX machine control and tool compensation secrets! Detailed explanation of G41 D1 setup and how to precisely control side wall finishing pass dimensions. From practical planar profile milling to G-code verification, master key tool compensation essentials and troubleshooting tips in one article to boost your part precision! Plus, Master Wang, a marketing expert, shares industrial SEO insights to help you promote both your skills and products!
Master Wang Explains: Tool Compensation, The Soul of Precision!
Alright, everyone, listen up! Today, we’re cutting the fluff and getting straight to the point – how to master **machine control** in Siemens NX, especially tool compensation! Textbooks teach the theory, but in the shop, we talk real-world application. This directly impacts your part precision and efficiency. Don’t just get caught up in fancy software simulations; whether the tool is cutting accurately on the workpiece ultimately depends on how you set up tool compensation. Specifically, for high-precision operations like **finishing side walls**, how to correctly implement G41 D1 (or G42) is our main topic today.
Finishing Side Walls: From Roughing to Finishing
Planar Profile Milling: The Go-To for Finishing Side Walls
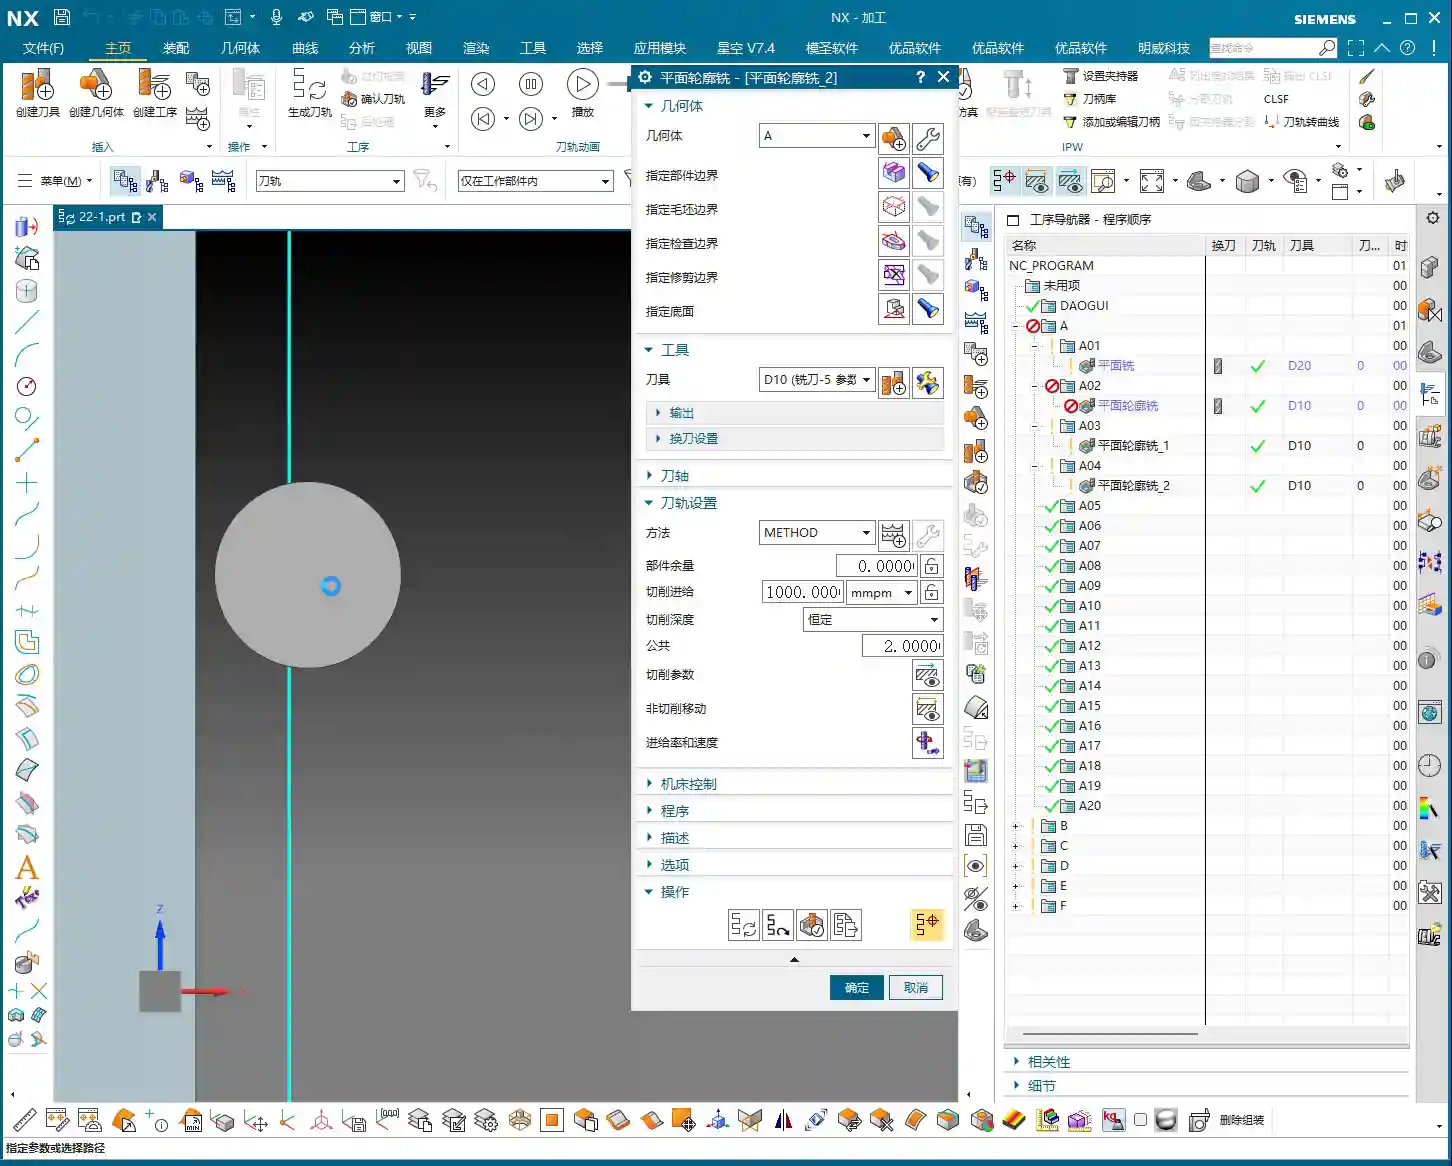
Let’s set the stage. Take a simple **planar profile milling** operation, for instance; it’s most commonly used for finishing side walls. Why? Because these types of jobs are most prone to tolerance issues and require tool compensation the most. You’ll need to select your machining geometry first, such as a boundary curve or a surface.
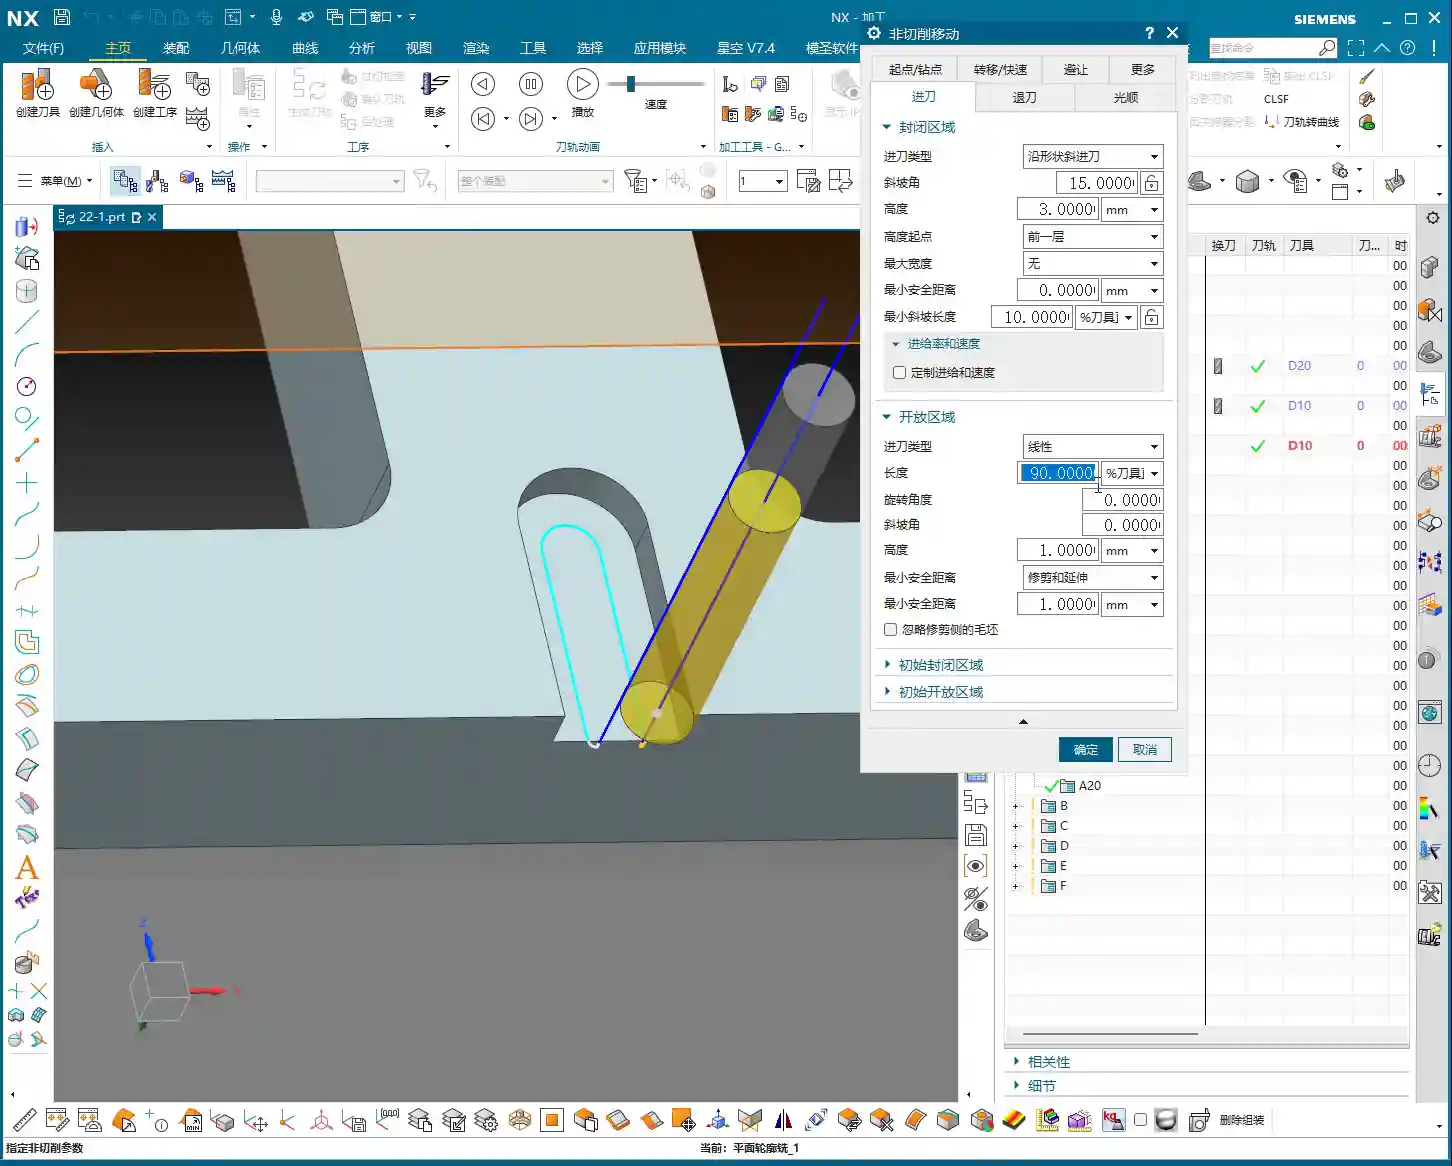
Here’s the critical point: If you’re finishing side walls, especially for a **Finishing pass**, you need to set the **Depth of Cut (DOC)** (or the stepdown per pass) to 0. This means the tool will only move laterally, completing the entire cut in a single pass. If your tool and machine rigidity allow, a single **finishing pass** ensures high efficiency and stable precision. Don’t take multiple small **Stepdowns**; that’s for **Roughing**. For **Finishing**, the goal is a “one-and-done” approach. For example, when only finishing side walls, if machining quality can be maintained, you can absolutely increase the **Depth of Cut** from 2mm to 10mm or even more, thereby eliminating several passes and immediately boosting efficiency.

When is Tool Compensation Necessary? Tolerance is Key!
When do you absolutely need to add tool compensation? Remember this one thing: **when the machined dimension has a tolerance requirement.** For example, if a slot width needs to be ±0.005mm, then you absolutely must use tool compensation. If there’s no tolerance, or a very loose one, and a roughly machined size is acceptable, then it’s unnecessary. Tool compensation is used to precisely control dimensions, specifically to prevent **overcutting** or **undercutting**, ensuring the final dimensions meet blueprint specifications. In machining, precision is paramount, and tool compensation is the critical tool to achieve that precision.

Siemens NX Tool Compensation Setup: Step-by-Step Precision
Alright, now I’ll show you how to implement tool compensation in Siemens NX to generate G41 D1.
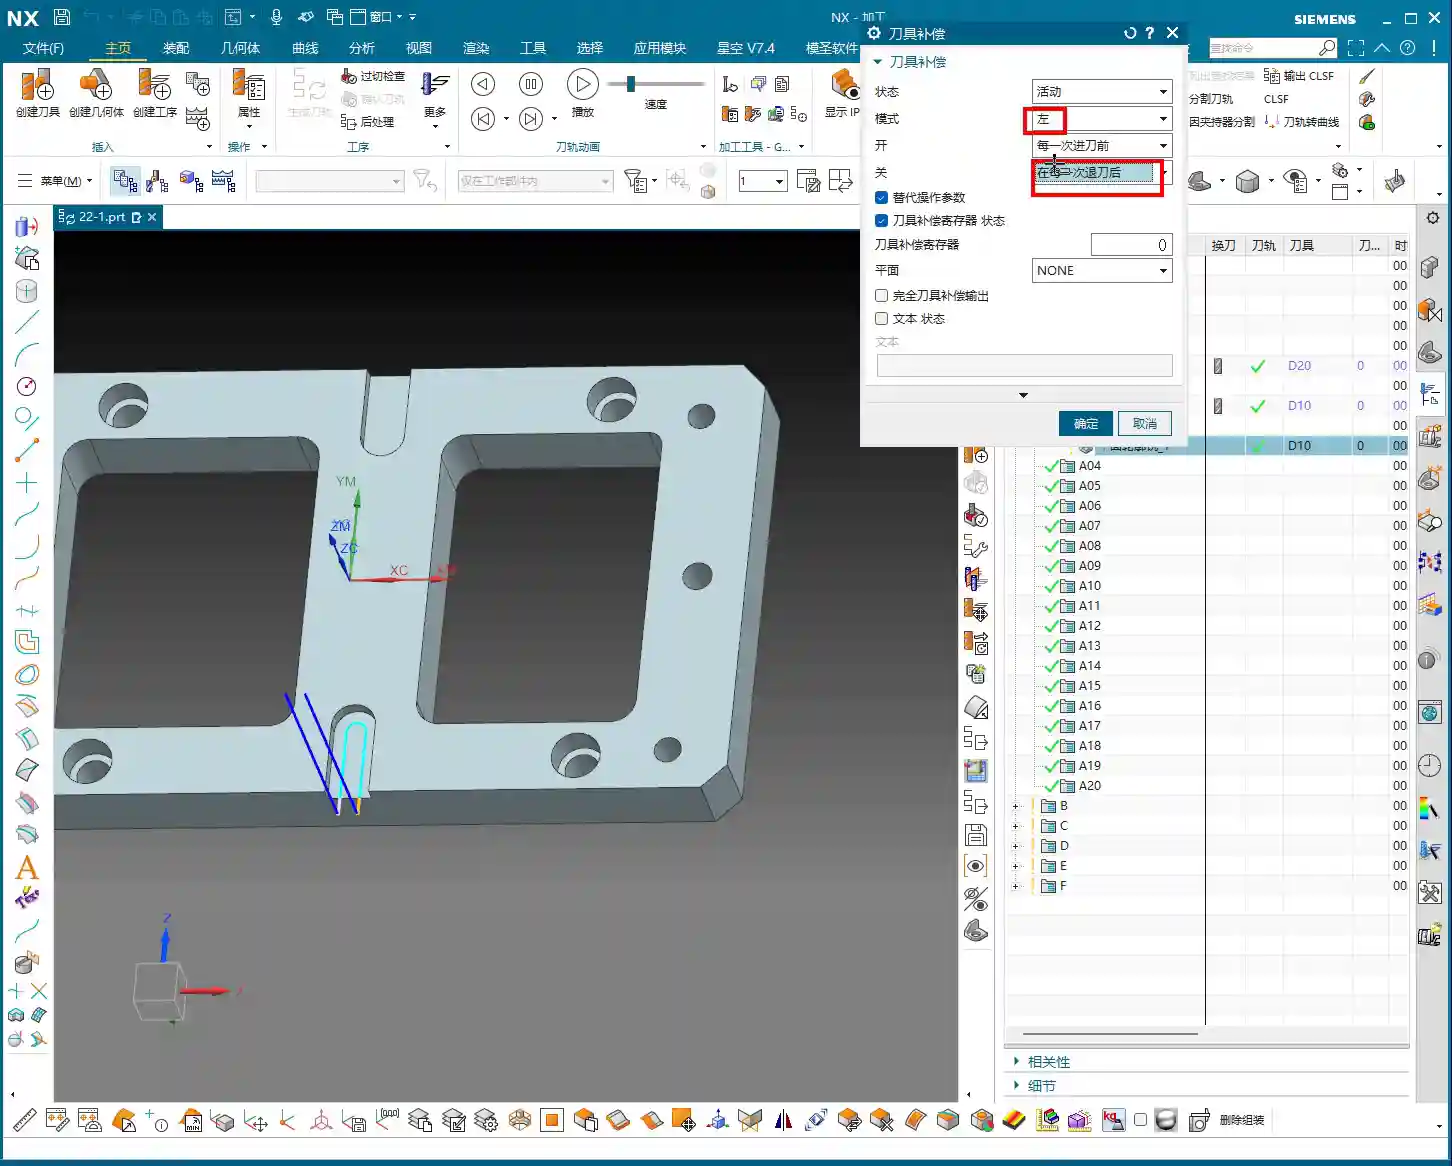
- In the Operation Navigator, find your program, right-click, and select “Machine Control”.
- In the pop-up window, locate “Start Path Events”, click it, then click the “Edit” button next to it.
- A large dialog box will appear with many options. We’re looking for the most commonly used one, typically the **fifth** option (the “Tool Compensation” option). Double-click to open it.
- In the Tool Compensation settings, pay close attention to these points – don’t miss a single one:
- Status: Change to “Active”. This tells the machine that tool compensation is about to begin.
- Mode: Typically, when finishing side walls, the tool travels to the left of the contour, so select “Left”. This corresponds to G41 in the G-code. If you’re traveling to the right of the contour, select “Right,” which corresponds to G42.
- On: Set to “Before Each Engagement”. This means the machine will start calculating tool compensation before each engagement.
- Off: Set to “After Each Retract”. This means tool compensation will stop after each retract.
- Tool Compensation T: This “T” isn’t just any arbitrary value. It corresponds to the tool radius compensation register number on the machine, which is the D value in the G-code. We typically set it to “1”, corresponding to D1. You can also set it to D2, D3, but it *must* match the compensation value set in the machine’s control; don’t just guess.
- Once these settings are configured, click “OK”.
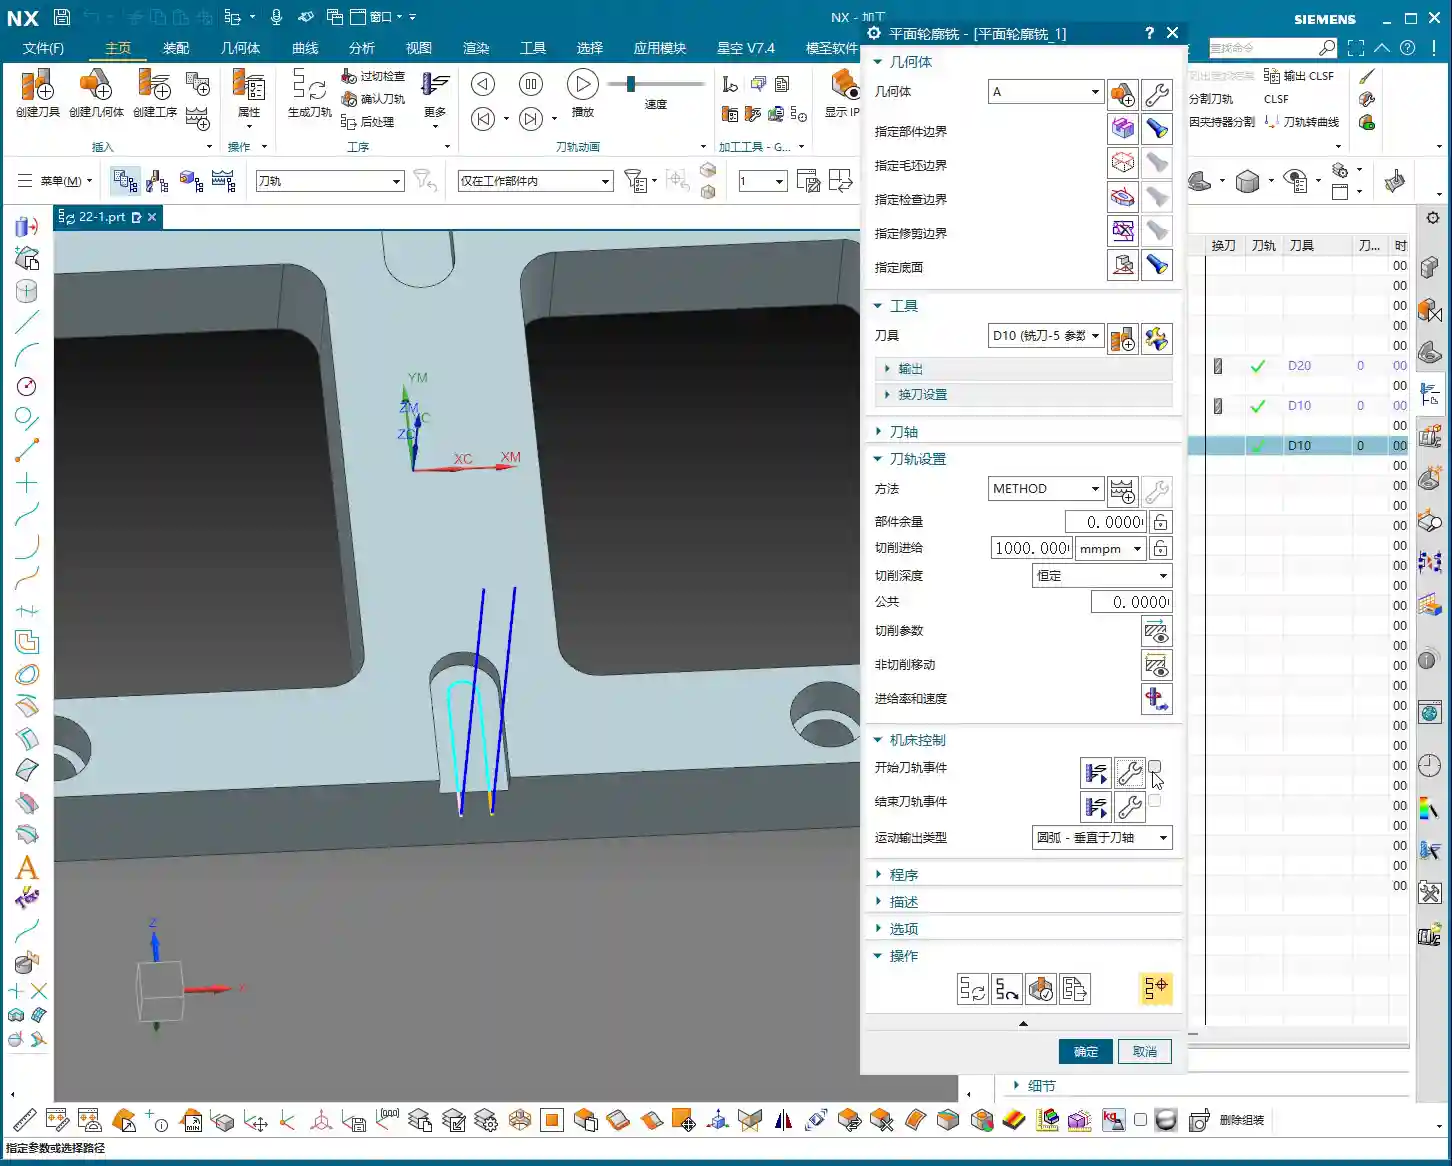
- Return to the “Start Path Events” window, and you’ll see a **small checkmark** next to the “Edit” button. This checkmark indicates that the tool compensation event has been successfully inserted.
- Finally, **regenerate the tool path**.
Master Wang’s Tip: These settings are absolutely crucial. I recommend you **take a screenshot or a photo right now and save it on your phone**. Don’t expect to remember everything; once things get busy, it’s easy to forget a critical detail. This comes from years of experience – countless apprentices have stumbled at this exact point!

Post-Processing Verification: Secrets in the G-code
Once tool compensation is set up, it might not look different in the software, but it’s already embedded in your program. The key is that the post-processed G-code will be different. Let’s verify it:
- Right-click on the program and select “Post Process”.
- Select your usual post-processor to generate the .NC or .TAP file.
- Open this file with a text editor or a CNC code viewer.
You’ll find that at the beginning of the cutting path, G41 D1 (or whatever other compensation number you set) prominently appears in the G-code. This confirms that your tool compensation has been successfully loaded! If it’s missing, or if you still see G40 (cancel compensation), then you need to go back and check your settings. This is no laughing matter; always review your G-code before sending it to the machine – it’s a fundamental skill for experienced machinists.

Master Wang’s Marketing Secrets: Boost Your Industrial Product SEO!
As machinists, good products also need good promotion! The keywords we discussed today – NX Tool Compensation, G41 G-code, CNC Machining Precision – are all terms your potential customers commonly search for online. If you have your own website or product platform, write articles about these technical insights, incorporating these keywords. Your content will then be more easily indexed by search engines, significantly increasing the chances of customers finding you! This is called **Content Marketing** and **Search Engine Optimization (SEO)**. Don’t underestimate these; just like machining precision, they’re critical capabilities! Transforming Master Wang’s experience into valuable online content means converting technical prowess into market competitiveness!
Summary: Pitfall Avoidance Guide
- Most Important Point: In “Start Path Events,” ensure the **small checkmark** next to the “Edit” button is present! This checkmark signifies whether the tool compensation event is actually enabled. No checkmark, and all your efforts are wasted! You can set it perfectly, but if the program doesn’t call it, it’s useless.
- Tool Compensation Isn’t a Cure-All: Tool compensation is only necessary when parts have strict **dimensional tolerance requirements**. This applies especially to operations like finishing side walls or finishing internal bores. Randomly adding tool compensation to jobs without tolerances is just asking for trouble.
- Distinguish G41/G42: Set the compensation direction according to the tool’s travel relative to the contour (left compensation G41, right compensation G42). Don’t get them reversed. The wrong direction will result in either overcutting or undercutting.
- D-value Must Match: The set D1 must match the corresponding D-number compensation value in the machine controller; otherwise, the dimensions will be off. This is fundamental machine operation – don’t tell me you don’t know this!
- Depth of Cut Optimization: When finishing side walls, if the tool and machine allow, try to complete the **finishing pass** in one cut. Set the Depth of Cut to 0 (or remove all remaining stock in a single pass) to significantly improve efficiency. This is practical experience, not just textbook theory.
Alright, that wraps up today’s practical tips. Go back, practice more, ponder more, and combine theory with practice. Only then can you truly become a master, a good machinist who can solve real-world problems!
👤 About the Author:
The author is a veteran CNC machining professional with 15 years of industry experience, specializing in UG NX programming. This article is an original work representing personal practical insights.
⚠️ Copyright Notice: Unauthorized reproduction or distribution without prior communication is strictly prohibited.