📝 Key Takeaways: Master Wang gives a hands-on tutorial, thoroughly analyzing the core parameter settings and practical applications for Approach, Open Area, and Retract in UG NX 1980. This guide helps avoid common machining pitfalls, significantly improving processing efficiency and surface quality. From linear approach to helical, arc, and ramp approaches, and then to retract strategies, each step is combined with practical experience to ensure you learn hard-core knowledge that’s ‘ready for the machine.’
Introduction: The ‘Tool Tip Dancers’ of Machining Efficiency
Hello everyone, I’m Master Wang! Today, let’s cut to the chase and talk about the practical aspects of setting up Approach, Open Area, and Retract in UG NX programming. These aren’t just fancy features; they directly impact your machining efficiency and part surface quality. Listen up, this isn’t something you’ll necessarily learn from books, but rather through hands-on experience on the shop floor.
Part One: Approach Strategies
Let’s start with the approach. Choosing the wrong approach method can lead to low efficiency, or worse, scrapped parts and broken tools. So, you need to thoroughly understand the nuances here.
1. Basic Setup and ‘Linear Move’
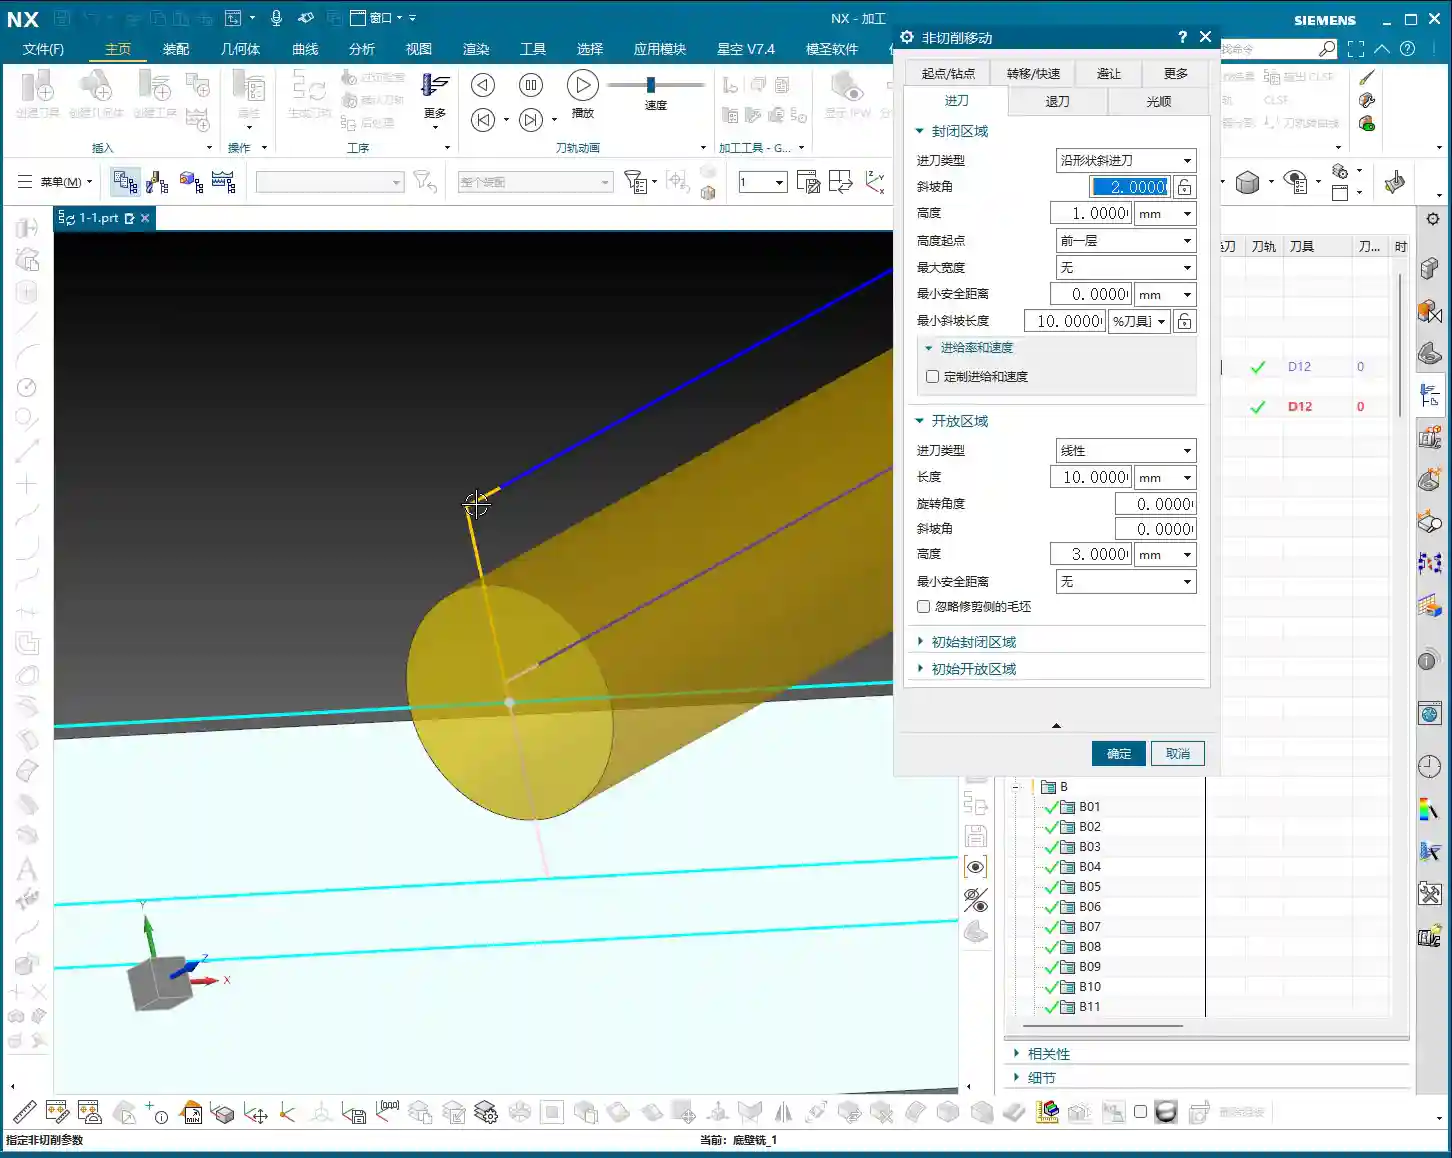
First, let’s create a standard program and select an appropriate tool, for example, Tool #12. After generating the program, focus on the approach. In the ‘Open Area,’ the default ‘Linear move’ is our most commonly used option. It determines how the tool enters the cutting area from a safe position.
- Length: This parameter controls the length of the yellow approach line. If you input a value, say 2mm, you’ll see a very short approach line. If you change it to 10mm, the line becomes longer. But there’s a pitfall here: if ‘Extend’ is enabled, the displayed length might not be the actual value you entered. So, to see the true length, it’s best to first disable the ‘Extend’ function. This way, your set 10mm will be the actual 10mm approach length.
2. Special Approach Method: Same as Closed Area (Helical Approach)
Besides ‘Linear move,’ there’s the ‘Same as closed area’ option. This is essentially a Helical approach. The tool descends in a helical path, like a drill bit, instead of plunging directly. For situations with pre-drilled holes or harder materials, this can effectively reduce impact and extend tool life. However, in open areas, we use it relatively less often; ‘Linear move’ is more direct and efficient.
3. Arc Approach
The ‘Arc’ approach is another common method, where the tool enters along an arc trajectory. This approach is frequently used when performing a Finishing pass on external part contours, especially when finishing walls with a turning tool. An arc approach ensures smooth engagement, reducing tool marks. Of course, in most cases, we still primarily use ‘Linear move.’
4. Rotation Angle & Ramp Angle
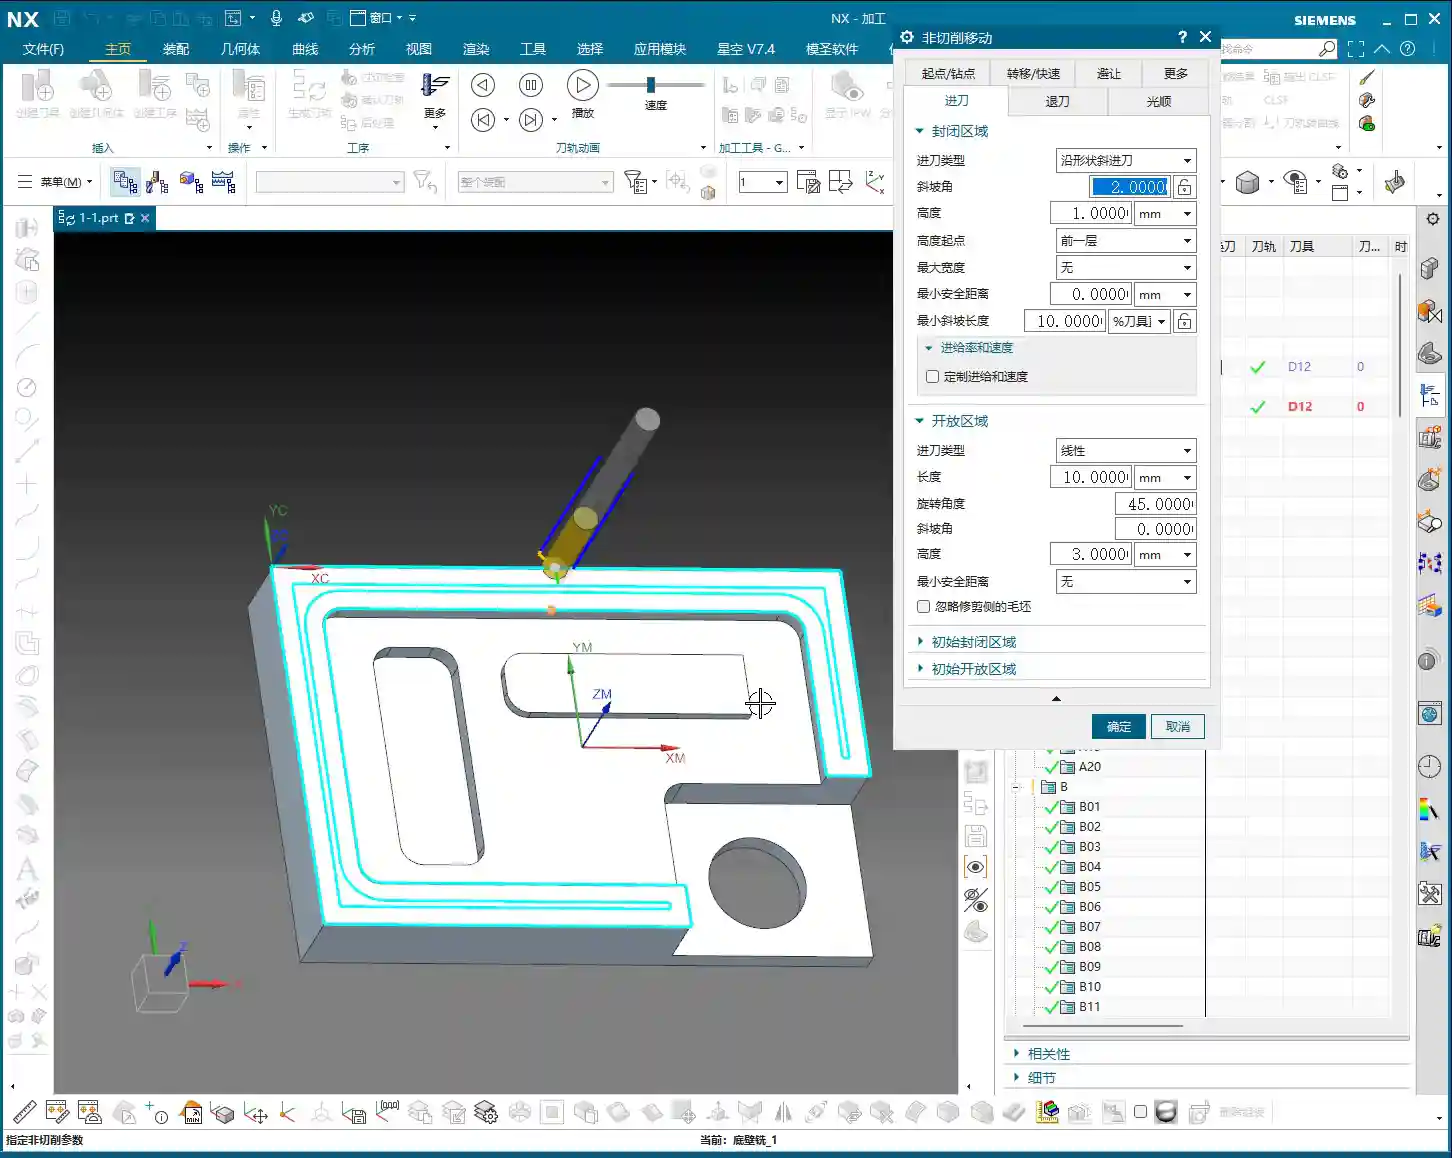
- Rotation Angle: If you give it an angle, for example, 45 degrees, the tool will not approach perpendicular to the approach line, but rather diagonally. This might be useful in certain special machining conditions, but it’s not commonly used. Just be aware of it.
- Ramp Angle: For example, setting a 10-degree ramp angle, you’ll notice the tool doesn’t enter horizontally, but ramps down with a slope. This is somewhat similar to the helical effect of ‘Same as closed area,’ also aiming for smoother tool engagement. It also plays a role in specific situations, but it’s not as universally applicable as ‘Linear move.’
5. Height & Minimum Safe Distance
- Height: This parameter determines the distance over which the tool will descend at a slow speed before entering the cutting area. For instance, if you input 10mm, the tool will decelerate when it’s 10mm above the part surface and slowly move down. This prevents high-speed plunging. We usually set it to around 3mm, which is sufficient unless there are special requirements. Don’t just rely on software simulation; observe the cutting sparks and listen to the sound to feel confident.
- Minimum Safe Distance: This is generally a default value, used to ensure the tool maintains a safe distance from the workpiece in non-cutting areas.
6. Extend & Shrink
These two parameters are used to lengthen or shorten the yellow approach line. They are not frequently used with ‘Linear move,’ but sometimes come in handy with ‘Arc’ approaches, for example, if you want the arc to be slightly longer or shorter to optimize the cutting path. Of course, we’ll discuss this in more detail later when we cover finishing passes and arc approaches.
7. Meaning of Open Area and Closed Area
‘Open Area’ refers to a region where the tool can freely enter from the outside, such as the side of a part. ‘Closed Area’ refers to a region where the tool is enclosed internally and can only enter through a plunge hole or via a helical approach, etc.
8. Initial and Final
Here, ‘Initial closed area’ and ‘Initial open area’ refer to the strategy for the very first tool engagement. For example, if a workpiece has multiple machining faces, the first face might require a specific approach method. We rarely change this parameter; the default usually works well.
Part Two: Retract Strategies
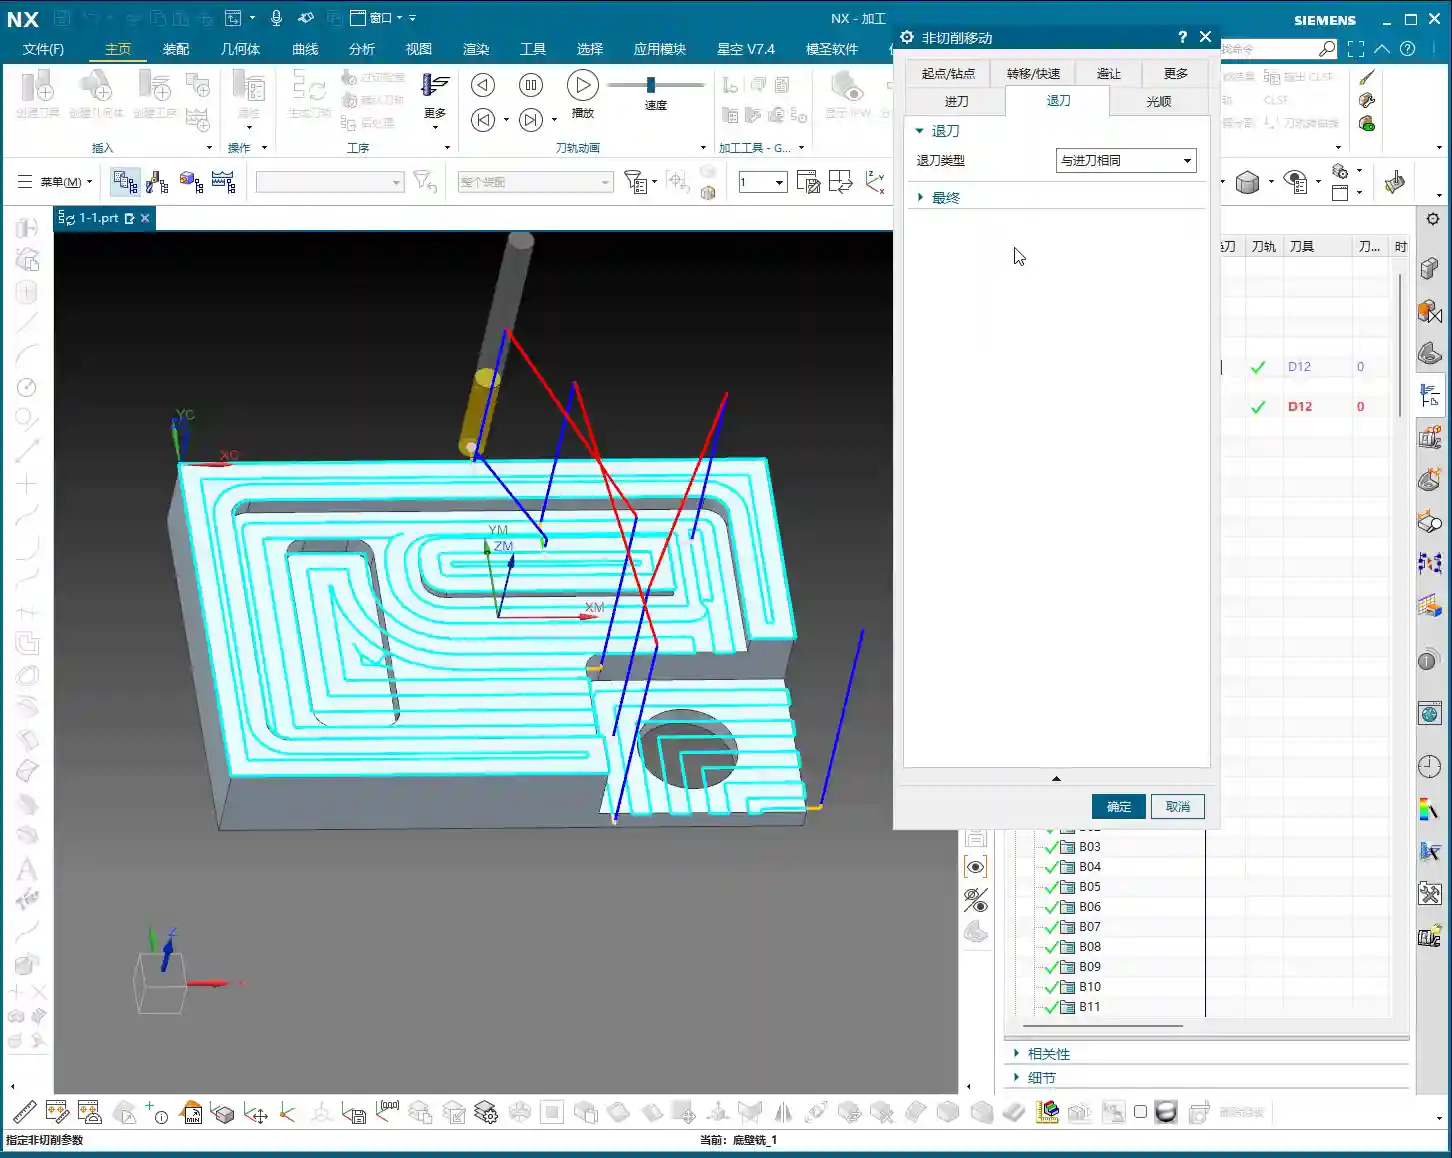
Now that we’ve covered approach, let’s talk about retract. Retract is actually quite simple; in most cases, we choose ‘Same as Approach.’ This way, the tool exits the same way it entered, maintaining consistency and reducing potential problems.
1. Direct Retract
‘Direct retract’ means the tool lifts vertically immediately after cutting. This method is very abrupt and generally not recommended. Especially in precision machining or when there’s leftover material, direct retract can easily scratch the part surface or increase tool wear. See, that white line is a direct retract. This spot is prone to ‘chatter’; don’t just look at the software simulation, watch the cutting sparks! So, giving it some clearance and retracting smoothly, just like the approach, is the golden rule.
2. Initial and Final Retract
Similar to approach, retract also has ‘Initial’ and ‘Final’ options. These control the strategies for the first retract and the last retract, respectively. Again, we generally don’t need to change these; keeping them at their default settings is usually fine.
Summary: Pitfall Avoidance Guide
- Distinguish between open and closed areas: This is fundamental for choosing your approach and retract strategies.
- Maintain consistent approach and retract strategies: In most cases, selecting ‘Same as Approach’ for retract is the most reliable and efficient solution.
- Use ‘Direct retract’ with caution: Unless you have 100% certainty about the machining conditions, avoid using it to prevent damage to the workpiece or tool.
- The Height parameter is crucial: Setting an appropriate slow descent distance effectively prevents high-speed plunging, protecting both the tool and the workpiece.
- Combine theory with practice: Software parameters are static, but machines and workpieces are dynamic. Observe the sparks, sound, and vibrations during machining, and adjust parameters as needed.
Today, we’ve thoroughly covered these core approach and retract parameters in UG NX. Don’t underestimate these details; a master can guide you, but practice makes perfect. Mastering these will elevate your programming skills to the next level!
Thank you for watching, see you next time!