📝 Key Takeaways:
Practical Planar Milling in NX
Introduction…
Introduction: Master Wang Reviews Planar Milling Fundamentals
Hello everyone, I’m Master Wang! Last time, we thoroughly explained the intricacies of planar milling, covering both GSM and legacy planar milling operations. Today, let’s dive into a practical exercise. We’ll take this part on hand and program it from start to finish. Listen up, follow my thought process, and see how this job is done. I’ll share all the practical tricks you won’t find in textbooks, explaining them all to you today!
Part Analysis and Tool Selection Strategy
Part Feature Interpretation: Dimensions and Challenges
First, let’s analyze this part’s characteristics. Looking at its edges, some areas have small R6 fillets. This means you can’t use a tool with a diameter greater than 12mm (approx. 0.47 inch) to cut them aggressively, or you definitely won’t achieve a clean finish, and might even cause a tool crash. Most other corners are larger and relatively easier to handle. As for the holes, we’ll be machining the two larger ones on top, and the central 14mm (approx. 0.55 inch) diameter hole. We can set aside the other smaller holes for now; they are not the main focus for planar milling.

Roughing Tool Selection and Overall Approach
Since efficiency is key, the first step is always **roughing**. My approach is to first remove most of the material with a larger tool, then use a smaller tool for detail **finishing passes** in the corners. Here, we can directly select a D32 R0.8 (approx. D1.26 inch, R0.031 inch) corn cutter. Why this one? Because it’s large enough, offers high cutting efficiency, and can quickly rough out the part’s general contour. Don’t worry about those small R6 fillets for now; we’ll address them later during **corner cleanup**.

Practical NX Operations: Stock Definition and Roughing
Stock Definition and **Work Coordinate System (WCS)** Setup
Alright, listen up! In Siemens NX, the first thing we need to do is define the stock. The simplest method is to use a Bounding Block. First, select the part, then generate it with a single click, essentially creating an ‘outer shell’ for it. Next is the crucial WCS (Work Coordinate System). I typically set it on the bottom face of the part, which makes subsequent depth control more intuitive and accurate. Remember, the position and orientation of the coordinate system must match your machine’s **clamping** or **fixturing** method. This is the fundamental basis for avoiding errors!

Operation Creation: Planar Milling Roughing
Next, let’s create the operation. Select the Face Milling operation.
Tool: The previously selected D32 R0.8 (approx. D1.26 inch, R0.031 inch).
Machining Area: Select the entire bottom face of the part; we’ll mill it flat first.
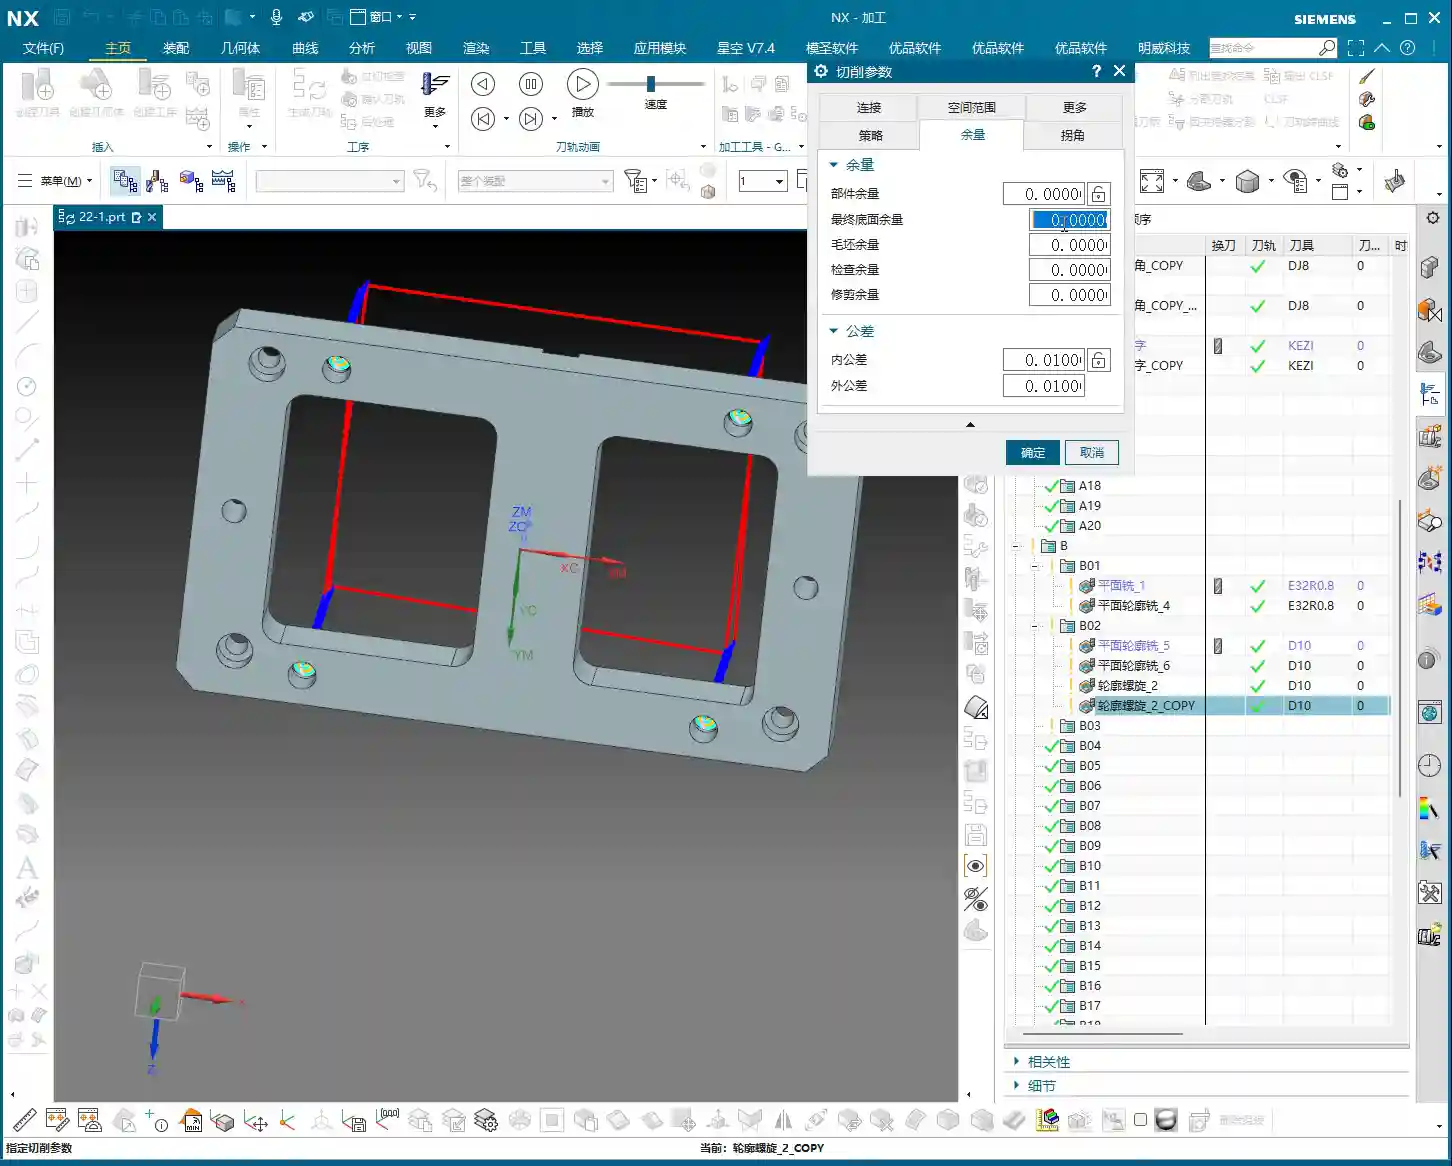
Now for the critical part: **Allowance Settings** (or “Stock to Leave”)! To ensure enough material for subsequent **finishing passes**, I’ll leave 0.1mm (approx. 0.004 inch) on the bottom face and 0.2mm (approx. 0.008 inch) on the side walls. These values are empirical; they can be adjusted based on material and accuracy requirements. Don’t underestimate this small amount of stock—it directly impacts tool life and surface finish during **finishing passes**. Finally, generate the tool path. First, review the results to ensure the tool path covers the entire machining area with no missed regions. This **roughing** program is essentially complete.

Open Boundary and Internal Hole/Slot Machining Strategies
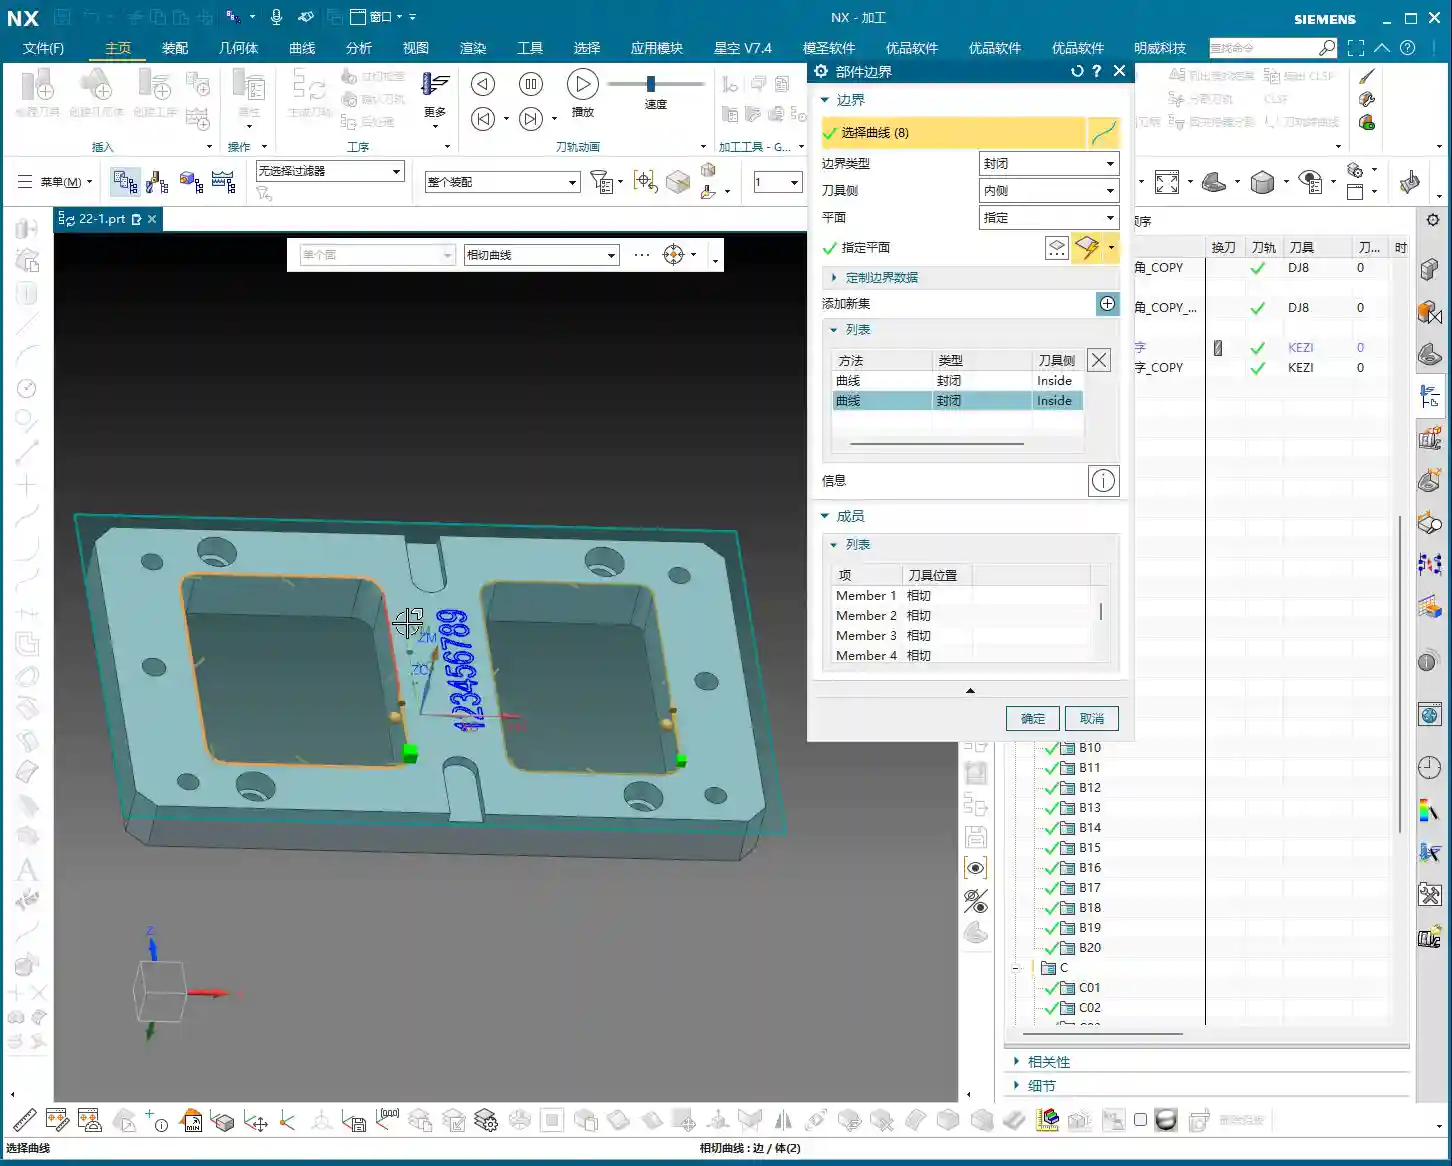
Boundary Roughing: Planar Profile Milling
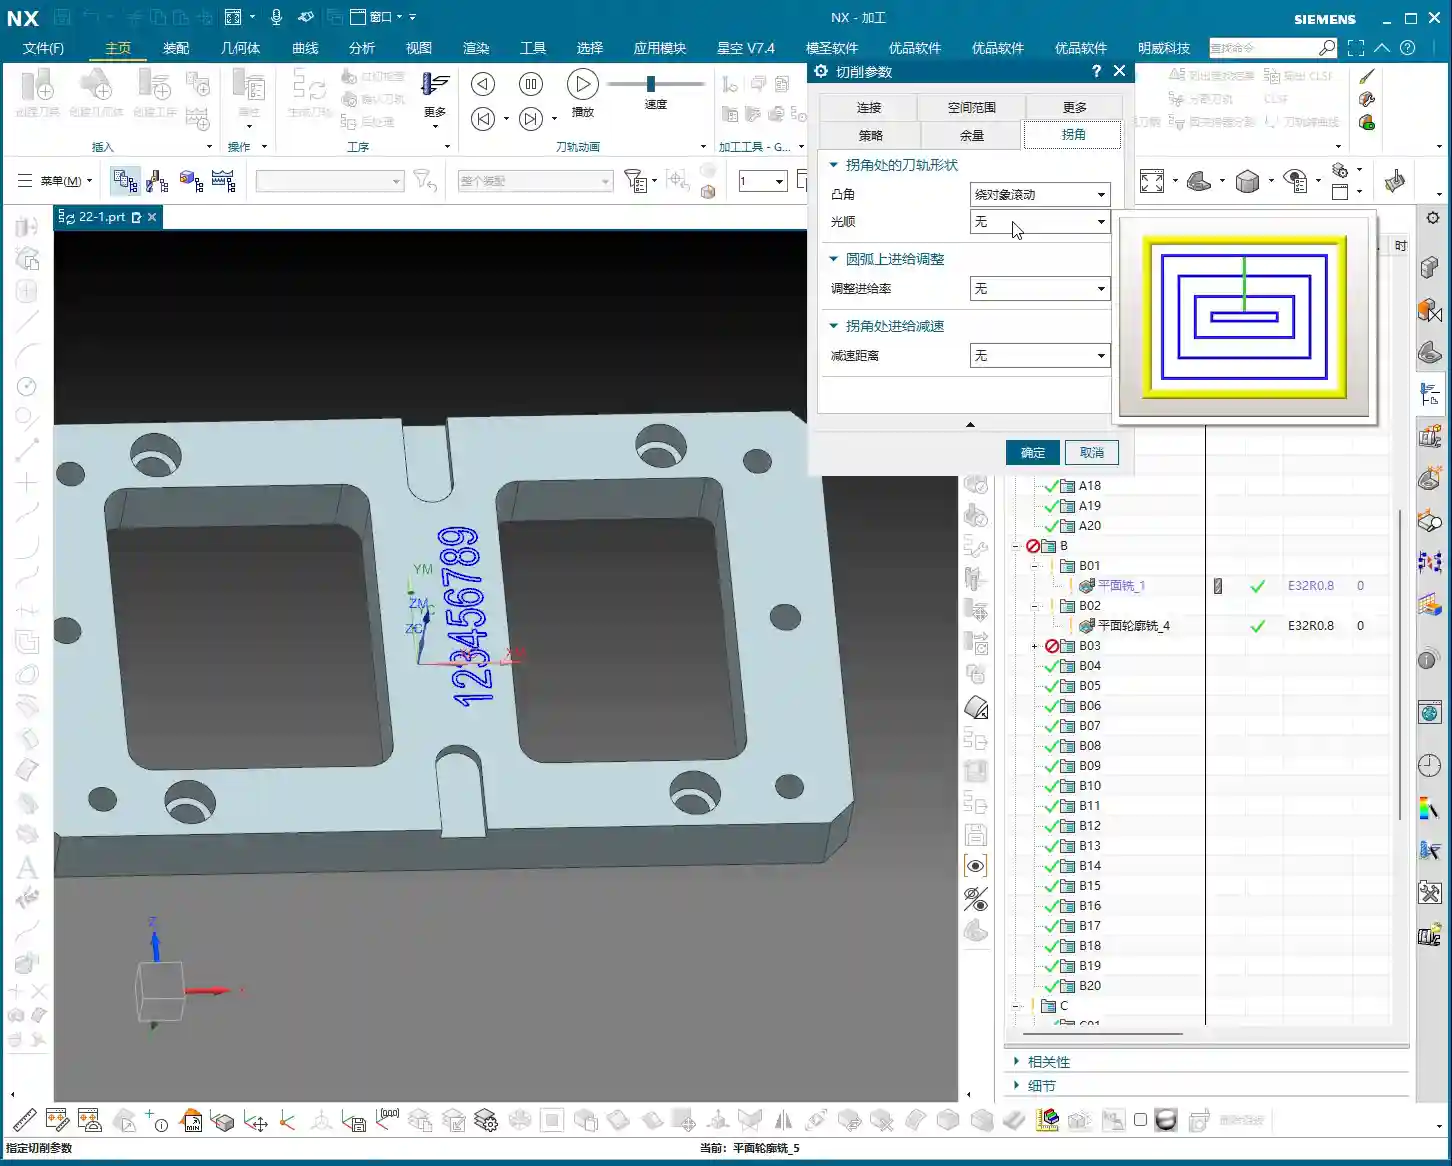
Once the bottom face is roughed, next we’ll address the external contours. Here, we’ll use Planar Profile Milling. We’ll continue to use the same D32 R0.8 (approx. D1.26 inch, R0.031 inch) tool. For the geometry, select the part’s outer contour, which is an open area. Here’s the key: **Approach Method** (or “Entry Method”)! Many beginners prefer arc entry, thinking it looks cleaner, but in **roughing** scenarios like this, arc entry can leave marks at the starting point and even lead to excessive localized **depth of cut (DOC)**. I recommend switching directly to linear entry, with a percentage of 60%, no extension, and a height of 0. This creates a more stable entry path and avoids unnecessary interference. Regarding cutting parameters, the stepover can be adjusted to around 50%, allowing it to cut back and forth, efficiently clearing the peripheral material. Don’t just rely on software simulation; observe the cutting sparks and chip formation—that’s the true feedback of what’s happening!
Internal Hole/Slot **Corner Cleanup** and Helical Milling
With the external contour handled, now it’s time for the internal holes and corners. First, for the internal **corner cleanup**. During previous **roughing**, the D32 (approx. D1.26 inch) tool would certainly leave many corners untouched. Now we’ll use a D10 (approx. D0.39 inch) tool. Don’t ask why not a D16; my experience tells me that if you want to cleanly machine an R6 fillet, going straight to a smaller tool like a D10 is more efficient, saving you a tool change. Use Planar Profile Milling for **corner cleanup** in these internal enclosed areas. Select the corresponding boundaries, again leaving 0.2mm (approx. 0.008 inch) for side walls and 0.1mm (approx. 0.004 inch) for the bottom face.
Next, for those larger holes, such as the 14mm (approx. 0.55 inch) diameter one. For holes like these, Helical Milling (Contour Profile – Helical) is most suitable. Using the same D10 tool, select the inner wall of the hole as the machining boundary. Allow the tool to feed in a helical manner; this results in more stable cutting and a better surface finish on the hole wall, avoiding the impact of a direct plunge. The default helical entry method here is perfectly fine.
Master Wang’s Mini-Lesson: Tool Path Optimization and Practical Experience
Listen up, programming isn’t just about generating tool paths; more importantly, it’s about optimization.
Cutting Efficiency: As with the previous **roughing** operation, we used a large tool like the D32 (approx. D1.26 inch) to remove as much material as possible. **Stepover** and **depth of cut (DOC)** must be determined in conjunction with machine rigidity and material hardness. Don’t blindly aim for large values; if the tool starts to **chatter** or experience **tool deflection** as soon as it engages, that’s definitely not acceptable.
Tool Life: The entry/exit methods and the setting of cutting parameters all influence tool life. For instance, changing from arc entry to linear entry earlier was specifically to prevent premature localized tool wear.
Tolerance Control: Before the final **finishing pass**, ensure that the roughing stock allowance is uniform. If the roughing allowance is uneven, the tool will experience unbalanced cutting forces during **finishing**, making tolerance control difficult. For tolerances like ±0.005mm (approx. ±0.0002 inch), you must learn to use **machine compensation** or fine-tune feed rates and spindle speeds to control cutting forces and minimize deformation.
Don’t just rely on software simulation; observe the cutting sparks and listen to the machine’s sound. The spark color and chip shape—these are all experience-based insights you won’t learn from textbooks!
Summary: Pitfall Avoidance Guide
Finally, Master Wang will give you some more practical tips. These are all pitfalls I’ve encountered, so you can avoid making the same mistakes.
1. Tool Selection: From large to small, from rough to finish. This is a fundamental principle; don’t try to achieve everything in one step, especially with complex parts.
2. Stock Definition: Must be accurate. If the stock definition is inaccurate, the tool path can easily lead to air cuts or tool crashes.
3. Coordinate System Setup: Must align with fixturing. This is fundamental—a weak foundation will crumble.
4. Approach/Retract Strategy: Smooth transitions. Especially during **roughing**, avoid sudden engagements or exits, which can cause excessive **depth of cut (DOC)** and affect both surface finish and tool integrity.
5. Allowance Control: Leave sufficient material for finishing. Too little roughing allowance makes it difficult to achieve precision in **finishing**; too much burdens the **finishing pass**.
6. Practical Observation: Be highly observant of your surroundings. The sound of the machine, the flow of coolant, the color of sparks, the shape of chips—these are all direct feedback on whether your programming parameters are reasonable. Don’t just stare at the screen watching NX simulations; that’s just theory. Actual machining is the only true test.
7. Material Properties: Don’t forget to consider them. Cutting parameters and tool wear differ significantly for various materials, so keep this in mind when programming. For example, would you dare machine titanium alloys or superalloys the same way you mill aluminum? That’s just burning up your tools!
👤 About the Author:
The author is a veteran CNC machining professional with 15 years of industry experience, specializing in UG NX programming. This article is an original work representing personal practical insights.
⚠️ Copyright Notice: Unauthorized reproduction or distribution without prior communication is strictly prohibited.
Leave a Reply