📝 Key Takeaways: Master Wang provides a hands-on tutorial on Siemens NX Rest Milling with a Reference Tool, addressing residual material removal and precision challenges for complex parts. From parameter setup to toolpath optimization, learn to prevent overcutting and ensure machining accuracy up to ±0.005mm. Practical experience sharing helps you move beyond theoretical knowledge and master efficient rest milling techniques.
Master Wang Explains: The Ins and Outs of Rest Milling
Hello everyone, I’m Master Wang. Today, we’ll continue our discussion on rest milling operations, diving deep into **Rest Milling with a Reference Tool**. Listen up, this is a crucial and highly common technique in rest milling! Many times, after machining a part, you’ll find some ‘leftovers’ in the corners and edges. This operation is what you use to finish those areas, leaving no blind spots and pulling your precision to within ±0.005mm!
Last time, we talked about **Single Toolpath Corner Cleanup**. While it is a form of corner cleanup, it’s not widely used in actual production, so a basic understanding is sufficient. However, if you thoroughly grasp today’s topic, **Rest Milling with a Reference Tool**, then subsequent techniques like **Multi-Toolpath Rest Milling** will be ‘a piece of cake’ in principle. Mastering this will naturally lead to higher efficiency.
Remember, in Siemens NX, the concept of ‘remaining tool’ is sometimes simplified, but it’s essentially the ‘Reference Tool’. Regardless of the name, it’s the same thing: it tells the system, “Where did the previous tool machine up to?”
Rest Milling with a Reference Tool: No Blind Spots, More Precise Toolpaths
Why Use a Reference Tool?
You need to understand that machining a complex part, especially areas with deep cavities, narrow slots, or small radii, cannot be done with just one tool. For instance, after **roughing** with a larger ball end mill (e.g., a ⌀10mm ball end mill), it will inevitably leave residual material in corners, at the bottom, or in small radii. If this residual material isn’t properly removed, it can affect assembly or even scrap the part. Our goal is to use a smaller tool to clean up these blind spots that the larger tool couldn’t reach. In this process, you must inform the system where the previous large tool has already machined and what areas it couldn’t reach—this is the core function of the Reference Tool.
This is the same principle as when we discussed selecting a reference tool in **Deep Contour Milling** or **Corner Cleanup** previously; the concept is identical. Textbooks might categorize these concepts distinctly, but in practical application, they are interconnected. It’s about your ability to apply knowledge broadly.
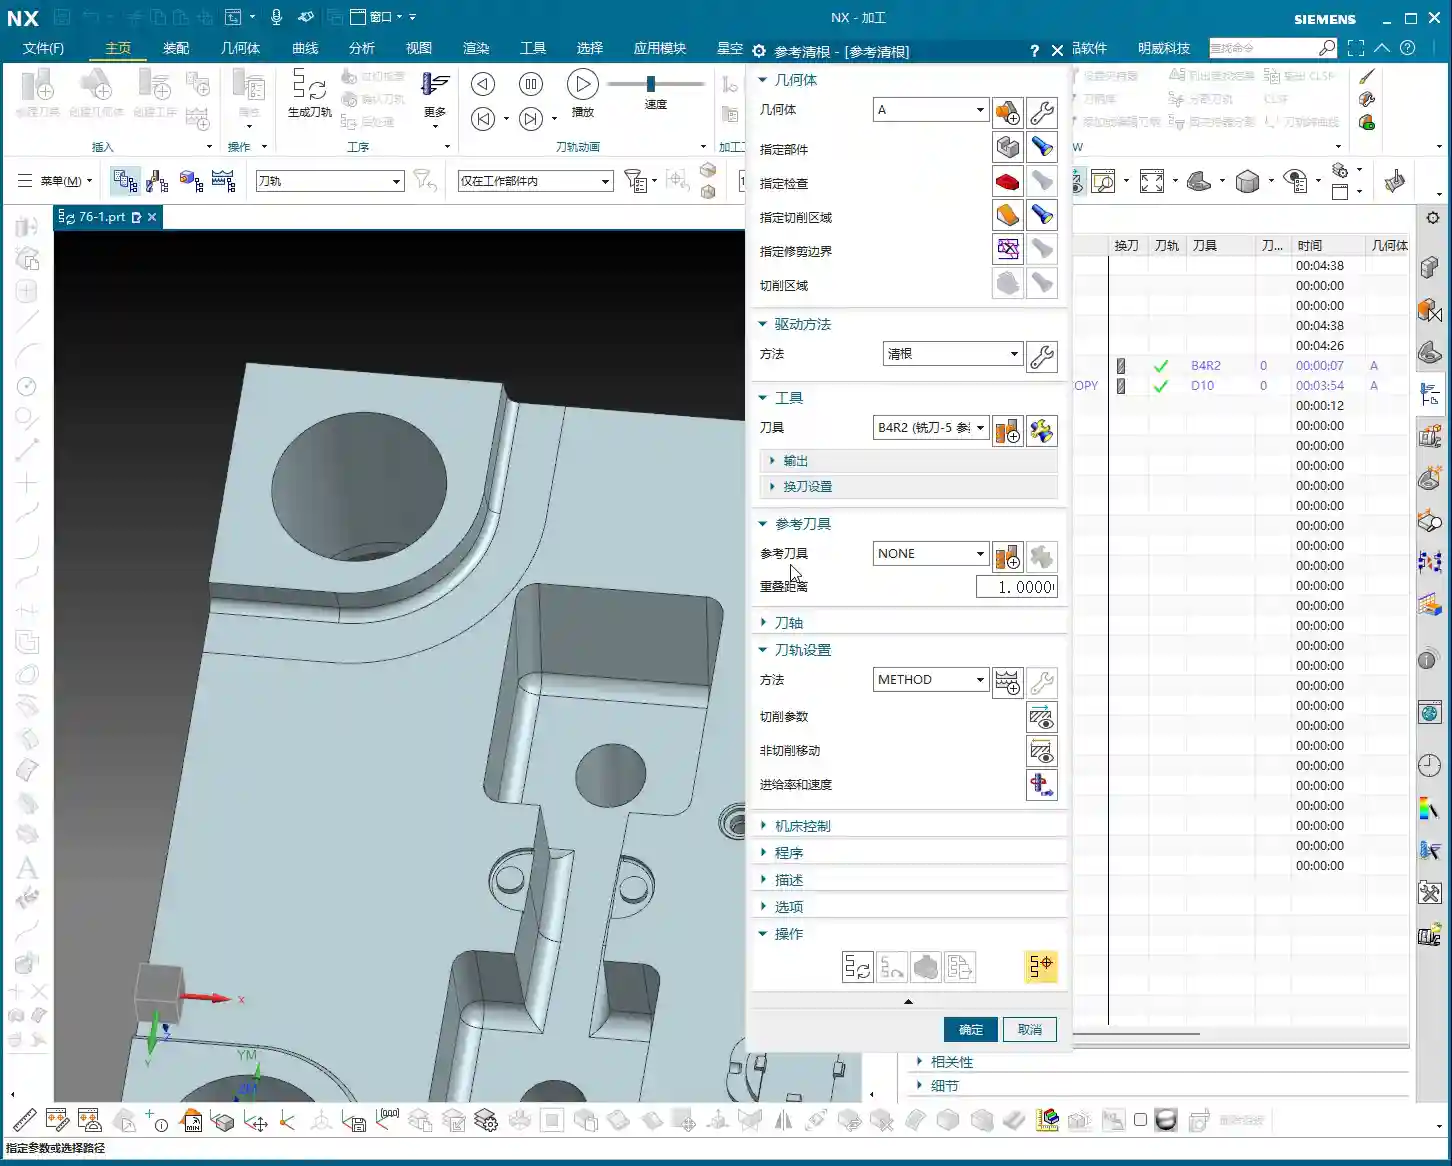
Main Parameters: Fundamentally Unchanged
Listen closely, whether it’s **Single Toolpath Corner Cleanup**, **Multi-Toolpath Rest Milling**, or today’s **Rest Milling with a Reference Tool**, their main page settings are largely similar, with no significant changes. So, when you open the rest milling interface, it will feel familiar. Where’s the key difference? It lies in what we’re discussing today: the ‘inner workings,’ specifically the definition of the Reference Tool. Don’t let the similar interface fool you; there’s a lot of nuance inside.

Hands-on Demonstration: Parameter Setup and Toolpath Generation
Selecting Machining Area and Rest Milling Tool
Let’s select an area requiring **rest milling**, such as a cavity with a small fillet at the bottom. Assuming the previous **roughing** operation used a ⌀10mm ball end mill, we will now use a ⌀12mm ball end mill for rest milling. Why ⌀12mm? Because this size might be more suitable for cleaning that specific residual material. Of course, in practice, you might choose a smaller tool, such as a ⌀6mm or ⌀8mm tool. There’s no absolute rule for tool selection; it entirely depends on your workpiece’s actual geometry and the amount of residual material. Just select your target area and the **rest milling tool**, leave other parameters for now, and let’s go step-by-step.
Crucial Step: Defining the Reference Tool
When you first attempt to generate a toolpath, the system will ‘error out,’ prompting you: “A reference tool must be defined!” This is perfectly normal because it doesn’t know which tool you used previously, and therefore cannot determine where residual material might exist. Hence, this step is critically important.
-
Understanding the Concept: The Reference Tool is the previously used tool that has already machined and will leave residual material. You need to tell Siemens NX where it has machined and where it couldn’t reach. The system then uses the shape and path of this reference tool to calculate the new **rest milling tool’s** paths to remove the residual material.
-
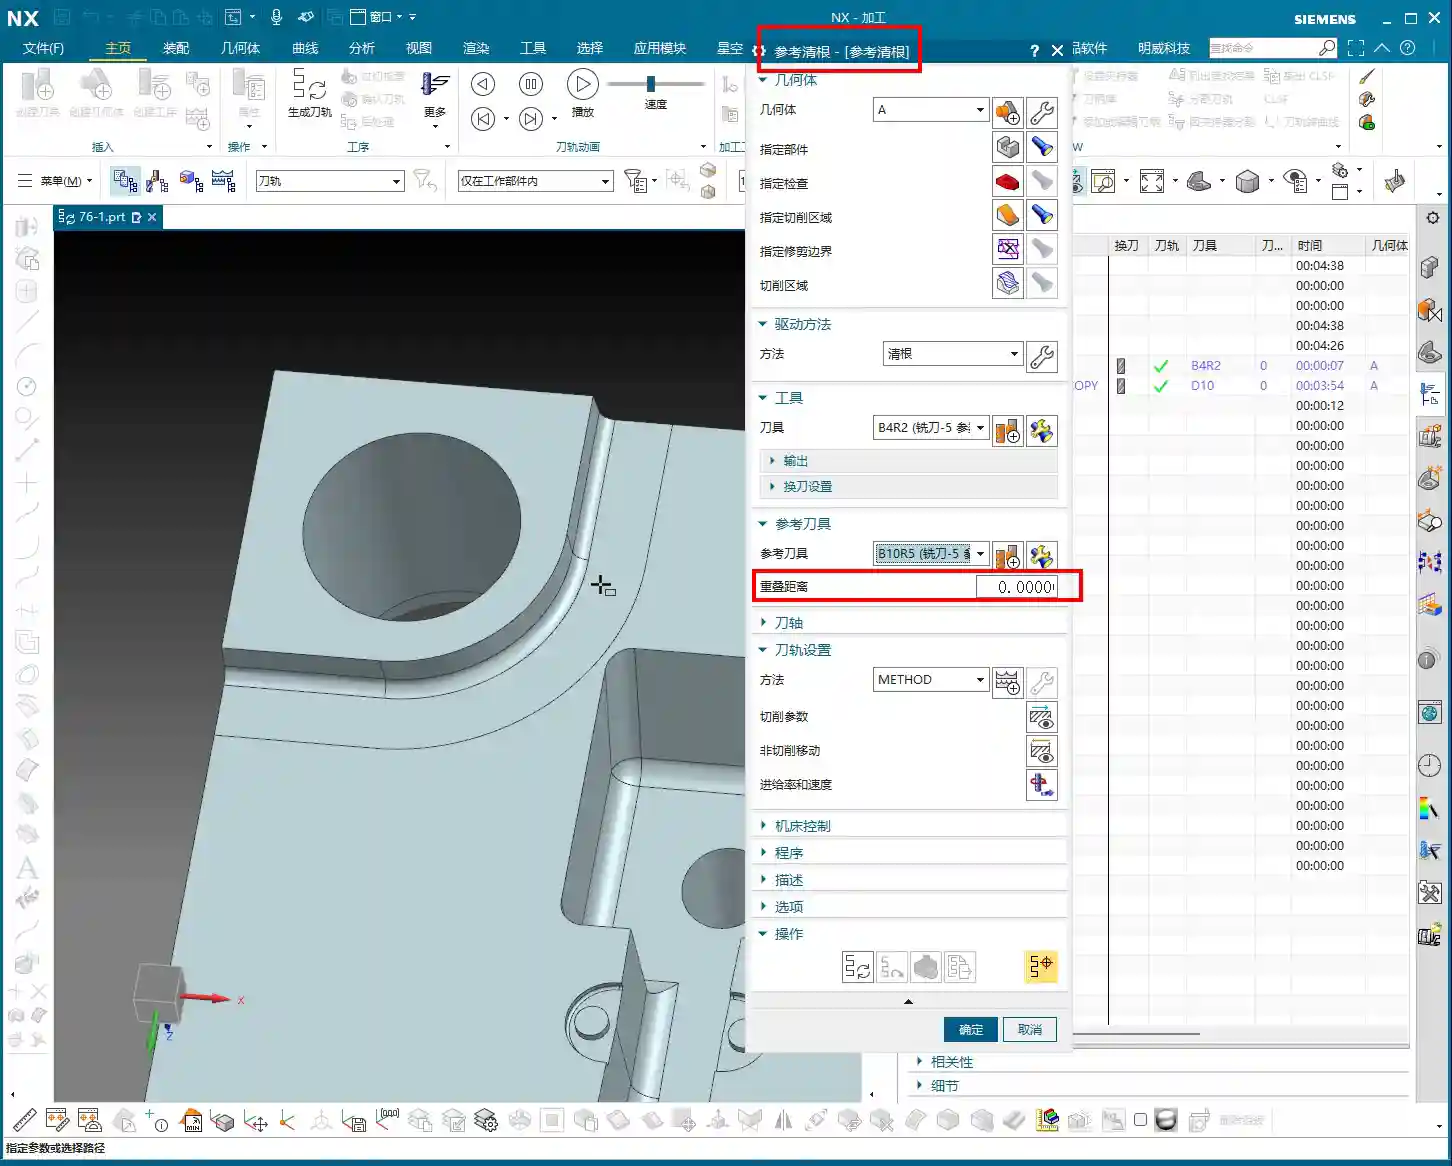
Setting Location: On the main page of the rest milling operation, there’s a direct option for “Reference Tool”. This differs from our previous experience in **Deep Contour Milling**, where you’d define the reference tool within ‘Space Constraints.’ Here in rest milling, it’s more direct and convenient.
-
Practical Operation: We will select the ⌀10mm ball end mill as the Reference Tool. You can choose from an existing tool library or create a new one. I usually find it convenient to just rename and use a system-provided tool. For example, let’s use a B11 R5.5 (11mm diameter, 5.5mm radius ball end mill, or understood as R5.5) as the reference tool. The previous B10 (10mm diameter, 5mm radius ball end mill) **roughing** tool left some uncleaned areas, right? That’s our reference object. Then, click “OK” and try generating the toolpath again.
The Mystery of Clearance Distance
Many people don’t fully understand the Clearance Distance parameter. It refers to how far the tool extends beyond the machining area. Theoretically, it can help make rest milling more thorough, but in actual rest milling operations, I generally set it to 0. Why?
-
Characteristics of Rest Milling: Rest milling is typically performed to remove residual material from areas that were already machined in the previous operation. Since it’s about residual material, it should be strictly confined within the original machining boundaries. If you set a clearance distance, the tool might extend outwards, leading to the risk of toolpath confusion or overcutting.
-
Practical Experience: I’ve seen many novices set a large clearance distance, resulting in chaotic toolpaths and even ‘damaging’ the workpiece. Of course, this isn’t an absolute rule; sometimes, if you find the toolpath isn’t ideal, you can try adjusting this parameter slightly, but you must do so cautiously, testing it little by little. If the toolpath genuinely becomes messy, the safest approach is to set it back to 0 or directly select an appropriate reference tool to control the toolpath boundary, rather than trying to ‘force it’ with the clearance distance. From my perspective, if you can avoid using clearance distance, do so; it keeps things simple, clear, and minimizes risk.

Toolpath Verification and Optimization: Don’t Just Look at the Screen, Observe the Cutting Sparks!
Toolpath Simulation: Identifying Residual Material Areas
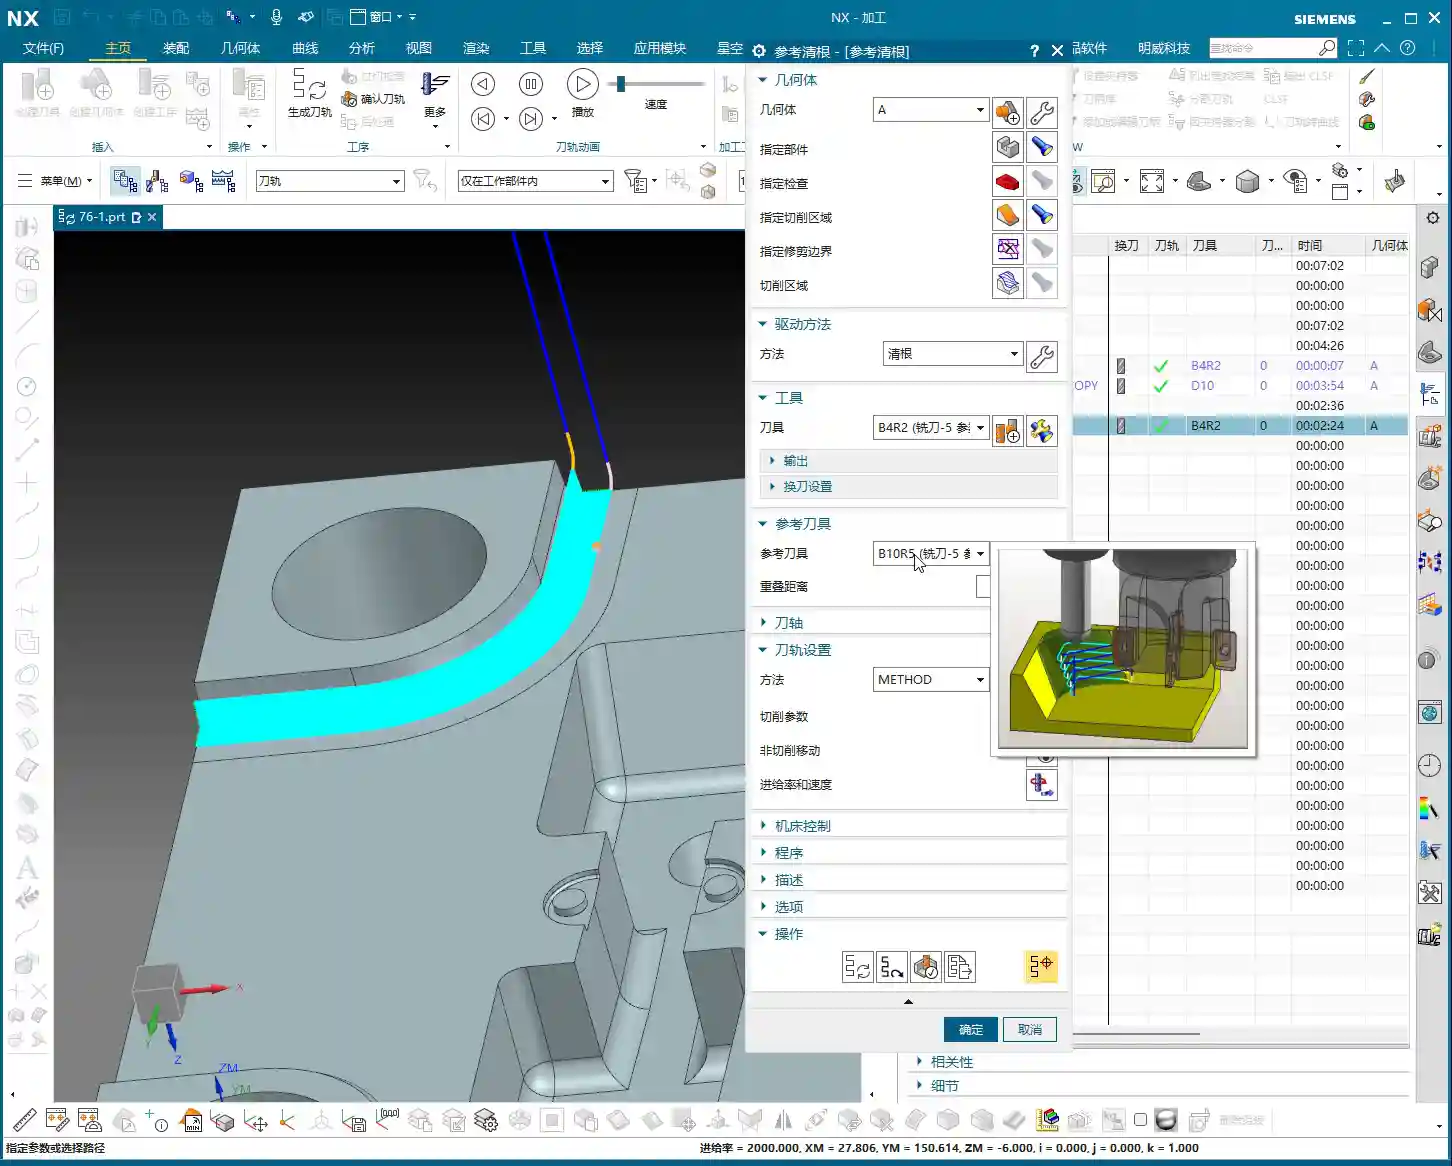
With all parameters set, let’s click Generate Toolpath and then perform a Toolpath Simulation. Simulation is the first step in verifying a toolpath, and you must observe it carefully. In Siemens NX simulation, yellow or orange is typically used to highlight residual material areas—meaning the areas your previous tool couldn’t machine. After the rest milling toolpath is generated, it will machine along these residual material areas.

Don’t just be satisfied with a perfectly clean software simulation; you need to envision the cutting sparks! While you can’t see sparks in a simulation, you should have a mental image. You must imagine how the tool moves on the workpiece: are there any air cuts? Is there a risk of overcutting? If the simulated toolpath can cleanly remove these yellow or orange areas, and the tool path is smooth, without unnecessary retracts or rapid moves, then the toolpath is largely acceptable.
In-Depth Analysis: Why is Residual Material Left Behind?
Let’s reconsider: why is residual material left behind? It’s simple. Take our earlier example of a ⌀10mm ball end mill (R5mm). The tip of a ball end mill is an arc, and its effective cutting point changes at different depths. When it reaches a sharp corner or acute angle, the spherical characteristic of the tool tip means it cannot fully ‘dig’ into the corner. For instance, in a deep internal fillet, if machined with an R5mm ball end mill, it can only machine up to the tangent point of the arc; further in, the tool’s radius obstructs it, naturally forming residual material.
The rest milling tool, such as the ⌀12mm ball end mill we’re using now (though in practice, a smaller one or an end mill with a specific corner radius might be used), will utilize its smaller radius, or a more suitable geometry, to precisely clean up these large tools’ “blind spots”. This is how Siemens NX calculates it using the reference tool—it’s very intelligent.
Considerations for Non-Cutting Moves
Regarding non-cutting moves—meaning tool approaches, retracts, lifts, and so on—in rest milling operations, the setup philosophy is quite similar to other operations. It’s essentially about ensuring safe tool engagement, safe tool withdrawal, and avoiding collisions. Generally, keeping the defaults or slightly adjusting approach angles and distances usually works fine. Of course, for detailed optimization, we can save that for the next lesson, where we’ll specifically discuss the parameters found under that small wrench (edit) icon. There are many secrets hidden there for improving efficiency and safety!
Today, our main goal was to clarify the core logic and common parameters of Rest Milling with a Reference Tool. Once you’ve digested these, you’ll know how to tackle residual material removal issues in practical applications.

Summary: A Guide to Avoiding Pitfalls
-
Reference Tool Must Be Precise: This is the ‘lifeline’ of the rest milling operation. You must select the tool actually used in the previous step, and which leaves residual material, as the reference. If chosen incorrectly, the system won’t know where the residual material is, toolpath calculation will be completely off, leading to overcutting or missed cuts.
-
Use Clearance Distance with Caution: In rest milling operations, unless absolutely necessary, my personal experience recommends setting the Clearance Distance parameter to 0. This precisely limits the toolpath to the residual material area, preventing toolpath confusion or unnecessary overcutting. If you find the toolpath is messy, first try setting it to 0. If that doesn’t work, then consider adjusting the reference tool’s size.
-
Residual Material Visualization: During toolpath simulation, carefully observe the residual material areas (typically yellow or orange) to ensure the rest milling toolpath covers them completely, leaving no blind spots. If you still see uncleaned yellow areas in the simulator, it indicates a problem with the toolpath, requiring parameter adjustment or selecting a more appropriate rest milling tool.
-
Combine Theory with Practice: No matter how perfect software simulation appears, it’s still ‘theory on paper.’ On the actual machine, you must observe cutting sparks, listen to cutting noise, and check chip evacuation. Incorrect spark color, abnormal noise, or irregular chip shape can all signal issues with the toolpath or process parameters. You must be willing to adjust feed rates, spindle speeds, or even the toolpath based on actual conditions to truly machine the part well.
-
Don’t Forget Material Properties: Different materials have vastly different cutting characteristics. From common aluminum to titanium alloys and high-temperature nickel-based alloys, cutting forces, heat dissipation, and tool wear vary significantly. Pay extra attention during rest milling; for example, when machining high-temperature alloys, tools wear easily, so cutting parameters should be conservative to prevent stress concentrations leading to deformation. Fixturing solutions must also consider material properties to prevent heat treatment deformation.

👤 About the Author:
The author is a veteran CNC machining professional with 15 years of industry experience, specializing in UG NX programming. This article is an original work representing personal practical insights.
⚠️ Copyright Notice: Unauthorized reproduction or distribution without prior communication is strictly prohibited.
Leave a Reply