📝 Key Takeaways:
Fixed Area Milling in Practice: Master Wang’s Guide t…
Hello everyone, I’m Master Wang. Today, let’s continue our discussion on Siemens NX programming. In our previous sessions, we ironed out the basic concepts of Fixed Area Milling. Today, we’re getting down to business: we’re going hands-on to program a “Finishing pass” for a real-world part. Listen up – this job isn’t just about clicking a mouse; it’s packed with experience and critical insights!
Step One: Eagle Eye Surface Analysis – Defining the Machining Area
Alright folks, when you get a job, don’t rush straight into it. We need to start with “surface analysis” – that means meticulously examining the part’s geometric features. You need to know which areas are flat and which are curved. This directly influences your tool selection and machining strategy.
Identifying Planar and Curved Surfaces
Some areas on this part might look planar, but are they truly flat? In NX, don’t just eyeball it; you need to verify with geometric properties.
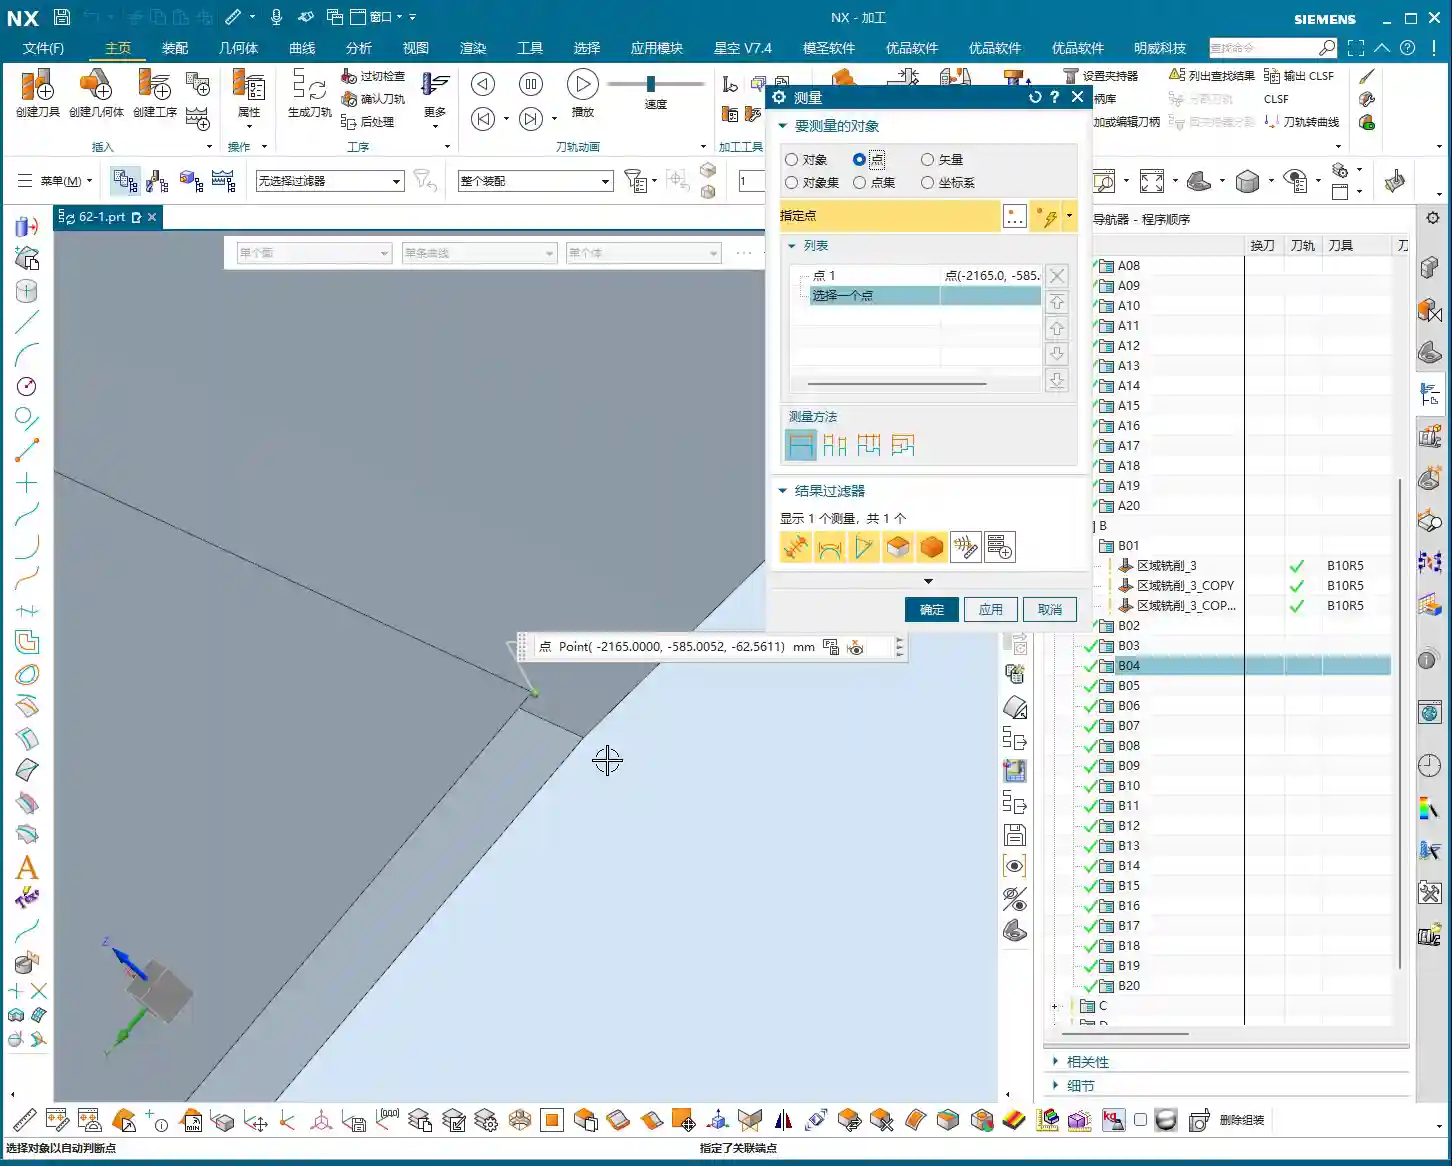
In NX, simply select a face and use the “Geometric Properties” function to check. If its Z-axis coordinate value is consistent across different points, then it’s a true planar surface. If the Z-axis value keeps changing, even slightly, it’s a curved surface and must be treated as such.
For this particular part, after my careful inspection, I found that most areas are curved surfaces, but there are a few genuinely flat spots, and these need to be handled differently.

Identifying Critical Fillets and Narrow Areas
Besides planar and curved surfaces, pay special attention to areas with fillets. The size of the fillet dictates the required tool diameter.
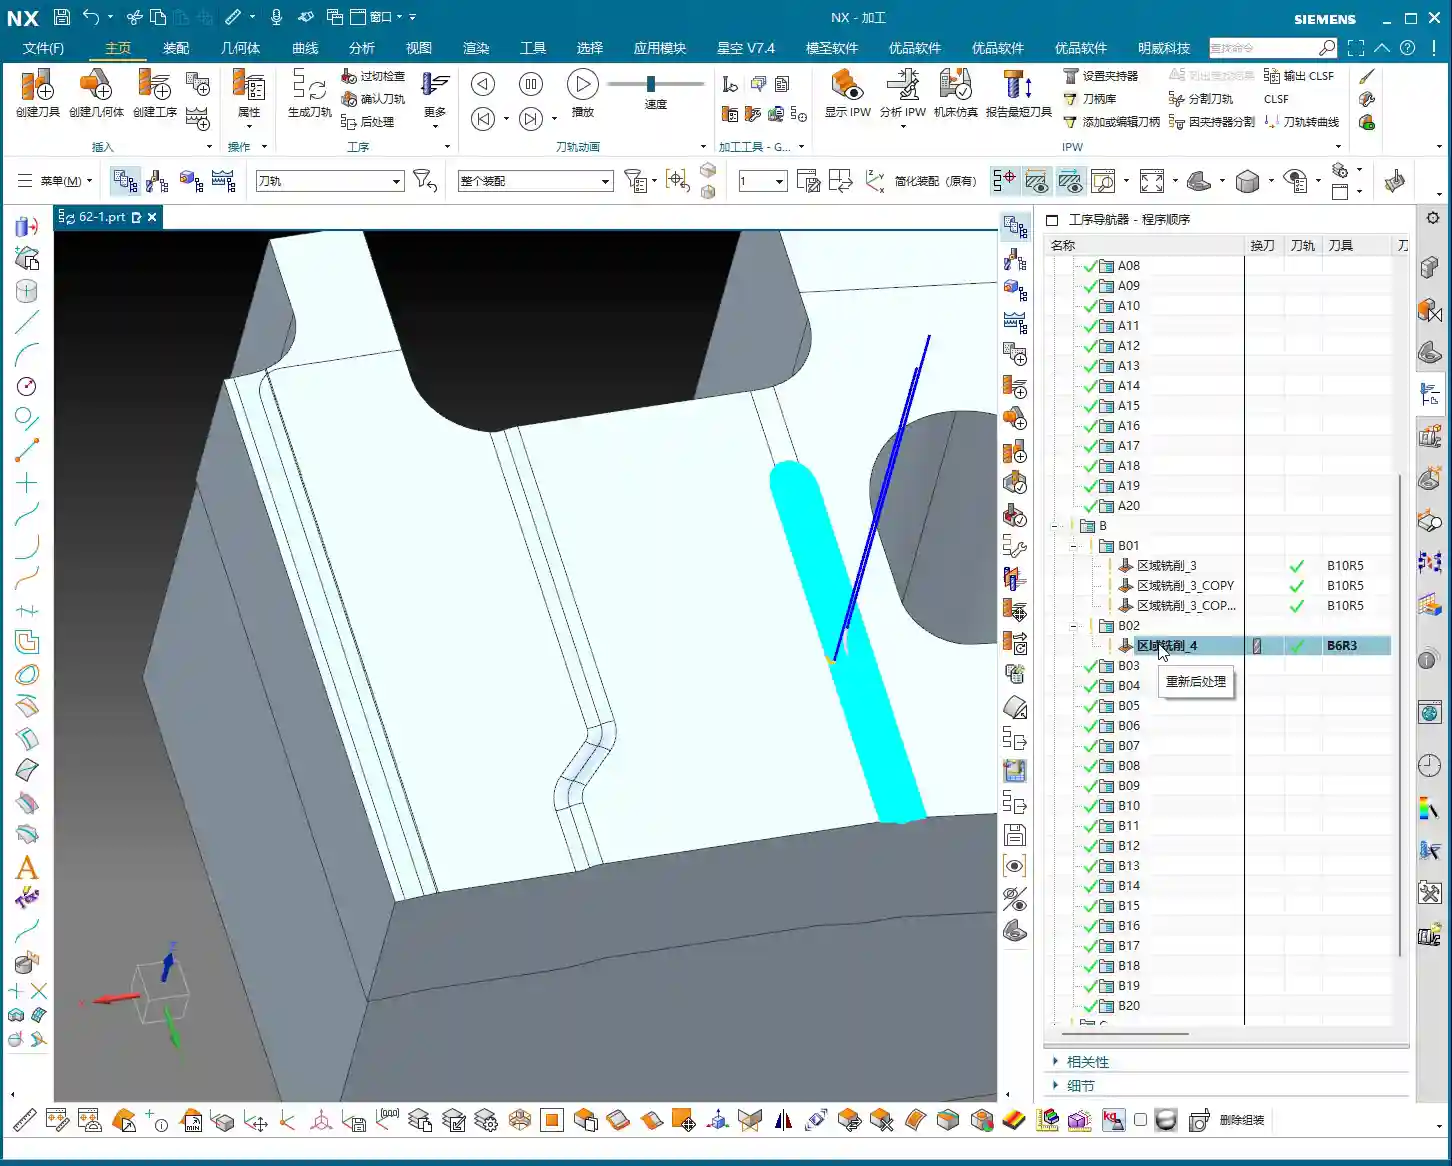
After my initial survey, I noticed one area with a slightly smaller fillet, approximately R6. For this, we’ll need to consider a 6mm diameter ball-nose end mill (or smaller) for the Finishing pass. Further in, some fillets are larger, like R5, where a 5mm diameter ball-nose end mill will suffice, potentially even completing it in a single pass. Remember, tool selection must match the part’s features; otherwise, you’ll either fail to machine the area completely or suffer from poor efficiency.
Step Two: Tool Selection and Strategy – Precision, Stability, and Aggression
Once the machining area is defined, the next step is tool selection and strategy formulation. Siemens NX’s Fixed Area Milling offers great flexibility, but getting quality results hinges on your experience.

Clever Use of Ball-Nose End Mills for Complex Surfaces
For parts like ours, which feature various fillets and curved surfaces, the ball-nose end mill is our primary tool.
Having identified the R5 and R6 fillets earlier, I have a clear plan:
- For R5 areas, we’ll use a Ø5mm ball-nose end mill for Finishing pass.
- For R6 areas, we can either add a Ø6mm ball-nose end mill or just use the 5mm tool with additional passes.
Remember, the tool diameter should be slightly less than or equal to the smallest machining radius to ensure proper Corner Cleanup.
Flexible Selection of Cut Direction and Start Point
In Fixed Area Milling, the cut direction and start point are crucial.
- Parallel to Tool Axis: This is the most commonly used method, especially suitable for flat or gently sloped surfaces.
- Perpendicular to Tool Axis: Sometimes used, but depends on the specific surface geometry.
- Helical/Spiral: For internal areas with circular or elliptical shapes, using this method to cut spirally from outside-in or inside-out creates a more continuous path, more stable cutting, and effectively reduces air cuts and “tool jumps” (unnecessary retractions).
For certain internal cavities on this part, I employed a “Spiral Inward” approach. See how smoothly the toolpath runs? Efficiency naturally improves.
Furthermore, setting the program’s “Start Point” is also very important. Sometimes, the default start point can lead to frequent tool retractions or engagements from unfavorable positions. We can manually specify a sensible start point, such as beginning the cut from the exterior of the workpiece or engaging from a more open area, to prevent damage to already machined surfaces.
“Tool Jumps”? No Worries, We’ve Got Solutions!
In NX, you sometimes encounter “tool jumps” in the toolpath, meaning the tool frequently retracts and re-engages. This can happen for several reasons:
- Holes or Open Areas in Between: If there’s a hole in the middle of the machining area, the tool will naturally retract to avoid it – that’s normal. If you want a more continuous toolpath, you can “cap off” this hole with a surface during modeling, then remove it after machining.
- Gaps or Elevation Differences in the Model Itself: If the model design itself has issues, such as the 4-micrometer (approx. 0.00016 inch) gap we just found, the tool might “hesitate” there. While the impact is minimal, ideally, the model should be clean.
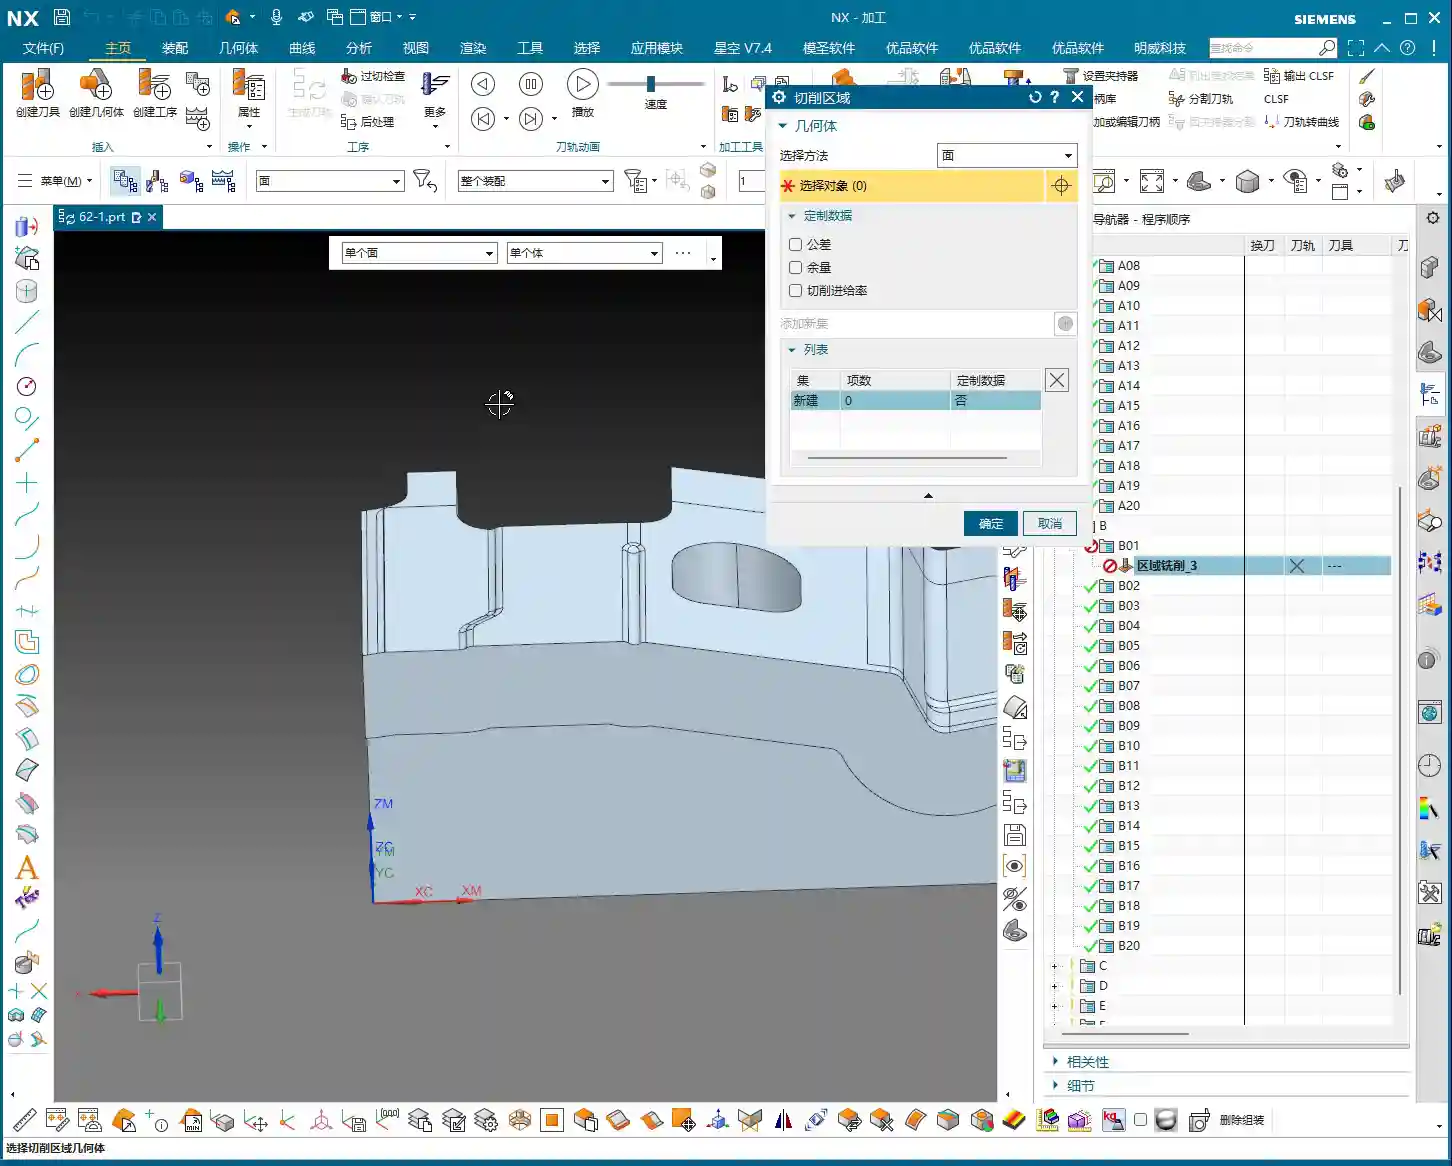
When programming, make good use of NX’s “Safe Region”, “Cut/Non-Cut Areas”, “Trim Boundary”, and other functions to control the toolpath more precisely and reduce unnecessary retractions.

Step Three: Practical Case Study and Toolpath Generation
Now, let’s combine this with actual operations and generate the toolpaths for these areas one by one.
Finishing Pass for Planar Areas
For the confirmed planar surfaces, simply select Fixed Area Milling, choose the faces, and generate the toolpath. Typically, NX will default to generating parallel linear toolpaths. If you find the toolpath moving from bottom-up and you prefer top-down, just change the “Cut Direction”. Don’t just rely on software simulation; during actual machining, cutting from top to bottom provides more stable cutting forces and better chip evacuation.

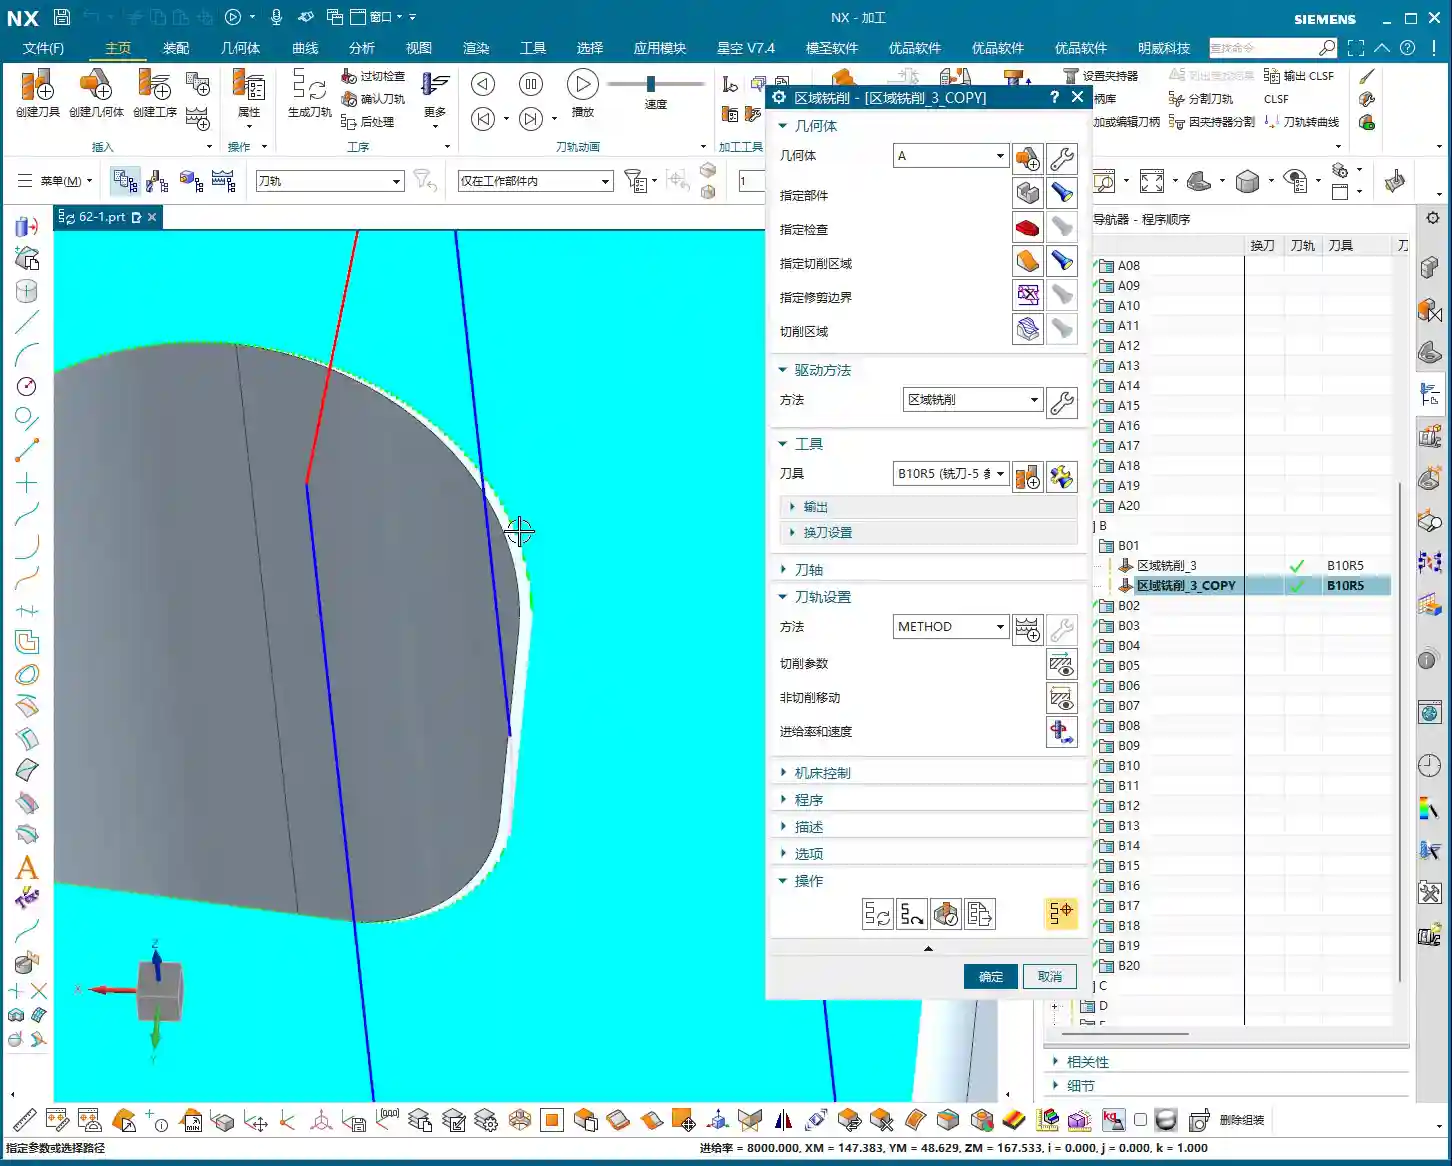
Precision Finishing Pass for Small Fillet Areas
For the small fillets like R5 and R6 we discussed earlier, we’ll first duplicate a program, then change the tool to a Ø5mm or Ø6mm ball-nose end mill.
Select a cutting method like “Spiral Inward” or “Boundary Machining”, guiding the tool to move layer by layer inward or outward along the fillet area, ensuring uniform cutting everywhere. This area is prone to heavy cutting conditions, so feed rates and spindle speeds must be carefully controlled to avoid tool breakage.
Addressing Minor Model Defects
Earlier, we discovered a 4-micrometer (approx. 0.00016 inch) gap or a slight raised surface in the part model. Theoretically, a defect of this size is concerning for our Finishing pass. However, in actual production, if it doesn’t affect assembly or function, and the tolerance allows for it, we’ll simply “ignore it” during programming.
Why? Because creating a toolpath to fix such a minor defect could incur time and cost far exceeding its impact. Of course, if tolerance requirements are stringent, then we must feedback to the design department to modify the model. I, Master Wang, always emphasize: Practicality first, cost-efficiency always!
Future Outlook: “Guide Curve Machining” for Special Areas
For some particularly complex surfaces, such as those with guide curves, if Fixed Area Milling feels insufficiently flexible, we can learn “Guide Curve Machining” later to handle them more effectively. This allows the tool to follow precisely specified curves, achieving much finer control. However, for today’s part, the current Fixed Area Milling strategy is sufficient.
Summary: Pitfall Avoidance Guide
Pitfall Avoidance Guide
- The Model is the Foundation, Cleanliness is Key: Even the best NX expert can run into trouble with a “wounded” model (e.g., with micro-gaps or warped surfaces). So, always check the model’s integrity and accuracy first – that’s your primary defense.
- Tool Selection Must Be “Context-Specific”: Don’t try to use one tool for every job. Select the appropriate tool type, diameter, and length based on the part material, hardness, geometry, and the size of the fillets in the machining area. Small fillets require small tools, deep cavities require long tools – this is common sense.
- Toolpath Strategies “Vary Widely, but the Core Remains Constant”: Fixed Area Milling offers many strategies, such as parallel cutting, helical cutting, and boundary following. Choose flexibly according to the actual situation, with one goal: ensure machining quality, reduce air cuts, and improve efficiency. Observe the cutting sparks carefully; don’t just rely on software simulation!
- Optimize “Non-Cutting Movements”: Though retractions, lead-in, and lead-out moves are auxiliary, their cumulative time can be significant. By adjusting parameters like start points, cut directions, and safe regions, strive to minimize unnecessary retractions and idle travel – these are your “invisible benefits” for efficiency.
- Learn to “Tolerate” Minor Defects: Perfectionism is good, but sometimes flexibility is necessary. For model defects that have minimal impact on part function and accuracy, if fixing them costs too much, let’s “give it a pass.” This is practical wisdom, a balance between efficiency and perfection.
- Experience is the Ultimate Teacher: NX programming, especially for complex surfaces and 5-axis machining, isn’t learned overnight. More hands-on practice, observation, and summarization are essential to transform textbook knowledge into practical skills. Every post-machining review is your best teacher.
Alright, that’s all for today. Go back, digest this information thoroughly, and get some hands-on practice in NX. Remember, in the machining industry, true gold fears no fire; a good product speaks for itself. Every high-precision part we program is our best advertisement, naturally allowing us to establish a strong foothold in the market. Talk next time!
— Master Wang
👤 About the Author:
The author is a veteran CNC machining professional with 15 years of industry experience, specializing in UG NX programming. This article is an original work representing personal practical insights.
⚠️ Copyright Notice: Unauthorized reproduction or distribution without prior communication is strictly prohibited.
Leave a Reply