📝 Key Takeaways: Master Wang provides an in-depth explanation of “Rapid Transfer” and “Entry Point” within Siemens NX’s non-cutting moves. He emphasizes how to precisely set safety heights, differentiate between within-region and between-region transfers, and flexibly specify entry points to avoid collisions, significantly reduce air cutting time, and boost machining efficiency, helping junior engineers avoid common pitfalls in practical operations.
Master Wang’s Lecture: Do You Really Understand Non-Cutting Moves?
Hello everyone, I’m Master Wang. Today, we’re going to continue discussing those practical tips and tricks in Siemens NX programming that you “won’t find in textbooks.” Where did we leave off last time? Oh, things like smoothing, collision checking, and tool compensation.
Listen up, for most of our 3-axis work, you can largely set aside or just use the system defaults for parameters like Smooth/Blend Corner, Collision Check, Tool Compensation, and B-spline. These have minimal impact on conventional 3-axis machining and are primarily used in complex 4-axis or 5-axis scenarios, or for specific finishing passes.
- Blend Corner: This feature primarily smooths tool path corners, preventing sharp turns that can affect tool life and surface quality. However, for standard pocketing and face milling, the default smoothness is usually sufficient. If you’re tackling complex surface finishing where extreme surface quality is paramount, that’s when we’d fine-tune it in specific finishing passes. But that’s a topic for another day.
- Collision Check: In theory, it’s a good feature, helping you spot issues during software simulation. But on the shop floor, I put more emphasis on your familiarity with the workpiece, fixturing, and cutting tools, as well as your judgment of the machine’s travel limits. A skilled machinist should already have a clear idea before programming: where potential collisions might occur and where it’s safe. This is about proactive prevention, not waiting for software errors to find remedies.
- Tool Compensation: G41 and G42 are fundamental CNC concepts. In Siemens NX, it primarily manages how tool radius and length compensation are applied. When programming, we typically model according to the workpiece’s actual dimensions, and tool paths are generated based on the tool’s centerline. Compensation is usually handled at the machine control, which is what we call Tool Offsetting or Touching off and measuring tools. The tool compensation parameters in Siemens NX primarily provide an instruction to the post-processor, telling it to output a program with G41/G42. In practice, it’s more about ensuring the post-processor correctly outputs these compensation commands rather than frequently modifying the compensation values within the Siemens NX interface.
- B-spline Parameters: This relates to the mathematical representation of tool path trajectories. Simply put, it affects the smoothness and calculation precision of the tool path. But for conventional 3-axis machining, Siemens NX’s internal optimization is excellent, so you generally don’t need to worry about this, especially during roughing and semi-finishing stages. Only in very rare cases, such as specific finishing passes requiring extremely high path continuity, would you need to adjust it.
So, we’ll skip these less frequently used parameters for now and focus on what’s truly important. Today, what we really need to talk about is the main event within “Non-Cutting Moves”: Rapid Transfer and Entry Point. How well these two parameters are set directly impacts your machine’s machining efficiency, and most importantly—whether you’ll have a tool crash or scratch the workpiece!
Rapid Transfer: The Art of Safety Height

Listen up, “Rapid Transfer” refers to how the tool quickly moves from one location to another when it’s not cutting. The most critical aspect here is setting the safety height. Set it too low, and you risk a collision; set it too high, and you’ll have long air cutting times, wasting valuable machining time!
Safety Plane: Default and Customization
In Siemens NX, it typically provides a default value that follows your initial setup. For example, when you create a new CAM setup and define geometry, don’t you usually set a Safety Plane, typically at Z100mm? The “Inherited” option within “Rapid Transfer” ensures the tool lifts to this height before moving. It’s the safest approach, but also the most conservative.
- Inherited Mode: Most of the time, I recommend beginners stick with this. It refers to your initially set Safe Plane, for instance, Z100mm, and the tool will lift to this safety height for every non-cutting move. The advantage is safety—it’s less likely to crash. The drawback is that if the workpiece isn’t tall, or if machining regions are close, lifting this high every time will significantly increase Air Cutting Time, effectively wasting the machine’s valuable machining efficiency.
- Plane Mode: You can choose this mode when you have an intimate understanding of the workpiece, fixturing, and tool paths. For example, if we’re machining a plate that’s only 20mm thick, lifting to 100mm every time is a huge waste. In such cases, you can lower the safety plane to 10mm or 20mm. But remember, this modification applies only to the current operation and won’t change global settings. After making changes, always meticulously check the tool path, especially ensuring the tool’s lift-off path doesn’t interfere with the fixturing or hit any protrusions on the workpiece. Don’t just rely on software simulation; pay attention to the cutting sparks and the machine’s actual operation! Safety first, efficiency second, but high efficiency is always pursued on the premise of ensuring safety.
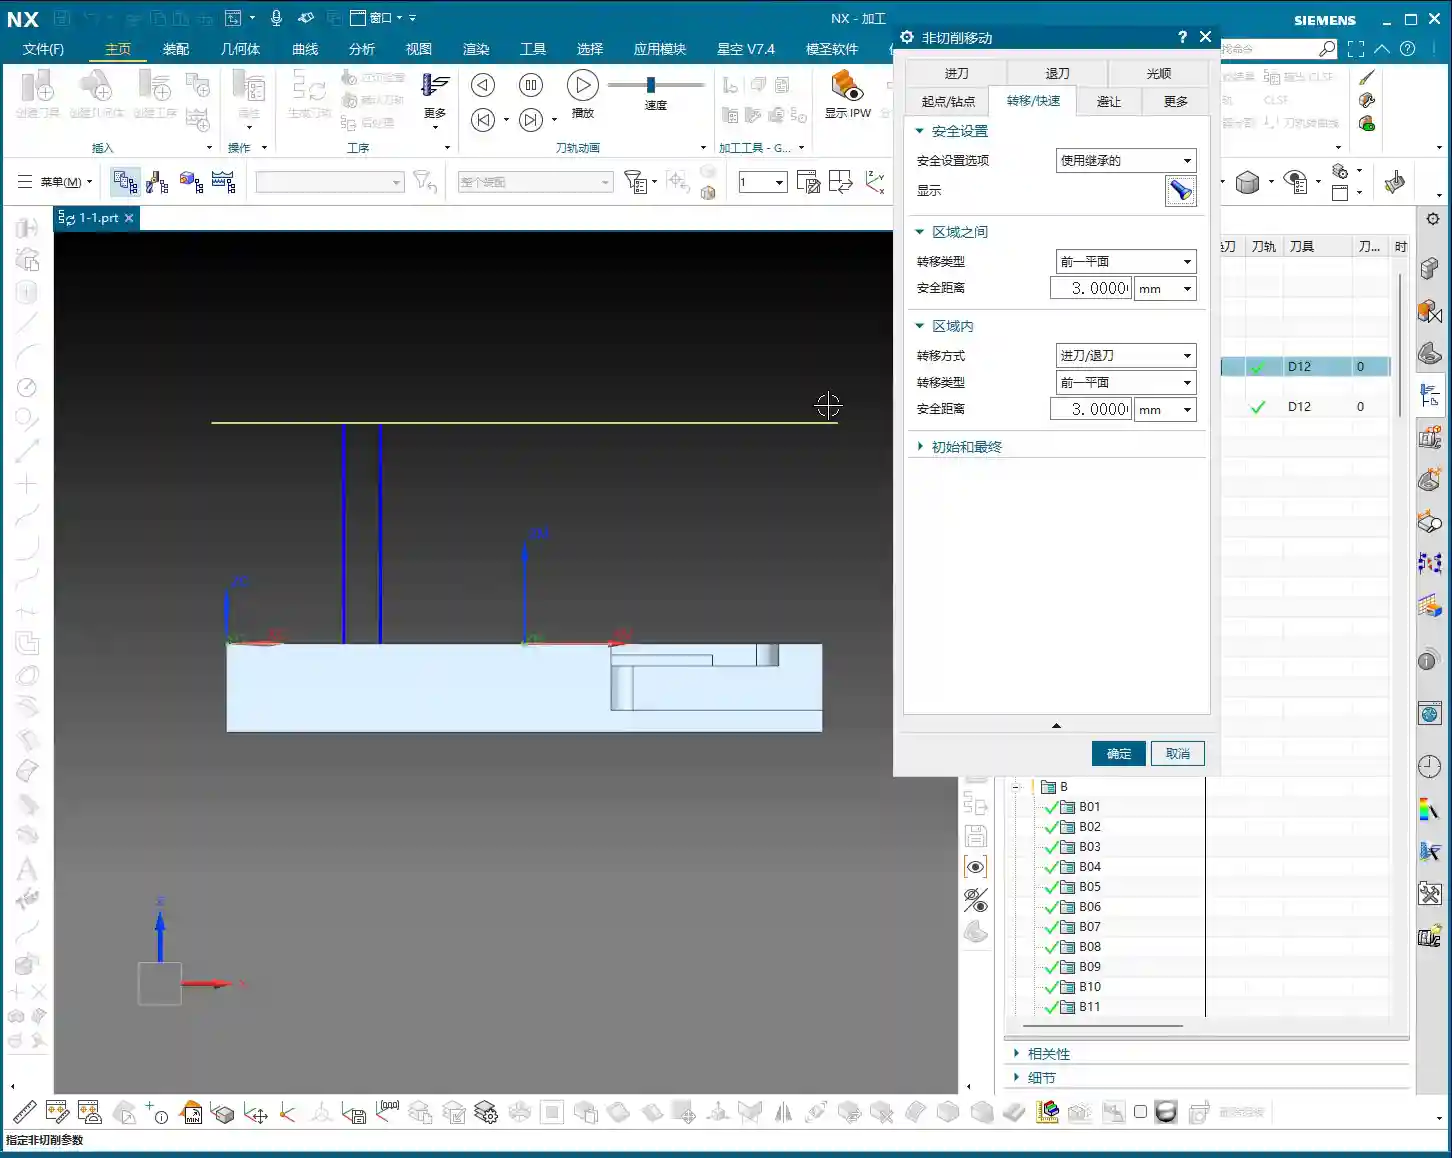
Between Regions and Within Region: Meticulous Calculation

This is where many beginners get confused. Siemens NX further subdivides “Non-Cutting Moves” into “Within Region” and “Between Regions.”
- Within Region: Imagine you’re milling a large flat surface, and the tool moves between a series of small slots, all within the same larger machining region. In this scenario, the tool only needs to lift to a very small safety height, just enough to clear already machined areas or the workpiece itself. We typically set this height quite low, for example, 2mm or 5mm, ensuring it doesn’t scratch the machined surface while reaching the next cutting point as quickly as possible. This is often used for localized tool lifts in Smooth tool paths or Cavity Milling operations.
- Between Regions: This is where it gets interesting. This refers to the tool needing to transfer from one independent machining region (e.g., a pocket) to another entirely unrelated region (e.g., another pocket, or a side wall). In this case, the tool needs to lift high enough to clear all potential obstacles, such as fixturing, unprocessed raw material edges, or other features on the workpiece. In the video, I demonstrated changing this value from the default 100 to 50 or even lower, and you can see the blue transfer path becoming noticeably shorter—that’s how you save time! But the precondition is that you must ensure this 50mm height genuinely clears all obstacles. My experience tells me that initially, you can set it higher to guarantee safety. Once you’re proficient and fully understand the relative positions of the workpiece, tool, and fixturing, then you can gradually reduce it.
So, you see, this “Rapid Transfer” is an art of balance. If the safety height is set correctly, your tool can avoid crashes and move swiftly, skyrocketing your machining efficiency. Conversely, you’re either sluggishly air cutting, or you accidentally hear a “bang,” ruining the workpiece, breaking the tool, and potentially damaging the machine. All that is money down the drain!
Entry Point: Precise Positioning, Reduced Wear
Next up is “Entry Point & Transition Point,” which is also quite important. How and where the tool enters the material directly affects tool life and machining quality.

Engage Distance: Make the Tool Entry Smoother
The “Engage Distance” option, simply put, gives the tool a buffer before it truly starts cutting. For instance, when milling a side wall, if the tool plunges directly from the edge, the impact force will be considerable, often leading to chipping. In such cases, you can set an “Engage Distance”, allowing the tool to start its entry a small distance away from the side wall, then slowly feed into the cutting position. This makes the tool entry much smoother and “gentler.”
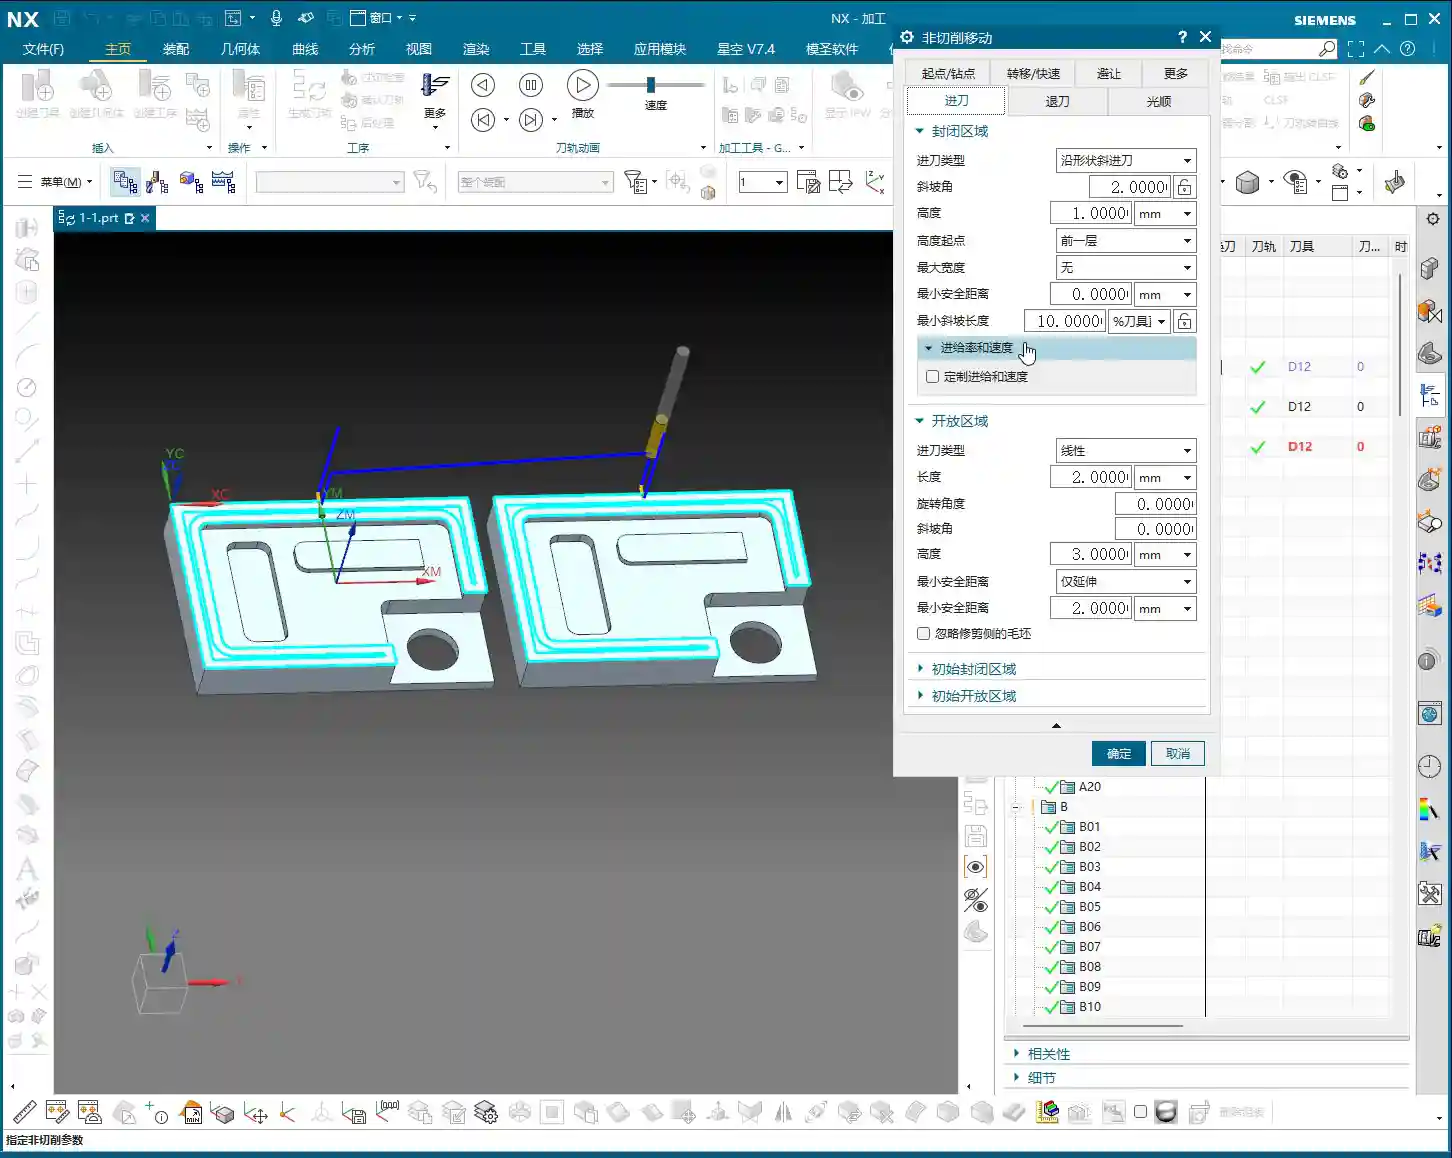
The video mentions the case of “finishing a side wall,” where this distance becomes especially critical. For example, when we perform a finishing pass on a part’s side wall, requiring extremely high surface quality. If the tool plunges directly in, the cutting chatter will leave marks, affecting the surface finish. Setting an engage distance of, say, 3mm to 5mm allows for a smooth transition before cutting begins, which can significantly improve surface quality and extend tool life. This is all based on practical experience!
Specify Point: Manual Intervention, Total Control
By default, Siemens NX intelligently selects the entry point for you. However, many times we need to intervene manually because the software doesn’t know the height of your fixturing, which part of the workpiece is raw stock, or where pre-machined holes are located. The “Specify Point” function gives you precisely this control.

- Avoid Obstacles: The most common use is to avoid fixturing or special features on the workpiece. For example, if you’re machining a part where the side is clamped by fixturing, or there’s an already finished surface nearby, you definitely wouldn’t want the tool to enter there. In such situations, you can manually select a safe and appropriate position as the entry point.
- Optimize Cutting: Sometimes, entering the material from a specific angle or position is most favorable for tool force distribution, reducing tool wear and improving cutting stability. For instance, if cutting forces are mainly concentrated at the tool tip, tool life will be shorter. Entering from a relatively spacious area or where the material allowance is uniform can better distribute the cutting forces.
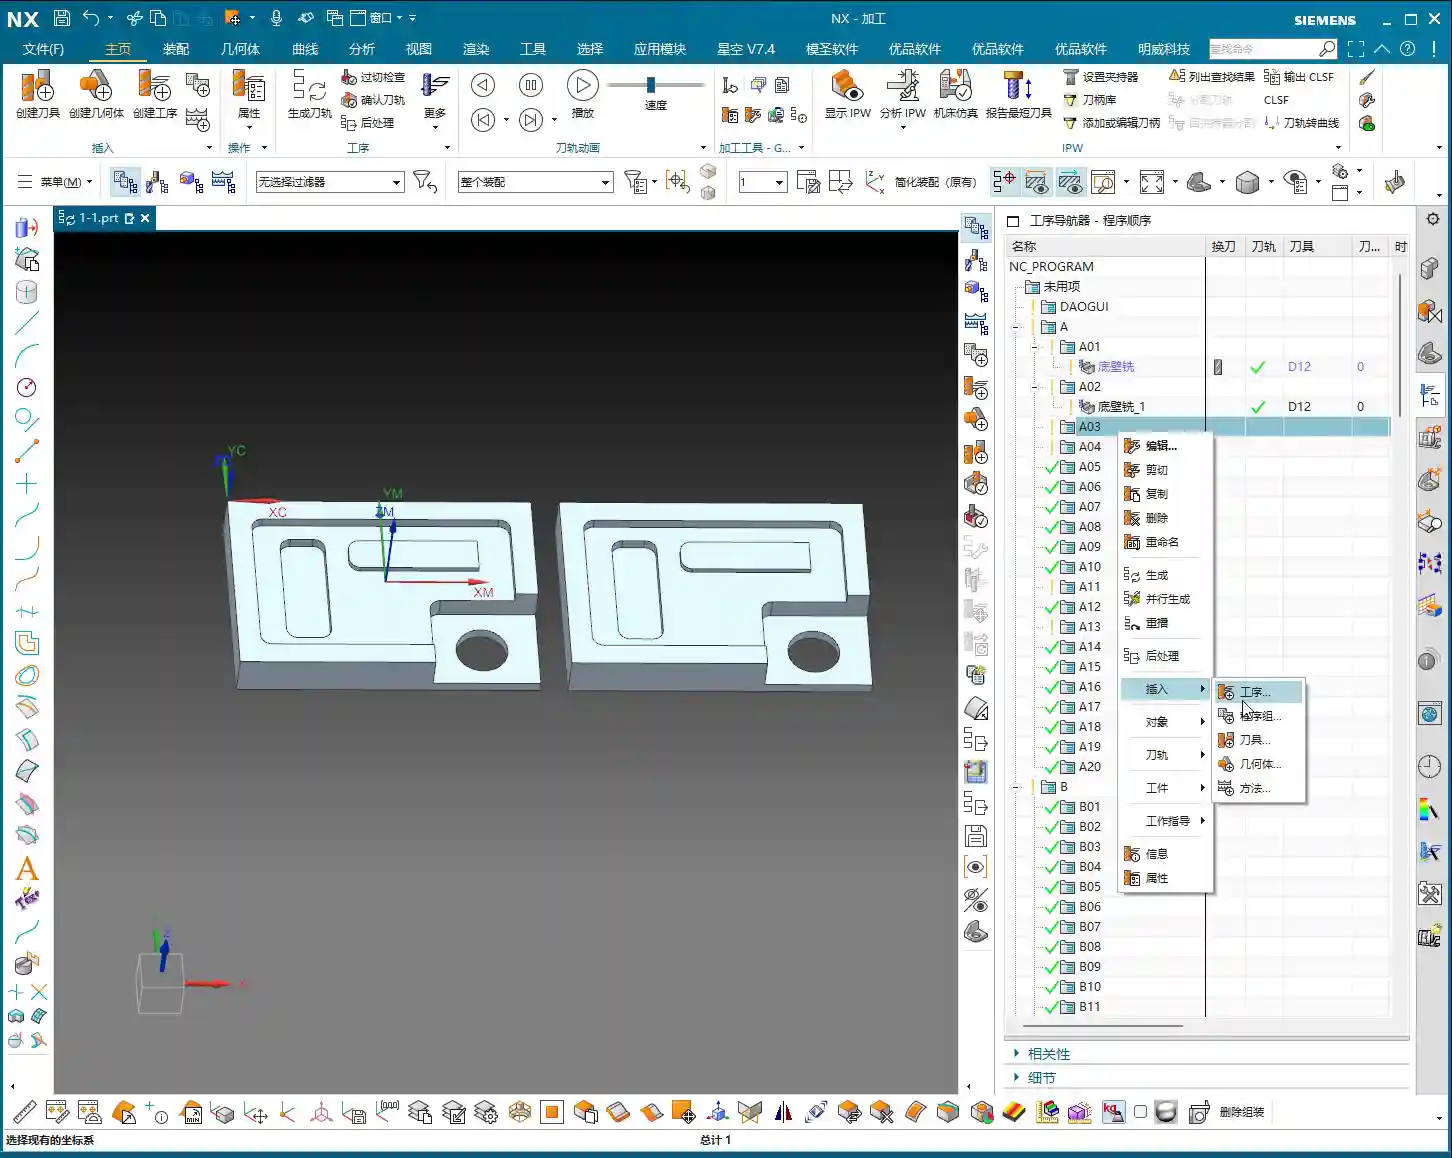
- Multiple Entry Points: The video also mentions that you can specify multiple entry points in Siemens NX. For example, when machining a part with multiple internal pockets, each pocket requires an independent entry. You can then specify different entry points for different regions, ensuring each area starts cutting safely and efficiently. Remember, when selecting, the point you click will be highlighted, ensuring you’ve chosen the correct location.
This isn’t something you can just click randomly. Choosing the wrong spot could lead to tool damage at best, or a collision with fixturing, even destroying the workpiece at worst. So, when specifying entry points, you must consider the raw material condition, fixturing location, and tool characteristics comprehensively. This is practical experience; it’s not something software simulation can fully replace.

Summary: Pitfall Avoidance Guide
Alright, that’s all for today’s valuable insights. Remember Master Wang’s advice:
- Rapid Transfer: Its core is the safety height. Beginners should first use “Inherited” to ensure no tool crashes. Once proficient, based on the actual workpiece and fixturing, boldly experiment with “Plane” mode to lower the transfer height “Between Regions” and reduce air cutting time. However, you must double-check repeatedly, especially by validating it extensively with simulation software, and then, once on the machine, slow down the feed rate and carefully observe the tool’s trajectory.
- Entry Point: “Engage Distance” is to ensure smoother tool entry, protect the tool, and enhance surface quality, especially for finishing passes. “Specify Point” is for avoiding obstacles, optimizing cutting, and extending tool life. When selecting points, you need to be precise and quick, have a clear understanding, and make judgments based on practical conditions.
- Non-Cutting Moves: It’s not just about moving the tool from one spot to another; it’s a comprehensive consideration of safety, efficiency, tool life, and surface quality. Simulate extensively in the software, observe keenly on the machine, and accumulate practical experience—only then can you truly become an excellent programming master.
Don’t just stare at the computer screen watching tool path simulations; those are virtual. A true expert can correlate the virtual tool path with actual cutting sparks, chip formation, and machine chatter to judge whether the tool path is reasonable. This kind of expertise is gained by hands-on experience on the shop floor. Ponder over this well; it’s more valuable than reading ten books!
Next time, I’ll chat with you all about something else.
👤 About the Author:
The author is a veteran CNC machining professional with 15 years of industry experience, specializing in UG NX programming. This article is an original work representing personal practical insights.
⚠️ Copyright Notice: Unauthorized reproduction or distribution without prior communication is strictly prohibited.
Leave a Reply