📝 Key Takeaways: **
Siemens NX Spot Drilling and Hole Machining Optimization in Practice
Master Wang’s Insights: The Intricacies of Hole Machining
To all seasoned pros and aspiring apprentices, I’m Master Wang. Today, let’s cut the fluff and get straight to the practical tips, discussing the “Spot Drilling” operation in Siemens NX. Don’t let its simplicity fool you; there’s a lot more to it than meets the eye. Mastering this will save you significant machining time and ensure your part’s precision. Spot drilling, drilling, and tapping generally follow the same operational logic in Siemens NX. Today, we’ll start with Spot Drilling (G81) to thoroughly understand this logic, and then all other hole machining operations will come naturally!
Hole Machining Cycle Overview (G-Code)
The hole machining cycles in Siemens NX essentially generate the corresponding G-code in the background for you. It’s crucial to understand:
- Spot Drilling: G81, typically used for locating counterbore holes, or for direct through-drilling of small holes.
- Drilling: G83, for deep hole drilling with chip break.
- Boring: G86, for finish boring, commonly used to improve hole accuracy and surface finish.
- Reaming: G85, for finishing already drilled holes, improving dimensional accuracy and cylindricity.
- Tapping: G84, for machining internal threads.
These commands have similar interfaces, and their principles are all top-down. So, if we thoroughly understand spot drilling, the others will fall into place naturally.
Spot Drilling Operation: Selection is Key

Alright, open Siemens NX and locate the “Spot Drilling” operation. The first step is to select the holes you want to machine.
Basic Selection: Specify Feature Group and Selection Modes
After selecting “Specify Feature Group,” you’ll enter the hole selection interface. Here are a few options you need to understand:
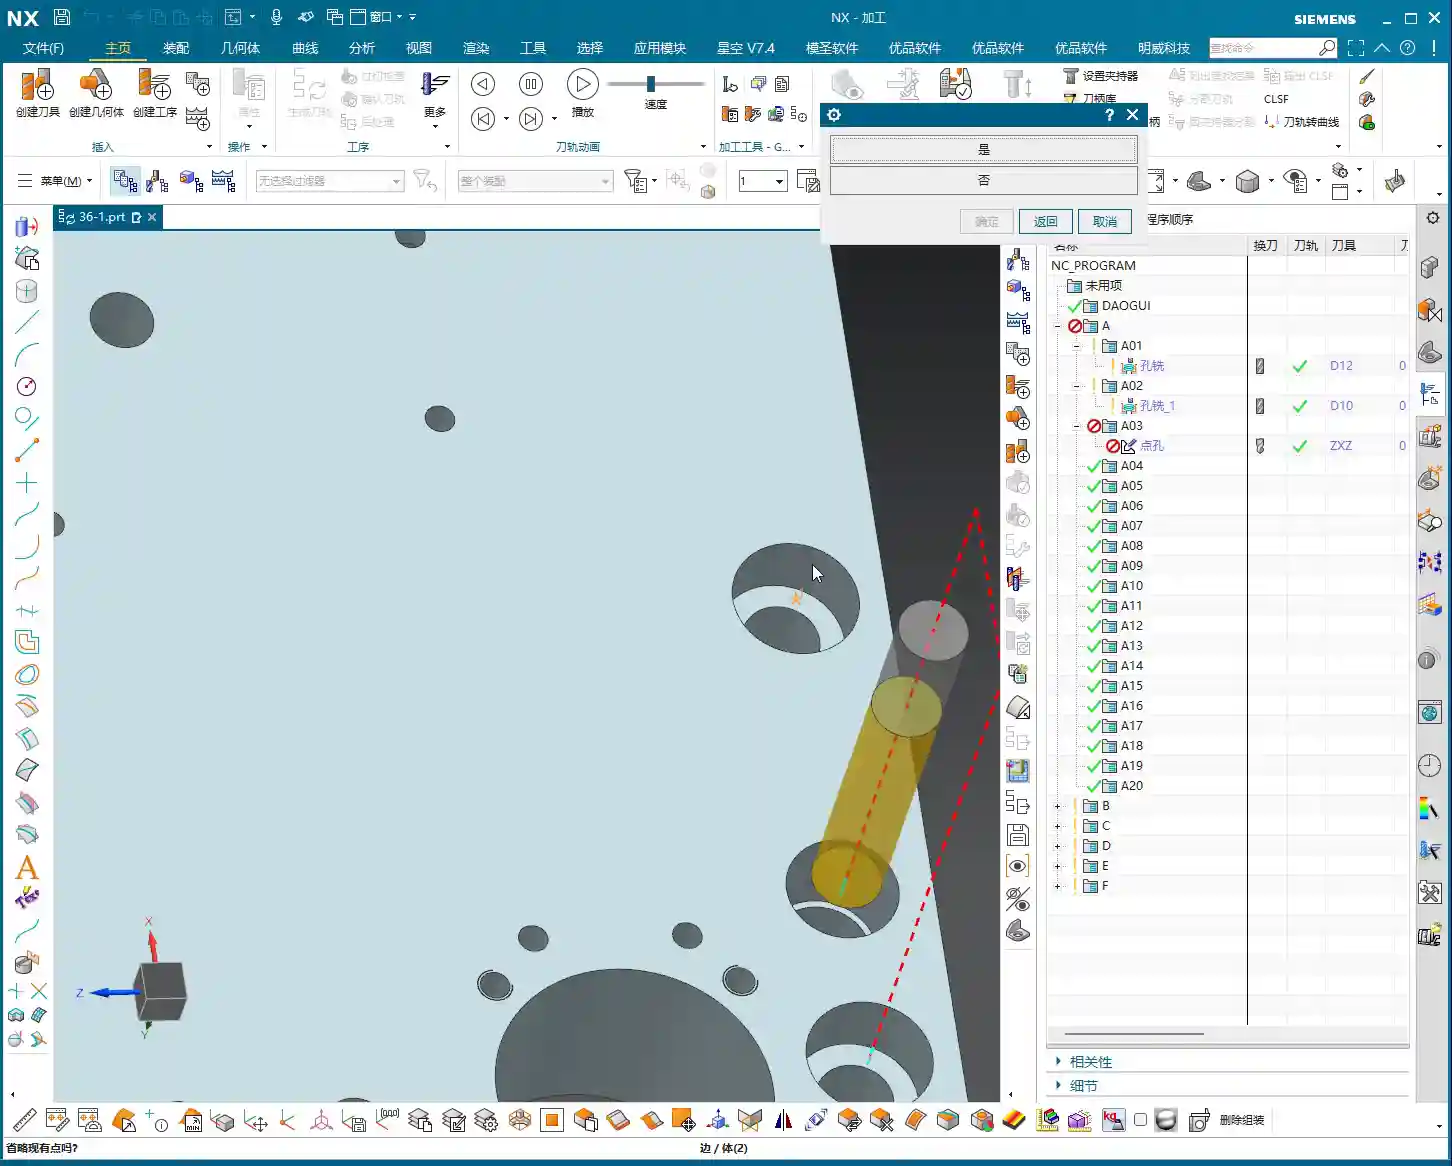
- Select: This is the most frequently used method. You can directly click on the edge of the hole to select it. Siemens NX will automatically identify and mark it.
- The Trick to “Yes” or “No”: When you click the “Select” button again, the system will ask, “Delete existing selection?”
- If you choose “Yes”: It will delete all previously selected holes and allow you to reselect. If you want to clear your current selection and start over, click “Yes.”
- If you choose “No”: It will retain your previously selected holes and allow you to add new ones. This is the most common method; typically, you’ll click “No” to append to your selection.
- Add: This function is essentially the same as choosing “No” with the “Select” option—both allow you to append to an existing selection. In my experience, just using “Select” and then clicking “No” is sufficient; there’s no need to specifically click “Add,” as it can sometimes be confusing.

Advanced Selection: General Point and All Holes on Face
Besides manual point selection, Siemens NX also offers more intelligent selection methods, especially when a part has many holes, which can significantly boost efficiency.
- General Point:
This option allows you to directly select any point in space as the machining location. Remember, Siemens NX will only register where you click; it won’t determine if your selected point is a “true” hole feature.
Master Wang’s Warning: This is where problems can arise! If you click in the middle of a face or some odd location, it will still generate a spot drilling program. So, when using “General Point,” always ensure you’re precisely clicking on the intended machining point. Don’t just rely on the software simulation; visualize the chip formation and actual outcome.
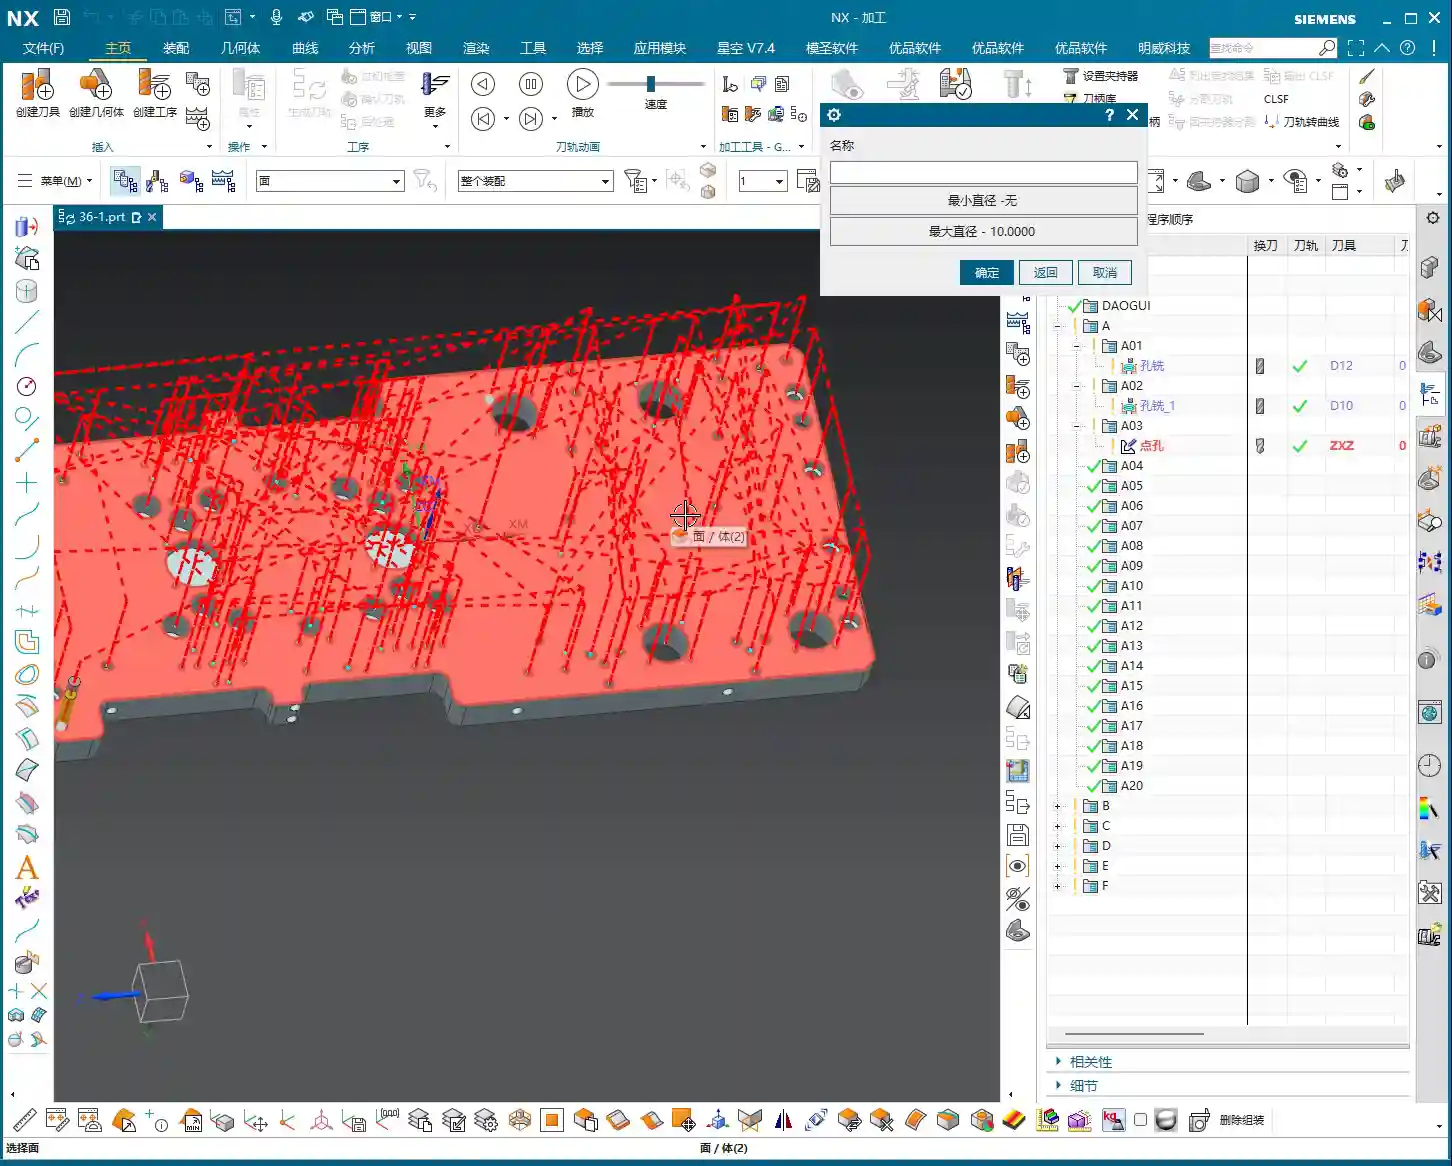
- All Holes on Face:
This is a powerful feature! When a face has numerous holes, you can directly select that face, and Siemens NX will automatically identify and select all holes on it.
What’s even better is that you can apply diameter filtering here. For instance, if you want to spot drill Ø5mm holes, you can set “Minimum Diameter” to 5 and “Maximum Diameter” also to 5. This way, it will only select the Ø5mm holes on that face.
Practical Tip: Often, blueprints specify a face with many holes of different diameters, but you only need to machine a specific type. In such cases, using “All Holes on Face” combined with precise “Minimum Diameter” and “Maximum Diameter” settings will help you quickly filter for your target holes, saving you the hassle of individual selections and instantly doubling your efficiency!
Deletion: Removing Unwanted Holes
What if you accidentally selected too many, or some holes you no longer wish to machine? Use the “Delete” function.
- Delete/Exclude: After clicking this option, if you then click on already selected holes, those holes will be removed from the machining list.
- Master Wang’s Reminder: After deleting holes, you absolutely *must* regenerate the toolpath! Otherwise, the program will still follow the old path, rendering your deletion useless. This will lead to rework, wasting both time and effort.

Toolpath Optimization: The Art of Balancing Efficiency and Cost
Once the holes are selected, the next step is optimization! This is of utmost importance, especially when you’re machining more than two holes. Without optimization, the tool will wander aimlessly across the part, making unnecessary rapid moves (air cuts). That’s time and money wasted!

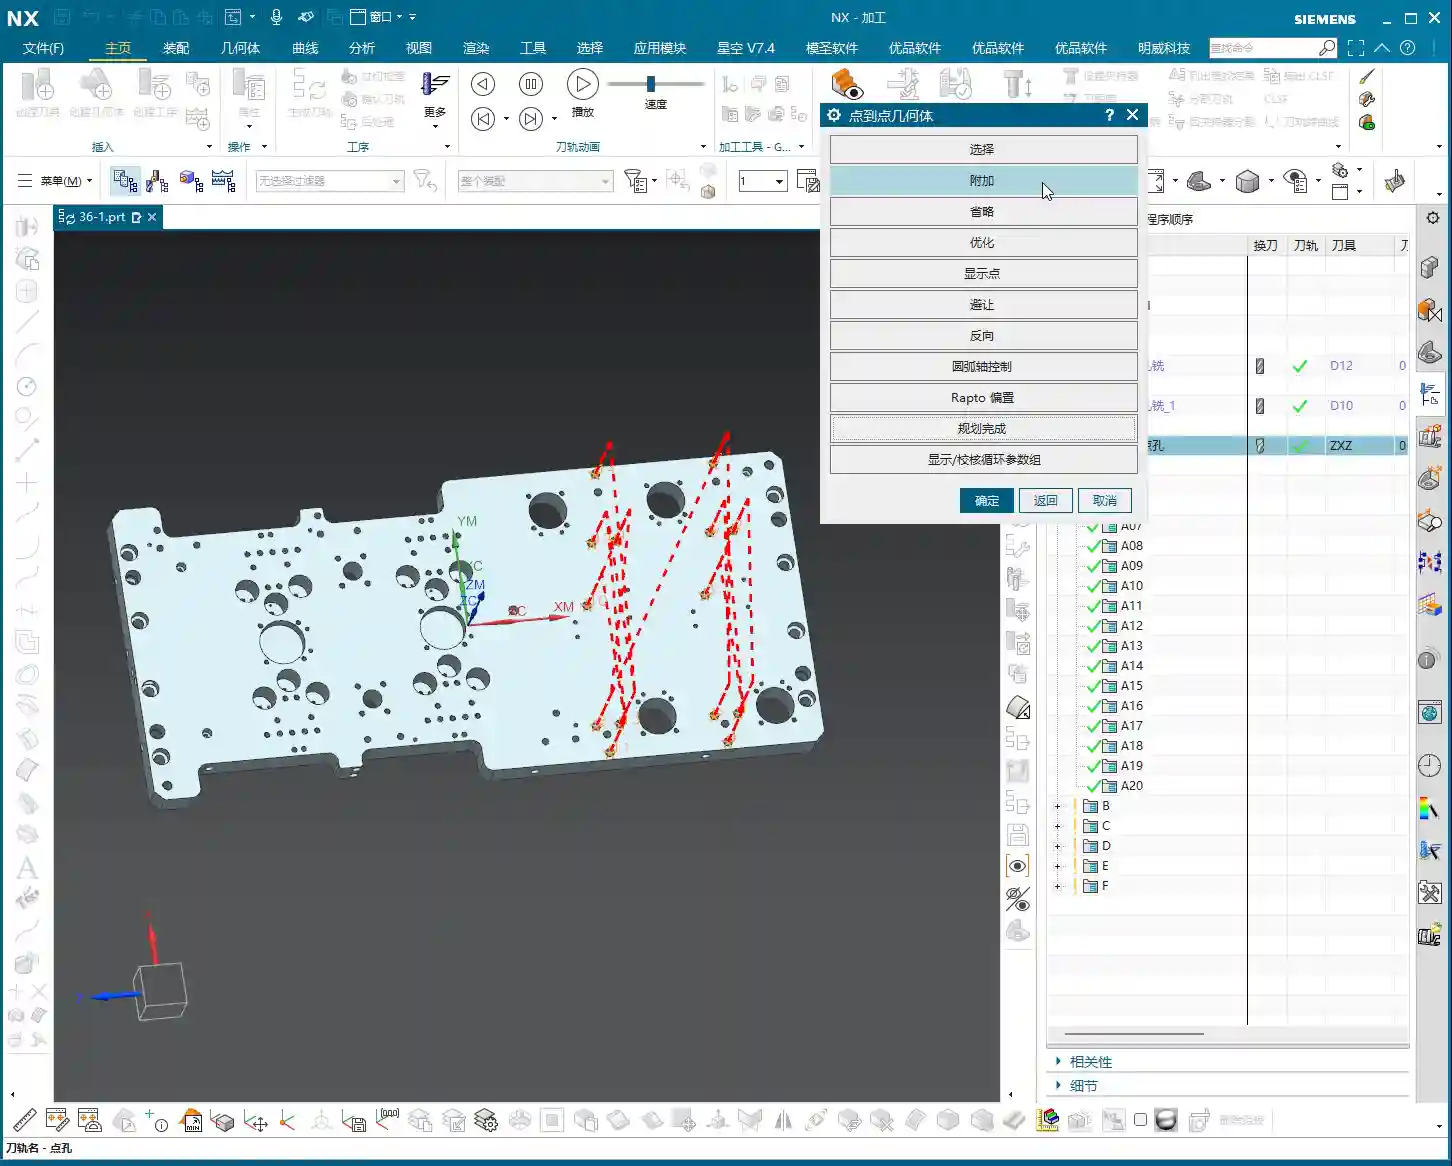
Siemens NX Optimization Steps and Logic
Optimization aims to make the tool travel the shortest path, reduce non-cutting moves, and improve machining efficiency.
- Click Optimize.
- In the dialog box that appears, select Shortest Path. This is the most commonly used optimization strategy.
- Click the Optimize button again.
- Click Accept.
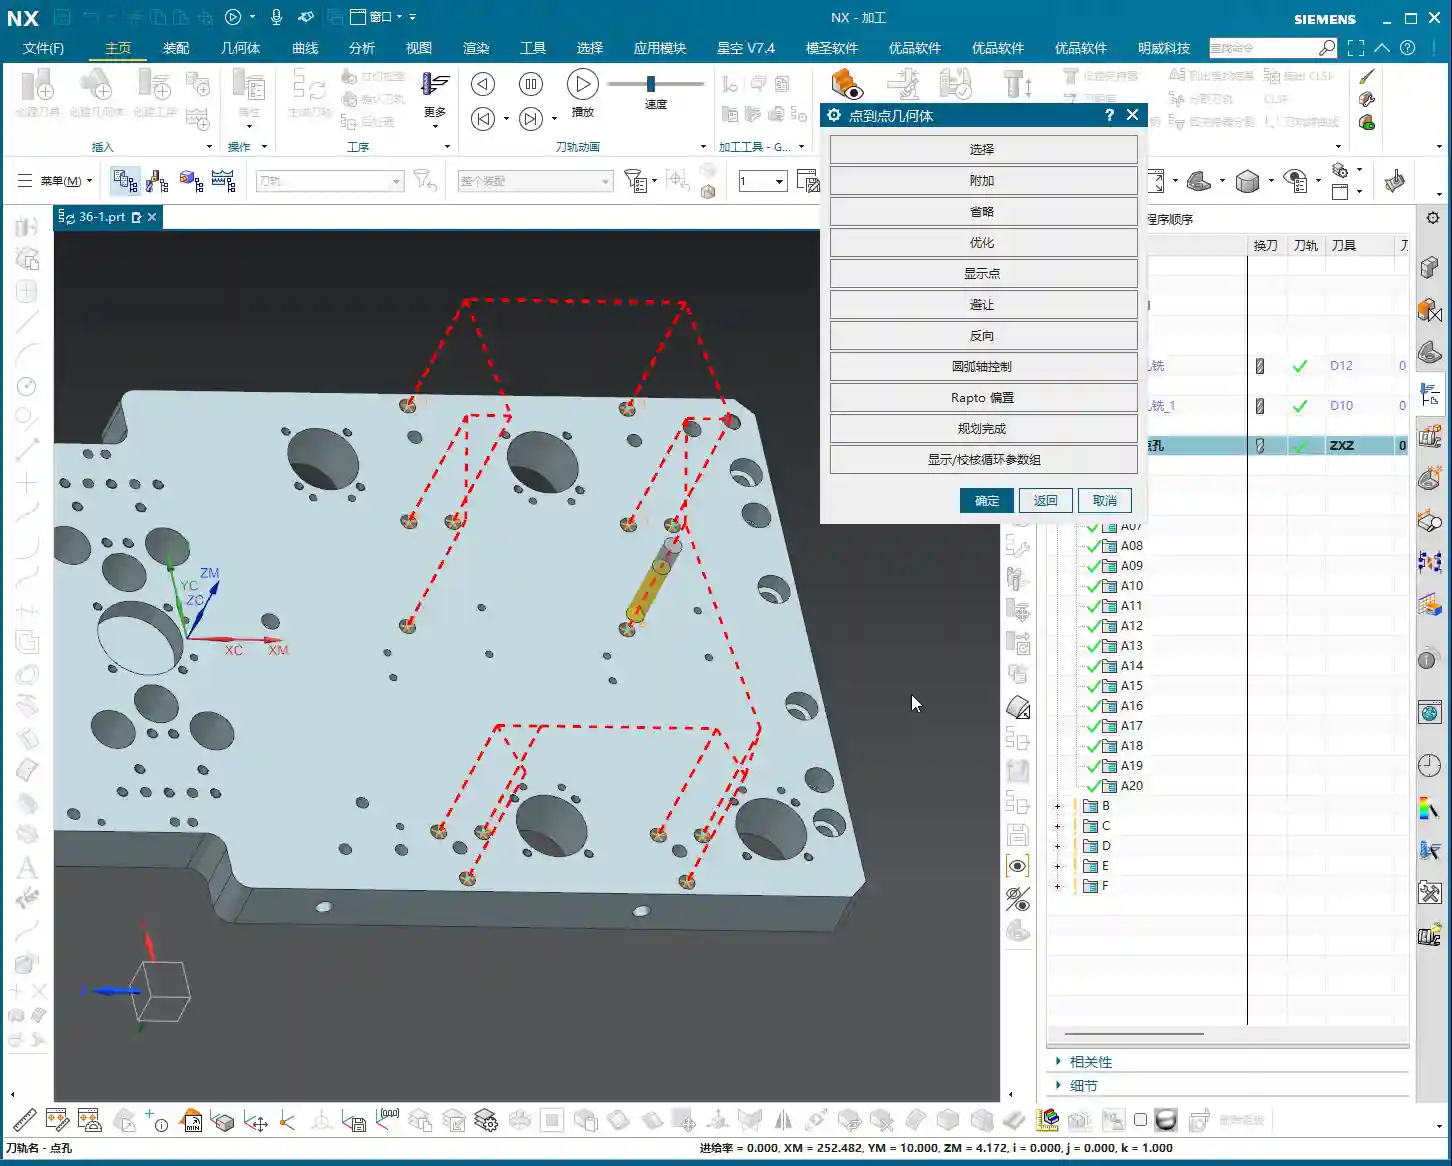
- Finally, regenerate the toolpath, and you’ll see a clear, logically sequenced machining order with the shortest path.
Master Wang’s Take: With an optimized toolpath, the tool will move from the closest hole to the next closest, avoiding unnecessary long-distance rapid moves (air cuts). This step is *mandatory* every time you select holes, especially if there are more than a couple! This is a hard-earned truth not taught in textbooks, but one that will save you money on the shop floor! Don’t just assume everything is fine if the software simulation shows no errors; a few extra rapid moves can easily waste your entire day’s production.
Clearance: Ensuring Safe Machining
Although “Clearance” wasn’t extensively covered in the audio, as a master machinist, I have to bring it up. On complex parts, especially when there are fixtures or bosses, the tool’s entry/exit paths and tool change positions must all account for clearance.
- Master Wang’s Reminder: Setting clearance parameters in Siemens NX directly impacts whether the tool will crash into the workpiece or fixture. It’s always better to use a slightly higher safe clearance than to risk crashing the tool for a little speed. In practice, clearance heights must consider fixture height, workpiece height, tool length, and machine travel limits. This area is prone to tool crashes; don’t just admire the pretty model—a real machine crash is a brutal and costly lesson!
Summary: Pitfall Avoidance Guide
- Choose “No” to append, “Yes” to clear: Remember this logic when selecting multiple holes to avoid accidental deletions or duplications.
- Use “General Point” with caution: Only use it when you genuinely need to specify an arbitrary point for machining. Otherwise, accidental clicks can lead to useless toolpaths or even tool crashes.
- Cleverly use diameter filtering: When facing a plane with many holes, leverage “Minimum/Maximum Diameter” to quickly filter target holes, significantly boosting efficiency.
- Always regenerate after deletion: Any changes to your selection (e.g., deleting holes) require toolpath regeneration to take effect.
- Optimization is Productivity!: For more than two holes, toolpath optimization is mandatory! This is crucial for boosting efficiency and reducing the cost of non-cutting moves.
- Don’t skimp on clearance parameters: Safety first! Ensure the tool avoids all obstacles during movement, especially during tool changes and rapid moves. This directly impacts the lifespan of your machine and tools.
Today’s practical insights from Master Wang are hard-won lessons I’ve accumulated over 15 years of hands-on experience on the shop floor. Theoretical knowledge is just the foundation; practical experience is true gold. I hope all of you can apply what you’ve learned, master Siemens NX, execute your jobs flawlessly, and become true experts on the shop floor!
👤 About the Author:
The author is a veteran CNC machining professional with 15 years of industry experience, specializing in UG NX programming. This article is an original work representing personal practical insights.
⚠️ Copyright Notice: Unauthorized reproduction or distribution without prior communication is strictly prohibited.
Leave a Reply